Patients › Elbow
டிஸ்டல் டிரைசெப்ஸ் தசைநாண் பழுதுபார்ப்பு (Distal Triceps Repair)
இந்த அறுவை சிகிச்சை ஏன் பரிந்துரைக்கப்பட்டுள்ளது
Mater Private Hospital Rockhampton-இல் மேல் அவயவ (upper-limb) அறுவை சிகிச்சை நிபுணரான டாக்டர் கியரன் ஹிர்பரா, உங்கள் குறிப்பிட்ட காயத்துக்கு ஏற்றவாறு சிகிச்சையைப் பொருத்துகிறார். டிரைசெப்ஸ் (triceps) என்பது உங்கள் மேற்கையின் பின்புறத்தில் உள்ள தசை; அதன் தசைநாண் (tendon) உங்கள் முழங்கையின் முனையில் பதிந்து, உங்கள் கையை நேராக்குகிறது. அந்தத் தசைநாண் எலும்பிலிருந்து முழுமையாகக் கிழிந்து விலகும்போது, அந்த அசைவை மீட்டுத் தர பொதுவாக அறுவை சிகிச்சை தேவைப்படுகிறது. டிஸ்டல் டிரைசெப்ஸ் பழுதுபார்ப்பு (distal triceps repair) எனப்படும் இந்த அறுவை சிகிச்சை, கிழிந்த தசைநாணை மீண்டும் எலும்புடன் இணைக்கிறது.
நோயாளிகள் பொதுவாக அவர்களுடைய GP (பொது மருத்துவர்) மூலம் எங்கள் கிளினிக்கிற்குப் பரிந்துரைக்கப்படுகின்றனர்; ஒரு இயன்முறை சிகிச்சையாளர் (physiotherapist) எங்களைப் பார்க்கும்படி பரிந்துரைத்திருந்தாலும், Medicare தள்ளுபடியைப் (rebate) பெறத் தகுதி பெற உங்கள் GP-யிடமிருந்து பரிந்துரைக் கடிதம் (referral) இன்னும் தேவைப்படும். நோய்க்குறிப்பை உறுதிப்படுத்த, நாங்கள் உங்கள் மருத்துவ வரலாற்றைக் கேட்டறிந்து, உங்கள் முழங்கையைப் பரிசோதித்து, தேவைப்படும் இடங்களில் படமெடுப்புகளுக்கு (imaging) ஏற்பாடு செய்கிறோம்.
பகுதியளவு கிழிவுக்கு, இயன்முறை சிகிச்சை போன்ற அறுவை சிகிச்சை அல்லாத கவனிப்பை முதலில் முயற்சிக்கலாம். அது போதுமான முன்னேற்றத்தைத் தராதபோது, அல்லது கிழிவு முழுமையானதாக இருக்கும்போது, அறுவை சிகிச்சை தொடர்கிறது. சுறுசுறுப்பான வாழ்க்கை முறை உள்ளவர்களுக்கும், கைகளைக் கடுமையாகப் பயன்படுத்தும் தொழிலாளர்களுக்கும், போட்டிக்குத் திரும்ப விரும்பும் விளையாட்டு வீரர்களுக்கும் இது அடிக்கடி பரிந்துரைக்கப்படுகிறது. பழுதுபார்ப்பு பலத்தையும் செயல்பாட்டையும் மீட்டுத் தருவதை நோக்கமாகக் கொண்டுள்ளது; பெரும்பாலானோர் சுமார் 2.2 மாதங்களில் வேலைக்குத் திரும்புகிறார்கள், 89.3% பேர் விளையாட்டுக்குத் திரும்புகிறார்கள்.
அறுவை சிகிச்சைக்கு முன்
உங்கள் பழுதுபார்ப்பைத் திட்டமிடுவதற்கு முன், உங்கள் அறுவை சிகிச்சை நிபுணர் ஸ்கேன்கள் மூலம் கிழிவை உறுதிப்படுத்துவார். இது பொதுவாக எக்ஸ்-ரேயுடன் தொடங்குகிறது; தசைநாணுடன் சேர்ந்து ஒரு சிறிய எலும்புத் துண்டு பிய்ந்து வந்துள்ளதா என்பதை அது காட்டும். தசைநாணை நெருக்கமாகப் பார்க்க MRI ஸ்கேன் பயன்படுத்தப்படலாம்.
அறுவை சிகிச்சைக்கு முன், அதற்கு ஏழு மணி நேரம் முன்பிருந்து நீங்கள் உண்பதையும் குடிப்பதையும் நிறுத்த வேண்டும். அறுவை சிகிச்சை அரங்கின் பட்டியல் முன்கூட்டியே நகர்ந்தால் உங்கள் அறுவை சிகிச்சையை முன்னதாகக் கொண்டுவர முடியும் என்பதற்காகவே, ஆறு மணி நேரத்துக்குப் பதிலாக ஏழு மணி நேரம் கேட்கிறோம். எந்த மருந்துகளை எப்போது நிறுத்த வேண்டும் என்று உங்கள் அறுவை சிகிச்சை நிபுணர் சொல்வார். நீங்கள் எடுத்துக்கொள்ளும் அனைத்தின் எழுதப்பட்ட பட்டியலைக் கொண்டு வாருங்கள். அதன் பிறகு உங்களை வீட்டுக்கு வாகனத்தில் அழைத்துச் செல்ல ஒருவரை ஏற்பாடு செய்யுங்கள்; அன்றைய தினம் தளர்வான, வசதியான ஆடைகளை அணியுங்கள். உங்களுக்கு வேறு உடல்நலப் பிரச்சினைகள் இருந்தால், இரத்தப் பரிசோதனைகள் அல்லது மயக்க மருந்து நிபுணரின் (anaesthetist) பரிசோதனை தேவைப்படலாம்.
அறுவை சிகிச்சை நாளில்
நீங்கள் மருத்துவமனையின் அறுவை சிகிச்சை அனுமதிப் பிரிவுக்கு (surgical admissions unit) வருவீர்கள்; அங்கே உங்கள் வருகை பதிவு செய்யப்பட்டு, அறுவை சிகிச்சை அரங்குக்குத் தயார்படுத்தப்படுவீர்கள். பின்னர் மயக்க மருந்து நிபுணரைச் சந்திப்பீர்கள்; உங்களை உறங்க வைத்து, அறுவை சிகிச்சையின்போது உங்கள் வலியைக் கவனித்துக்கொள்ளும் மருத்துவர் அவர். இந்த அறுவை சிகிச்சை முழு மயக்க மருந்தில் (general anaesthetic) செய்யப்படுகிறது. அறுவை சிகிச்சைக்குப் பிந்தைய வலி நிவாரணத்துக்காக சில சமயம் பகுதி நரம்புத் தடுப்பு ஊசியும் (regional nerve block) சேர்க்கப்படுகிறது; அதைப் பற்றி மயக்க மருந்து நிபுணர் அன்றைய தினம் உங்களுடன் கலந்துரையாடுவார். பின்னர் நீங்கள் அறுவை சிகிச்சை அரங்குக்கு அழைத்துச் செல்லப்படுவீர்கள்; அங்கே பழுதுபார்ப்பு செய்யப்படும்.
அதன் பிறகு, மீட்புப் பகுதியில் (recovery area) நீங்கள் கண் விழிப்பீர்கள்; மயக்க மருந்தின் விளைவு குறையும் வரை செவிலியர்கள் உங்களை நெருக்கமாகக் கவனிப்பார்கள். உங்கள் நிலை சீரானதும், அறுவை சிகிச்சையையும் உங்கள் மீட்சி எப்படிச் செல்கிறது என்பதையும் பொறுத்து, நீங்கள் வார்டுக்குச் செல்வீர்கள் அல்லது வீட்டுக்குச் செல்வீர்கள். அதே நாளில் வீட்டுக்குச் சென்றால், முன்பே நீங்கள் ஏற்பாடு செய்த நபர் உங்களை வாகனத்தில் அழைத்துச் செல்ல வேண்டும்.
அறுவை சிகிச்சையில் என்ன செய்யப்படுகிறது
டிரைசெப்ஸ் தசைநாண், உங்கள் முழங்கையின் நுனியில் உள்ள ஒரு சிறிய எலும்புப் பகுதியுடன் இணைகிறது. முழுமையான கிழிவில், தசைநாண் அந்த எலும்பிலிருந்து பிய்ந்து விலகியிருக்கும் — ஒரு கயிறு அதன் நங்கூரப் புள்ளியிலிருந்து கழன்று வருவது போல. தசைநாண் இருக்க வேண்டிய இடமான எலும்பின் மேல் அதை மீண்டும் தைத்து இணைப்பதே இந்த அறுவை சிகிச்சையின் நோக்கம்.
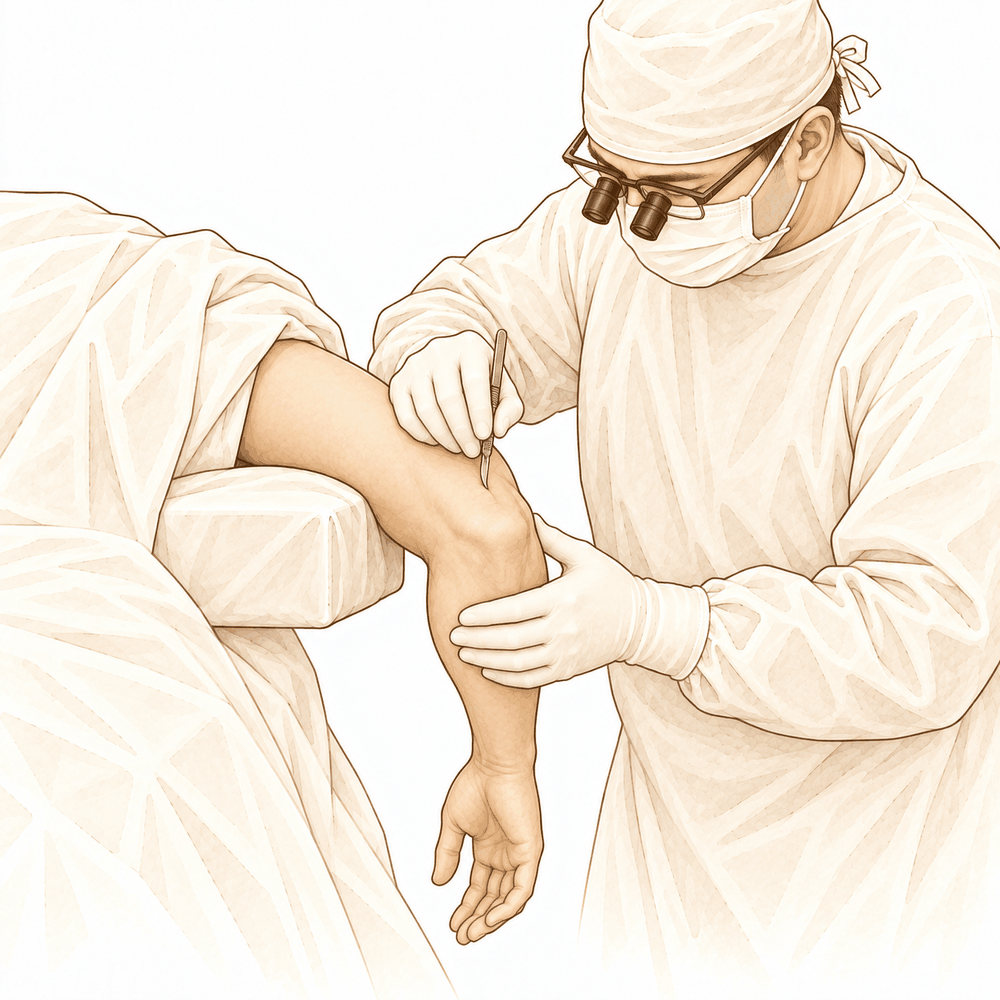
கிழிந்த தசைநாணை அடைய, உங்கள் அறுவை சிகிச்சை நிபுணர் உங்கள் முழங்கையின் பின்புறத்தில் ஒரு வெட்டு போடுகிறார். பின்னர், எலும்பினுள் பொருத்தப்படும் சிறிய நங்கூரங்களைப் (anchors) பயன்படுத்தி, தசைநாணை சமமான இறுக்கத்தில் பிடித்து வைக்கும் வலுவான தையல்களுடன், அது எலும்பில் இணைந்திருக்கும் இயற்கையான இடத்தில் மீண்டும் இணைக்கப்படுகிறது. இது தசைநாணின் இணைப்பிடத்தின் இயல்பான வடிவத்தையும் நிலையையும் மீட்டுத் தருகிறது; அதுவே பழுதுபார்ப்புக்கு அதன் வலிமையைத் தருகிறது.
சில பழுதுபார்ப்புகளில், இணைப்புப் பகுதி முழுவதையும் இரண்டு வரிசை நங்கூரங்களால் மூடும் ஒரு முறை பயன்படுத்தப்படுகிறது — ஒரு ஓரத்தை இரண்டு இணையான வரிசைத் தையல்களால் தைப்பது போல. சிலவற்றில் முழுக்க முழுக்கத் தையல் இழையாலேயே செய்யப்பட்ட நங்கூரங்கள் பயன்படுத்தப்படுகின்றன; அவை வழக்கமான நங்கூரங்களைப் போலவே தசைநாணை உறுதியாகப் பிடித்து வைக்கின்றன. உங்கள் காயத்துக்கு ஏற்ற முறையை உங்கள் அறுவை சிகிச்சை நிபுணர் தேர்ந்தெடுப்பார்.
தசைநாண் உறுதியாகப் பிடிக்கப்பட்டதும், பழுதுபார்ப்பு சீராக அசைகிறதா என்பதை அறுவை சிகிச்சை நிபுணர் சரிபார்த்து, பின்னர் வெட்டைத் தையல்களால் மூடி, கட்டு (dressing) போடுகிறார். மீட்சிப் பகுதியில் விவரிக்கப்பட்டுள்ளபடி, அந்தக் கட்டைச் சுமார் 10 நாட்கள் அப்படியே வைத்திருப்பீர்கள்.
கருத்தளவில் இந்த அறுவை சிகிச்சை நேரடியானது: கிழிந்த தசைநாணை மீண்டும் எலும்புக்குக் கொண்டுவந்து, அது குணமாகும் அளவுக்கு உறுதியாக அங்கேயே பிடித்து வைப்பது. அதற்குப் பிறகு என்ன நடக்கிறது, எவ்வளவு விரைவாக நீங்கள் கையை அசைக்கவும் பயன்படுத்தவும் முடியும் என்பது, தொடர்ந்து வரும் மீட்சிப் பகுதியில் விளக்கப்பட்டுள்ளது.
அறுவை சிகிச்சைக்குப் பிறகு
நீங்கள் கண் விழிக்கும்போது மீட்புப் பகுதியில் இருப்பீர்கள்; மயக்க மருந்தின் விளைவு குறையும் வரை செவிலியர்கள் உங்களை நெருக்கமாகக் கவனிப்பார்கள். வசதிக்காக உங்கள் கை ஒரு சாதாரண கைத்தாங்கியில் (sling) ஓய்வெடுக்கும். முழங்கை அசையாமல் பூட்டப்படுவதில்லை; மென்மையான அசைவுகள் தொடக்கத்திலேயே ஆரம்பிக்கின்றன. வலி நிவாரணம் உங்களுக்கு ஏற்றவாறு அமைக்கப்படும், செவிலியர்கள் உங்களை வசதியாக வைத்திருப்பார்கள். நீங்கள் வீட்டுக்குச் சென்ற பிறகு முதல் 24 மணி நேரம் உங்களுடன் யாராவது தங்க வேண்டும். அதே நாளில் வீட்டுக்குச் செல்கிறீர்களா அல்லது மருத்துவமனையில் ஒரு இரவு தங்குகிறீர்களா என்பதை உங்கள் குழு சொல்லும். கட்டைச் சுமார் 10 நாட்கள் அப்படியே வைத்திருக்கிறோம்; நாங்கள் சொன்னால் தவிர, அதற்கு முன் அதை அகற்ற வேண்டாம். உங்களைப் பார்க்கும்போது நாங்கள் அதை மாற்றுவோம் அல்லது அகற்றுவோம். பெரும்பாலானோர் அறுவை சிகிச்சை நாளிலேயே மெதுவாக நடந்து நடமாடுகிறார்கள்.
மீட்சி
முதல் சில நாட்களுக்கு உங்கள் முழங்கை வலியுடனும் வீக்கத்துடனும் இருக்கும். இது படிப்படியாகத் தணியும். ஓய்வு, உட்கார்ந்திருக்கும்போது உங்கள் கையை உயர்த்தி வைப்பது, உங்களுக்காகப் பரிந்துரைக்கப்பட்ட வலி மருந்து ஆகிய அனைத்தும் உதவும். வசதிக்காக உங்கள் கை ஒரு சாதாரண கைத்தாங்கியில் ஓய்வெடுக்கும்; ஆனால் முழங்கை அசையாமல் பூட்டப்படுவதில்லை, மென்மையான அசைவுகள் தொடக்கத்திலேயே ஆரம்பிக்கின்றன.
கை சிகிச்சை (hand therapy) உங்கள் மீட்சியின் பெரும் பகுதி. உங்கள் அமர்வுகள் Extend Rehabilitation-இல் Ruby Doolan-உடன் நடைபெறும். Ruby ஒரு கை சிகிச்சையாளர்: அவர் உங்கள் பயிற்சிகளுக்கு வழிகாட்டுவார், உங்களுக்குத் தேவையான பிடிப்புக் கட்டையையும் (splint) செய்து தருவார். தொடக்கத்தில், உங்கள் முழங்கை அதன் அசைவை மீண்டும் பெறும்போது பழுதுபார்ப்பைப் பாதுகாப்பதே கவனம். தசைநாண் குணமாகும்போது, உங்கள் கையை எதிர்ப்புக்கு எதிராக நேராக்கும் பலத்தை மீட்டுத் தரும் அளவுக்குப் பயிற்சிகள் படிப்படியாக அதிகரிக்கின்றன.
அன்றாட வாழ்வில், பழுதுபார்ப்பு நிலைபெறும் வரை வீட்டில் இலகுவான வேலைகளை உங்கள் மறு கையால் செய்வீர்கள். உங்கள் கை கைத்தாங்கியில் இருக்கும்போது நீங்கள் வாகனம் ஓட்ட மாட்டீர்கள்; மீண்டும் வாகனம் ஓட்டுவதற்கு முன், இரு கைகளாலும் சுக்கானைப் பிடிக்கவும், அவசரமாக நிறுத்த வேண்டிய சூழலில் உடனடியாகச் செயல்படவும் உங்களால் முடிய வேண்டும், மேலும் வலுவான வலி மருந்து எதுவும் உங்கள் உடலில் இருக்கக் கூடாது. எங்கள் மேல் அவயவ அறுவை சிகிச்சைக்குப் பிறகு வாகனம் ஓட்டுதல் வழிகாட்டி இதை இன்னும் விரிவாக விளக்குகிறது.
முன்னேற்றப் படிகள் தேதிகளாக அல்ல, நிகழ்வுகளாக வருகின்றன. வீக்கம் தணிந்ததும், முழங்கையை மடக்குவதும் நேராக்குவதும் எளிதாகத் தோன்றும். உங்கள் சிகிச்சையாளர் பலப் பயிற்சிகளுக்கு அனுமதி தந்ததும், கைக்குச் சுமை ஏற்றத் தொடங்குவீர்கள். பெரும்பாலானோர் காயத்துக்கு முன் இருந்த அதே தீவிரத்துடன் வேலைக்கும் விளையாட்டுக்கும் திரும்புகிறார்கள். உங்கள் கால அளவு மாறுபடலாம்; உங்கள் அறுவை சிகிச்சை நிபுணரும் Ruby-யும் உங்களுக்கு வழிகாட்டுவார்கள்.
என்ன தவறு நேரலாம்
பெரும்பாலான நோயாளிகள் நன்றாக இருக்கிறார்கள், ஆனால் எப்போதாவது பிரச்சினைகள் ஏற்படலாம். எந்தப் பிரச்சினையையும் முன்கூட்டியே கண்டறிய உங்கள் அறுவை சிகிச்சை நிபுணரும் குழுவும் உங்களை நெருக்கமாகக் கண்காணிக்கிறார்கள்.
மிகத் தீவிரமான பிரச்சினை, பழுதுபார்க்கப்பட்ட தசைநாண் மீண்டும் கிழிவது. உங்கள் முழங்கையின் பின்புறத்தில் திடீரென ஒரு "படக்" என்ற ஒலியையோ அல்லது விட்டுக்கொடுக்கும் உணர்வையோ நீங்கள் உணரலாம்; அதைத் தொடர்ந்து, எதற்கேனும் எதிராகக் கையை நேராக்க முயலும்போது பலவீனம் இருக்கும். தசைநாண் முதலில் கிழிந்தபோது இருந்ததைப் போலவே, முழங்கையின் நுனியில் வீக்கத்தையும் ரத்தக் கசிவுத் தழும்பையும் சிலர் கவனிக்கிறார்கள். இது நேர்ந்தால், உடனடியாகக் கிளினிக்கைத் தொடர்புகொள்ளுங்கள். உங்கள் அறுவை சிகிச்சை நிபுணர் முழங்கையைப் பரிசோதித்து, பழுதுபார்ப்பு நிலைத்திருக்கிறதா என்பதைச் சரிபார்க்க ஸ்கேன்களுக்கு ஏற்பாடு செய்வார்.
சில பிரச்சினைகள் காயத்தைச் சுற்றியே தோன்றுகின்றன. தணிவதற்குப் பதிலாகத் தொடர்ந்து மோசமாகும் வலி, காயத்திலிருந்து பரவும் சிவப்பு, அல்லது கட்டின் வழியே கசியும் திரவம் ஆகியவற்றைக் கவனியுங்கள். இந்த அறிகுறிகளுடன் காய்ச்சல் அல்லது பொதுவாக உடல்நலம் சரியில்லாத உணர்வும் இருந்தால் அதுவும் முக்கியம். இவற்றில் ஏதேனும் உங்களுக்குத் தென்பட்டால், உங்கள் அடுத்த சந்திப்புக்குக் காத்திராமல் அன்றைய தினமே கிளினிக்கை அழையுங்கள்.
எப்போதாவது ஒரு பழுதுபார்ப்புக்கு மேலும் ஒரு அறுவை சிகிச்சை தேவைப்படுகிறது. தசைநாண் மீண்டும் கிழிந்திருப்பது இதற்குக் காரணமாக இருக்கலாம், அல்லது பழுதுபார்ப்பு தொடர்பான வேறு ஏதோ ஒன்று இருக்க வேண்டிய முறையில் நிலைபெறாமல் இருப்பது காரணமாக இருக்கலாம். தொடர்ந்த வலி, பலவீனம், அல்லது முழங்கை எதிர்பார்த்தபடி மீளவில்லை என்ற உணர்வு மூலம் இதை நீங்கள் பொதுவாக அறிவீர்கள். உங்கள் மறுபரிசோதனைச் சந்திப்பில் இதைச் சொல்லுங்கள்; ஏதோ தெளிவாகத் தவறாக இருப்பதாகத் தோன்றினால் அதற்கு முன்பே எங்களைத் தொடர்புகொள்ளுங்கள்.
இந்தப் பிரச்சினைகளிலிருந்து மீள்வது முதலில் திட்டமிட்டதைவிட அதிக காலம் எடுக்கலாம்; சிலருக்கு வேலையிலிருந்தும் வழக்கமான செயல்பாடுகளிலிருந்தும் அவர்கள் முதலில் எதிர்பார்த்ததைவிட அதிக காலம் விலகியிருக்க வேண்டியிருக்கும். இது உங்களைப் பாதித்தால், என்ன நடந்தது, அடுத்த படிகள் என்ன என்பதை உங்கள் அறுவை சிகிச்சை நிபுணர் உங்களுடன் விவரமாகப் பேசுவார்.
விவரங்கள் வேண்டுமானால், இந்தப் பக்கத்தில் உள்ள சிக்கல்கள் அட்டவணை வழக்கமான விகிதங்களைப் பட்டியலிடுகிறது.
எப்போது எங்களை அழைக்க வேண்டும்
பெரும்பாலான மீட்சிகள் சீராகவே நடக்கின்றன, ஆனால் சில அறிகுறிகளுக்கு உடனடிக் கவனம் தேவை. உங்களுக்குக் காய்ச்சல் இருந்தால், அல்லது காயத்தைச் சுற்றியுள்ள சிவப்போ கசிவோ தொடர்ந்து அதிகரித்தால் எங்களை அழையுங்கள். கையை நேராக்கும்போது பலவீனத்துடன் திடீரென ஒரு "படக்" உணர்வு ஏற்பட்டால், உடனடியாக எங்களை அழையுங்கள்; அலுவலக நேரத்துக்குப் பிறகு என்றால், அவசர சிகிச்சைப் பிரிவுக்குச் செல்லுங்கள். முழங்கையில் திடீரென ஏற்படும் கடுமையான வலி உங்கள் வலி நிவாரண மருந்துகளால் தணியவில்லை என்றால், அவசர சிகிச்சைப் பிரிவுக்குச் செல்லுங்கள். உங்கள் கெண்டைக்கால் வீங்கினாலோ வலித்தாலோ, அல்லது உங்களுக்கு மூச்சுத் திணறல் ஏற்பட்டாலோ அவசர சிகிச்சைப் பிரிவுக்குச் செல்லுங்கள். உங்கள் கையிலோ (arm) கைப்பகுதியிலோ (hand) உணர்வு இழந்தால், அல்லது அந்த அவயவத்தை அசைக்க முடியாவிட்டால், அவசர சிகிச்சைப் பிரிவுக்குச் செல்லுங்கள்.
Evidence & references
This is the clinical evidence summary written for health professionals. It is technical, and it lists the research this page was built from. You do not need to read it to understand your treatment or to make a decision about it.
Anatomy & Pathophysiology
Bony Anatomy
- The elbow is a trocho-ginglymoid joint consisting of medial and lateral articulations that provide bony stability [3].
- The trochlea articulates with the ulna within the greater sigmoid notch to form the ulnohumeral, hinged, or trochoid portion of the elbow joint [3].
- The ulnohumeral articulation provides highly congruent anatomy through almost 180° of articular contact [3].
- The greater sigmoid notch of the ulna contains a bare area devoid of cartilage [3].
- The coronoid process has medial and lateral facets that buttress the trochlea anteriorly [3].
- The sublime tubercle is located just distal and medial to the coronoid and serves as the attachment site for the anterior bundle of the medial ulnar collateral ligament [3].
- The medial epicondyle is larger and more posteriorly oriented than the lateral epicondyle [3].
- The capitellum and radial head form the radiocapitellar joint [3].
- The radius is held in close approximation to the ulna at the proximal radioulnar joint by the annular ligament [3].
- The lesser sigmoid notch is the area of the ulna that articulates with the margin of the radial head at the proximal radioulnar joint [3].
- The radial head is a concave elliptical structure covered with articular cartilage along the radiocapitellar joint and approximately 270° of the articular margin [3].
- The lateral epicondyle is the origin of the lateral extensor musculature [3].
- The origin of the lateral ulnar collateral ligament complex is located just distal to the lateral epicondyle at the geometric center of the radiocapitellar articulation [3].
- The distal humeral articulation is angled 30° from the longitudinal axis [3].
- The anterior humeral line should pass through the center of the axis of rotation [3].
- The axis of rotation is angulated 5° to 7° in the coronal plane relative to the epicondylar axis, with the medial side more distal than the lateral side [3].
- The olecranon provides a broad attachment site for the triceps [3].
- The ulna bends approximately 8° medially at 8 cm from the tip of the olecranon [3].
- The articulation to the tip of the coronoid is approximately 30° from the long axis of the ulna in the sagittal plane [3].
Ligaments and Soft Tissue
- The medial ulnar collateral ligament is comprised of the anterior bundle, posterior bundle, and transverse ligament [2].
- The anterior bundle of the medial ulnar collateral ligament is the strongest component and the primary restraint to valgus stress [2].
- The anterior bundle of the medial ulnar collateral ligament is subdivided into anterior and posterior bands that provide reciprocal function, with the anterior band tight in extension and the posterior band tight in flexion [2].
- The lateral ulnar collateral ligament origin center is 10.7 mm from the lateral epicondyle [2].
- The lateral ulnar collateral ligament insertion is 3.3 mm from the apex of the supinator crest [2].
- The triceps muscle insertions have three distinct insertional areas to the olecranon: posterior capsular insertion, deep muscular portion, and superficial tendinous portion [2].
- The deep muscular head of the triceps corresponds to the medial head of the triceps [2].
- The superficial tendinous portion of the triceps corresponds to the long and lateral heads [2].
- The width of the triceps insertion is 2.6 cm [2].
- The triceps insertion is located 1.1 cm from the tip of the olecranon [2].
- The primary elbow extensor, the triceps, inserts on the olecranon process [4].
- The brachialis is the strongest elbow flexor and attaches to the coronoid 11 mm distal to the tip [4].
- The biceps brachii inserts at the ulnar margin of the radial tuberosity, with the long head inserting proximally and the short head distally [4].
- The biceps brachii is a powerful supinator of the forearm [4].
- The mobile wad consists of the brachioradialis, extensor carpi radialis longus, and extensor carpi radialis brevis [4].
- The flexor-pronator mass consists of the pronator teres, flexor carpi radialis, palmaris longus, flexor carpi ulnaris, and flexor digitorum superficialis [4].
- Tensile forces are present at the medial elbow while compressive forces are present at the lateral elbow [4].
- The elbow capsule allows maximum distension at approximately 70 to 80 degrees of flexion [4].
- The anterior capsule attaches at a point approximately 6 mm distal to the tip of the coronoid [4].
- The coronoid tip is an intraarticular structure visualized during elbow arthroscopy [4].
- The medial or ulnar collateral ligament is the primary valgus stabilizer [4].
- The anterior bundle of the medial ulnar collateral ligament is the most important component for stability [4].
- The posterior bundle of the medial ulnar collateral ligament has the greatest change in length and becomes taut at flexion beyond 120 degrees [4].
- The lateral ulnar collateral ligament is the posterolateral stabilizer [4].
- Osborne’s ligament stabilizes the ulnar nerve in the cubital tunnel [4].
- The ligament of Struthers is a variant anatomy arising from the supracondylar process to attach to the medial epicondyle and is a potential site of median nerve compression [4].
Biomechanics and Motion
- The normal elbow has a range of motion from 0° to 140° from extension to flexion [1].
- The normal elbow has a range of motion of 75° in pronation and 85° in supination [1].
- A functional arc for flexion and extension is 100° [1].
- A functional arc for forearm rotation is 100° [1].
- Elbow stability is determined by primary and secondary stabilizers [1].
- The three primary stabilizers of the elbow are the ulnohumeral articulation, the medial ulnar collateral ligament, and the lateral ulnar collateral ligament complex [1].
- Secondary stabilizers of the elbow include the radiocapitellar articulation, the common flexor tendon, the common extensor tendon, and the joint capsule [1].
Investigations
Physical Examination
- The physical examination of the elbow is directed by the history and the location of the patient's pain in the anterior, posterior, medial, or lateral aspect [1].
- Active and passive flexion, extension, supination, and pronation should be evaluated using a goniometer for accurate measurement [9].
- The contralateral elbow should be examined for comparison during range of motion assessment [9].
- If the elbow has less than 90° to 100° of flexion, the posterior bundle of the medial collateral ligament is contracted and must be released to restore flexion [9].
- Pain during the mid-arc of motion is more common with intrinsic disease and may not improve with contracture release alone [9].
- The ulnar nerve is of utmost importance in the physical examination due to its anatomic proximity to the elbow [9].
- The posterior bundle of the medial collateral ligament forms the floor of the cubital tunnel along the course of the ulnar nerve [9].
- Electromyography and nerve conduction velocity studies should be performed if there is any question about neurologic dysfunction [9].
- An assessment for ulnar nerve subluxation should be performed, as subluxation is a relative contraindication for an arthroscopic procedure secondary to possible iatrogenic nerve injury [9].
- The soft tissue surrounding the elbow should be examined for previous skin incisions, grafts, eschar, or infection [9].
Imaging
- Plain radiographs remain the hallmark and the best screening test for elbow evaluation [1].
- Standard radiographic views include AP, lateral, and oblique views [9].
- Serial radiography is used as follow-up when heterotopic ossification is present [9].
- Primary bony landmarks assessed on radiographs include the ulnohumeral joint, coronoid process, radial head, capitellum, radiocapitellar joint, olecranon tip, coronoid/olecranon fossae, and trochlear ridge [9].
- CT is helpful when assessing for malunion architecture and the location and pattern of osteophytes and/or loose bodies [9].
- Three-dimensional CT is used to check for heterotopic ossification [9].
- CT is not necessary when the stiffness is entirely soft-tissue related [9].
- CT is beneficial if any joint incongruity or abnormal bony anatomy is present [9].
- MRI can be used to evaluate ligaments and tendons, but it is rarely indicated for elbow stiffness [9].
- AP, lateral, oblique, and axillary views of the elbow may reveal posteromedial olecranon osteophytes and/or loose bodies in valgus extension overload syndrome [11].
- CT with two-dimensional reconstruction and three-dimensional surface rendering best visualizes the pathology of valgus extension overload syndrome [11].
- MRI may be most helpful in evaluating associated injuries including partial or complete tears of the medial collateral ligament in valgus extension overload syndrome [11].
- Radiographic evaluations are essential when diagnosing an osteochondritis dissecans lesion of the elbow [12].
- Important aspects of osteochondritis dissecans lesions may be better seen with MRI [12].
References
[1] Orthopaedic Knowledge Update 13 Ebook Without Multimedia. Anatomy, Biomechanics, Physical Examination, and Imaging of the Elbow > Summary and Conclusions.
[2] Orthopaedic Knowledge Update 13 Ebook Without Multimedia. Anatomy, Biomechanics, Physical Examination, and Imaging of the Elbow > Annotated References.
[3] Orthopaedic Knowledge Update 13 Ebook Without Multimedia. Anatomy, Biomechanics, Physical Examination, and Imaging of the Elbow > Anatomy > Bony Anatomy.
[4] Miller S Review Of Orthopaedics. SECTION 16 PATELLAR TRACKING IN TOTAL KNEE ARTHROPLASTY > TABLE 2.3 Shoulder Spaces.
[9] Aaos Comprehensive Orthopaedic Review 3. Elbow Stiffness* > IV. Evaluation.
[11] Aaos Comprehensive Orthopaedic Review 3. Elbow Injuries in the Athlete* > III. Valgus Extension Overload Syndrome and Posterior Impingement.
[12] Orthopaedic Knowledge Update. Osteochondritis Dissecans of the Knee and Elbow* > Summary.