Patients › Ankle
ਟੇਲਸ ਹੱਡੀ ਦਾ ਓਸਟੀਓਕਾਂਡਰਲ ਲੀਜ਼ਨ (ਕਾਰਟੀਲੇਜ ਅਤੇ ਹੱਡੀ ਦਾ ਨੁਕਸਾਨ)
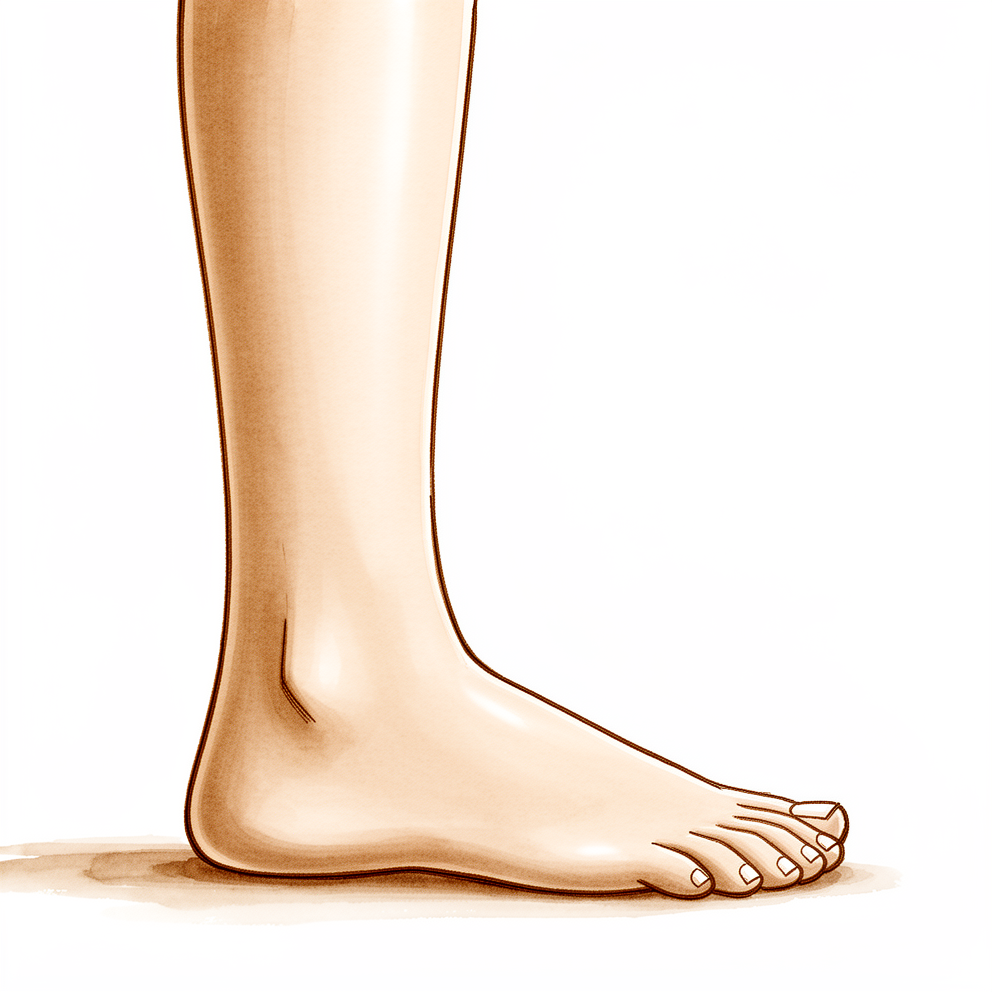
ਤੁਸੀਂ ਕੀ ਮਹਿਸੂਸ ਕਰਦੇ ਹੋ
ਟੇਲਸ ਦਾ ਓਸਟੀਓਕਾਂਡਰਲ ਲੀਜ਼ਨ (osteochondral lesion of the talus) ਟੇਲਸ (talus), ਯਾਨੀ ਤੁਹਾਡੇ ਗਿੱਟੇ ਦੇ ਜੋੜ ਹੇਠਾਂ ਟਿਕੀ ਹੱਡੀ, ਦੀ ਸਤ੍ਹਾ ਉੱਤੇ ਨੁਕਸਾਨੀ ਗਈ ਕਾਰਟੀਲੇਜ (cartilage, ਜੋੜ ਵਿੱਚ ਹੱਡੀਆਂ ਦੇ ਸਿਰਿਆਂ ਉੱਤੇ ਚਿਕਨੀ ਪਰਤ) ਅਤੇ ਹੱਡੀ ਦਾ ਇੱਕ ਛੋਟਾ ਟੁਕੜਾ ਹੁੰਦਾ ਹੈ। ਇਹ ਨੁਕਸਾਨ ਗਿੱਟੇ ਦੀ ਇੱਕ ਵਾਰ ਦੀ ਮੋਚ ਤੋਂ, ਸਮੇਂ ਦੇ ਨਾਲ ਵਾਰ-ਵਾਰ ਆਈਆਂ ਮੋਚਾਂ ਤੋਂ, ਜਾਂ ਕਈ ਕਾਰਨਾਂ ਦੇ ਮੇਲ ਤੋਂ ਹੋ ਸਕਦਾ ਹੈ ਜੋ ਪੂਰੀ ਤਰ੍ਹਾਂ ਸਮਝੇ ਨਹੀਂ ਗਏ। ਇਸ ਨੁਕਸਾਨ ਵਾਲੇ ਕੁਝ ਲੋਕਾਂ ਨੂੰ ਕੁਝ ਵੀ ਮਹਿਸੂਸ ਨਹੀਂ ਹੁੰਦਾ। ਦੂਜਿਆਂ ਨੂੰ ਗਿੱਟੇ ਵਿੱਚ ਡੂੰਘਾ ਦਰਦ ਮਹਿਸੂਸ ਹੁੰਦਾ ਹੈ ਜੋ ਵਾਰ-ਵਾਰ ਮੁੜ ਆਉਂਦਾ ਹੈ।
ਦਰਦ ਆਮ ਤੌਰ 'ਤੇ ਗਿੱਟੇ ਦੇ ਜੋੜ ਦੇ ਅੰਦਰ ਮਹਿਸੂਸ ਹੁੰਦਾ ਹੈ, ਅਤੇ ਸਰਗਰਮੀ ਨਾਲ ਵਧਦਾ ਹੈ। ਰੁਕ ਕੇ ਆਰਾਮ ਕਰਨ 'ਤੇ ਇਹ ਘਟ ਸਕਦਾ ਹੈ। ਤੁਹਾਡਾ ਗਿੱਟਾ ਸੁੱਜ ਵੀ ਸਕਦਾ ਹੈ ਅਤੇ ਜੋੜ ਦੇ ਆਲੇ-ਦੁਆਲੇ ਛੂਹਣ 'ਤੇ ਦੁਖ ਸਕਦਾ ਹੈ। ਜੇ ਤੁਹਾਨੂੰ ਪਹਿਲਾਂ ਵੀ ਇਸੇ ਗਿੱਟੇ ਵਿੱਚ ਮੋਚ ਆਈ ਹੈ, ਤਾਂ ਉਹ ਇਤਿਹਾਸ ਅਕਸਰ ਹੁਣ ਹੋ ਰਹੀ ਸਮੱਸਿਆ ਨਾਲ ਮੇਲ ਖਾਂਦਾ ਹੈ।
ਰੋਜ਼ਾਨਾ ਜ਼ਿੰਦਗੀ ਵਿੱਚ, ਇਹ ਦਰਦ ਤੁਰਨਾ, ਲੰਮੇ ਸਮੇਂ ਤੱਕ ਖੜ੍ਹਨਾ, ਅਤੇ ਪੈਰ ਨਾਲ ਧੱਕਾ ਦੇਣਾ ਜਿੰਨਾ ਹੋਣਾ ਚਾਹੀਦਾ ਹੈ ਉਸ ਤੋਂ ਔਖਾ ਬਣਾ ਸਕਦਾ ਹੈ। ਉੱਚੀ-ਨੀਵੀਂ ਜ਼ਮੀਨ, ਪੌੜੀਆਂ, ਅਤੇ ਗਿੱਟੇ 'ਤੇ ਭਾਰ ਪਾਉਣ ਵਾਲੀਆਂ ਖੇਡਾਂ, ਇਹ ਸਭ ਤਕਲੀਫ਼ ਵਧਾ ਸਕਦੇ ਹਨ। ਕੁਝ ਲੋਕਾਂ ਨੂੰ ਬੈਠਣ ਜਾਂ ਆਰਾਮ ਕਰਨ ਤੋਂ ਬਾਅਦ ਦੁਬਾਰਾ ਤੁਰਨਾ-ਫਿਰਨਾ ਸ਼ੁਰੂ ਕਰਨ 'ਤੇ ਗਿੱਟਾ ਆਕੜਿਆ ਜਾਂ ਦੁਖਦਾ ਮਹਿਸੂਸ ਹੁੰਦਾ ਹੈ।
ਜੇ ਇਸ ਵਿੱਚੋਂ ਕੁਝ ਵੀ ਜਾਣਿਆ-ਪਛਾਣਿਆ ਲੱਗਦਾ ਹੈ, ਤਾਂ ਗਿੱਟੇ ਦੀ ਚੰਗੀ ਤਰ੍ਹਾਂ ਜਾਂਚ ਕਰਵਾਉਣੀ ਫ਼ਾਇਦੇਮੰਦ ਹੈ। ਸਕੈਨ ਨੁਕਸਾਨੇ ਹਿੱਸੇ ਦੀ ਥਾਂ, ਆਕਾਰ ਅਤੇ ਗੰਭੀਰਤਾ ਦਿਖਾ ਸਕਦਾ ਹੈ, ਕਿਉਂਕਿ ਨੁਕਸਾਨ ਦੇ ਛੋਟੇ ਟੁਕੜੇ ਸਾਦੇ ਐਕਸ-ਰੇ ਵਿੱਚ ਦਿਖਾਈ ਨਹੀਂ ਦੇ ਸਕਦੇ।
ਅਸਲ ਵਿੱਚ ਕੀ ਹੋ ਰਿਹਾ ਹੈ
ਟੇਲਸ ਉਹ ਹੱਡੀ ਹੈ ਜੋ ਸਿੱਧੀ ਤੁਹਾਡੇ ਗਿੱਟੇ ਦੇ ਜੋੜ ਹੇਠਾਂ ਟਿਕੀ ਹੁੰਦੀ ਹੈ। ਇਸਦੀ ਉੱਪਰਲੀ ਸਤ੍ਹਾ ਕਾਰਟੀਲੇਜ ਦੀ ਚਿਕਨੀ, ਤਿਲਕਵੀਂ ਪਰਤ ਨਾਲ ਢਕੀ ਹੁੰਦੀ ਹੈ, ਇੱਕ ਸਖ਼ਤ ਗੱਦੀ ਜੋ ਦੋਵੇਂ ਹੱਡੀਆਂ ਨੂੰ ਬਿਨਾਂ ਰਗੜ ਦੇ ਇੱਕ-ਦੂਜੇ ਉੱਤੇ ਤਿਲਕਣ ਦਿੰਦੀ ਹੈ। ਇਸਨੂੰ ਟਾਇਰ ਦੀ ਉੱਪਰਲੀ ਪਰਤ ਵਾਂਗ ਸਮਝੋ: ਮਜ਼ਬੂਤ, ਥੋੜ੍ਹੀ ਲਚਕੀਲੀ, ਅਤੇ ਹਰ ਵਾਰ ਖੜ੍ਹੇ ਹੋਣ ਜਾਂ ਤੁਰਨ ਵੇਲੇ ਭਾਰ ਸਹਿਣ ਲਈ ਬਣੀ ਹੋਈ।
ਇਸ ਸਮੱਸਿਆ ਵਿੱਚ, ਉਸ ਕਾਰਟੀਲੇਜ ਦਾ ਇੱਕ ਛੋਟਾ ਟੁਕੜਾ, ਅਤੇ ਕਈ ਵਾਰ ਉਸਦੇ ਹੇਠਾਂ ਵਾਲੀ ਹੱਡੀ, ਕੁਚਲੀ ਗਈ ਹੁੰਦੀ ਹੈ, ਉਸ ਵਿੱਚ ਤਰੇੜ ਆ ਗਈ ਹੁੰਦੀ ਹੈ, ਜਾਂ ਉਹ ਢਿੱਲੀ ਹੋ ਕੇ ਵੱਖ ਹੋ ਗਈ ਹੁੰਦੀ ਹੈ। ਸੱਟ ਦਾ ਜ਼ੋਰ ਜੋੜ ਦੀਆਂ ਸਤ੍ਹਾਵਾਂ ਨੂੰ ਇੰਨੇ ਜ਼ੋਰ ਨਾਲ ਇੱਕ-ਦੂਜੇ ਨਾਲ ਦਬਾਉਂਦਾ ਹੈ ਕਿ ਉੱਪਰਲੀ ਪਰਤ ਨੁਕਸਾਨੀ ਜਾਂਦੀ ਹੈ। ਕਈ ਵਾਰ ਕੋਈ ਇੱਕ ਸੱਟ ਹੁੰਦੀ ਹੀ ਨਹੀਂ: ਇਹ ਨੁਕਸਾਨ ਵਾਰ-ਵਾਰ ਲੱਗੀਆਂ ਛੋਟੀਆਂ ਸੱਟਾਂ ਤੋਂ, ਹੱਡੀ ਦੀ ਉਸ ਥਾਂ ਤੱਕ ਖ਼ੂਨ ਦੀ ਸਪਲਾਈ ਦੀਆਂ ਸਮੱਸਿਆਵਾਂ ਤੋਂ, ਜਾਂ ਅਜਿਹੇ ਕਾਰਨਾਂ ਤੋਂ ਹੋ ਸਕਦਾ ਹੈ ਜੋ ਪੂਰੀ ਤਰ੍ਹਾਂ ਸਮਝੇ ਨਹੀਂ ਗਏ।
ਨੁਕਸਾਨਿਆ ਟੁਕੜਾ ਆਪ ਦਰਦ ਮਹਿਸੂਸ ਨਹੀਂ ਕਰ ਸਕਦਾ, ਕਿਉਂਕਿ ਕਾਰਟੀਲੇਜ ਵਿੱਚ ਕੋਈ ਨਸਾਂ (nerves) ਨਹੀਂ ਹੁੰਦੀਆਂ। ਜੋ ਦਰਦ ਤੁਸੀਂ ਮਹਿਸੂਸ ਕਰਦੇ ਹੋ ਉਹ ਹੇਠਾਂ ਵਾਲੀ ਹੱਡੀ ਤੋਂ ਆਉਂਦਾ ਹੈ। ਤੁਰਨ ਵੇਲੇ, ਉਸ ਹੱਡੀ ਦੀਆਂ ਬਰੀਕ ਤਰੇੜਾਂ ਵਿੱਚੋਂ ਤਰਲ ਬਹੁਤ ਦਬਾਅ ਨਾਲ ਧੱਕਿਆ ਜਾਂਦਾ ਹੈ, ਜਿਸ ਨਾਲ ਹੱਡੀ ਦੀ ਭਰਪੂਰ ਨਸਾਂ ਵਾਲੀ ਸਤ੍ਹਾ ਚਿੜ ਜਾਂਦੀ ਹੈ (irritated) ਅਤੇ ਉਹ ਡੂੰਘਾ, ਸਤਾਉਣ ਵਾਲਾ ਦਰਦ ਪੈਦਾ ਹੁੰਦਾ ਹੈ। ਸਮੇਂ ਦੇ ਨਾਲ, ਇਹ ਦਬਾਅ ਹੱਡੀ ਵਿੱਚ ਤਰਲ ਨਾਲ ਭਰੀ ਇੱਕ ਛੋਟੀ ਖੋੜ, ਯਾਨੀ ਸਿਸਟ (cyst), ਵੀ ਬਣਾ ਸਕਦਾ ਹੈ। ਜੇ ਨੁਕਸਾਨਿਆ ਟੁਕੜਾ ਟੁੱਟ ਕੇ ਜੋੜ ਵਿੱਚ ਢਿੱਲਾ ਤੈਰਨ ਲੱਗੇ, ਤਾਂ ਇਹ ਜੋੜ ਨੂੰ ਅਟਕਾ ਸਕਦਾ ਹੈ ਜਾਂ ਸੋਜ ਅਤੇ ਕਲਿੱਕ ਦੀ ਆਵਾਜ਼ ਪੈਦਾ ਕਰ ਸਕਦਾ ਹੈ।
ਨੁਕਸਾਨ ਦੇ ਛੋਟੇ ਟੁਕੜੇ ਕਈ ਵਾਰ ਆਰਾਮ ਅਤੇ ਸਮੇਂ ਨਾਲ ਆਪਣੇ ਆਪ ਠੀਕ ਹੋ ਜਾਂਦੇ ਹਨ। ਵੱਡੇ ਟੁਕੜੇ, ਜਾਂ ਉਹ ਜਿਨ੍ਹਾਂ ਵਿੱਚ ਟੁਕੜਾ ਢਿੱਲਾ ਹੋ ਕੇ ਵੱਖ ਹੋ ਗਿਆ ਹੈ, ਆਮ ਤੌਰ 'ਤੇ ਲੱਛਣ ਪੈਦਾ ਕਰਦੇ ਰਹਿੰਦੇ ਹਨ ਅਤੇ ਹੌਲੀ-ਹੌਲੀ ਜੋੜ ਨੂੰ ਹੋਰ ਘਿਸਾ ਸਕਦੇ ਹਨ। ਇਸੇ ਕਰਕੇ ਟੁਕੜੇ ਦਾ ਆਕਾਰ, ਡੂੰਘਾਈ ਅਤੇ ਥਾਂ, ਜੋ ਸਕੈਨ ਦਿਖਾ ਸਕਦਾ ਹੈ, ਇਹ ਤੈਅ ਕਰਦੇ ਹਨ ਕਿ ਅੱਗੇ ਕੀ ਹੋਵੇਗਾ।
ਅਸੀਂ ਇਸ ਬਾਰੇ ਕੀ ਕਰ ਸਕਦੇ ਹਾਂ
CT ਸਕੈਨ, ਜੋ ਹੱਡੀ ਦੀ ਵਿਸਥਾਰਪੂਰਵਕ ਤਸਵੀਰ ਬਣਾਉਂਦਾ ਹੈ, ਇਹ ਬਿਲਕੁਲ ਦਿਖਾ ਸਕਦਾ ਹੈ ਕਿ ਨੁਕਸਾਨਿਆ ਟੁਕੜਾ ਟੇਲਸ ਦੇ ਅਗਲੇ, ਵਿਚਕਾਰਲੇ ਜਾਂ ਪਿਛਲੇ ਹਿੱਸੇ ਵਿੱਚ ਕਿੱਥੇ ਹੈ। MRI ਸਕੈਨ ਕਾਰਟੀਲੇਜ ਅਤੇ ਹੱਡੀ ਨੂੰ ਵਿਸਥਾਰ ਨਾਲ ਦਿਖਾਉਂਦਾ ਹੈ ਅਤੇ ਟੁਕੜੇ ਦੇ ਆਕਾਰ ਅਤੇ ਡੂੰਘਾਈ ਦਾ ਅੰਦਾਜ਼ਾ ਲਗਾਉਣ ਵਿੱਚ ਸਾਡੀ ਮਦਦ ਕਰਦਾ ਹੈ। ਇਹ ਵੇਰਵੇ ਤੈਅ ਕਰਦੇ ਹਨ ਕਿ ਅਸੀਂ ਅੱਗੇ ਕੀ ਸਿਫ਼ਾਰਸ਼ ਕਰਦੇ ਹਾਂ।
ਜੋ ਛੋਟੇ ਟੁਕੜੇ ਢਿੱਲੇ ਹੋ ਕੇ ਵੱਖ ਨਹੀਂ ਹੋਏ, ਉਹਨਾਂ ਲਈ ਅਸੀਂ ਆਮ ਤੌਰ 'ਤੇ ਬਿਨਾਂ ਓਪਰੇਸ਼ਨ ਵਾਲੇ ਇਲਾਜ ਨਾਲ ਸ਼ੁਰੂਆਤ ਕਰਦੇ ਹਾਂ। ਇਸਦਾ ਮਤਲਬ ਹੈ ਆਰਾਮ, ਗਿੱਟੇ 'ਤੇ ਪਾਏ ਜਾਣ ਵਾਲੇ ਭਾਰ ਵਿੱਚ ਬਦਲਾਅ, ਅਤੇ ਫਿਜ਼ੀਓਥੈਰੇਪੀ। ਫਿਜ਼ੀਓਥੈਰੇਪੀ ਦਾ ਮਕਸਦ ਦਰਦ ਨੂੰ ਸ਼ਾਂਤ ਕਰਨਾ, ਤੁਹਾਡੇ ਗਿੱਟੇ ਨੂੰ ਸਹਾਰਾ ਦੇਣ ਵਾਲੀਆਂ ਮਾਸਪੇਸ਼ੀਆਂ ਨੂੰ ਮਜ਼ਬੂਤ ਕਰਨਾ, ਅਤੇ ਉੱਚੀ-ਨੀਵੀਂ ਜ਼ਮੀਨ 'ਤੇ ਜੋੜ ਨੂੰ ਸਥਿਰ ਰੱਖਣਾ ਹੈ। ਸਰਜਰੀ ਬਾਰੇ ਸੋਚਣ ਤੋਂ ਪਹਿਲਾਂ ਇਸਨੂੰ ਪੂਰਾ ਮੌਕਾ ਦਿਓ। ਇਸ ਸਮੱਸਿਆ ਵਾਲੇ ਲਗਭਗ 45% ਲੋਕਾਂ ਲਈ ਬਿਨਾਂ ਓਪਰੇਸ਼ਨ ਵਾਲਾ ਇਲਾਜ ਕਾਰਗਰ ਹੁੰਦਾ ਹੈ। ਜੇ ਤੁਹਾਡਾ ਨੁਕਸਾਨ ਸ਼ੁਰੂਆਤੀ ਪੜਾਅ ਵਿੱਚ ਹੈ, ਤਾਂ ਆਮ ਤੌਰ 'ਤੇ ਇੱਥੋਂ ਸ਼ੁਰੂ ਕਰਨਾ ਹੀ ਠੀਕ ਹੁੰਦਾ ਹੈ। ਕੁਝ ਡੂੰਘੇ ਟੁਕੜਿਆਂ ਦਾ ਵੀ ਪਹਿਲਾਂ ਇਸੇ ਤਰ੍ਹਾਂ ਇਲਾਜ ਕੀਤਾ ਜਾ ਸਕਦਾ ਹੈ, ਪਰ ਜੇ ਲੱਛਣ ਵਾਰ-ਵਾਰ ਮੁੜ ਆਉਂਦੇ ਰਹਿਣ ਤਾਂ ਅਕਸਰ ਉਹਨਾਂ ਲਈ ਸਰਜਰੀ ਦੀ ਲੋੜ ਪੈਂਦੀ ਹੈ।
ਜੇ ਟੁਕੜਾ ਵੱਡਾ ਹੈ, ਢਿੱਲਾ ਹੋ ਕੇ ਵੱਖ ਹੋ ਗਿਆ ਹੈ, ਜਾਂ ਬਿਨਾਂ ਓਪਰੇਸ਼ਨ ਵਾਲੇ ਇਲਾਜ ਨਾਲ ਤੁਹਾਨੂੰ ਕਾਫ਼ੀ ਰਾਹਤ ਨਹੀਂ ਮਿਲੀ, ਤਾਂ ਅਸੀਂ ਤੁਹਾਡੇ ਨਾਲ ਸਰਜਰੀ ਬਾਰੇ ਗੱਲ ਕਰਾਂਗੇ। ਮਕਸਦ ਨੁਕਸਾਨੇ ਹਿੱਸੇ ਤੱਕ ਪਹੁੰਚਣਾ, ਢਿੱਲੇ ਜਾਂ ਖ਼ਰਾਬ ਟਿਸ਼ੂ ਨੂੰ ਸਾਫ਼ ਕਰਨਾ, ਅਤੇ ਖਾਲੀ ਥਾਂ ਵਿੱਚ ਨਵੇਂ ਟਿਸ਼ੂ ਦੇ ਵਧਣ ਨੂੰ ਉਤਸ਼ਾਹਿਤ ਕਰਨਾ ਹੁੰਦਾ ਹੈ। ਛੋਟੇ ਤੋਂ ਦਰਮਿਆਨੇ ਟੁਕੜਿਆਂ ਲਈ ਇਹ ਆਮ ਤੌਰ 'ਤੇ ਦੂਰਬੀਨ ਵਾਲੀ (ਆਰਥਰੋਸਕੋਪਿਕ) ਸਰਜਰੀ ਰਾਹੀਂ ਕੀਤਾ ਜਾਂਦਾ ਹੈ, ਜਿਸਨੂੰ ਆਰਥਰੋਸਕੋਪੀ (arthroscopy) ਕਹਿੰਦੇ ਹਨ, ਜਿਸ ਵਿੱਚ ਬਰੀਕ ਚੀਰਿਆਂ ਰਾਹੀਂ ਇੱਕ ਪਤਲਾ ਕੈਮਰਾ ਅਤੇ ਛੋਟੇ ਔਜ਼ਾਰ ਵਰਤੇ ਜਾਂਦੇ ਹਨ। ਵੱਡੇ ਟੁਕੜਿਆਂ ਲਈ, ਸਰਜਰੀ ਵਿੱਚ ਨੁਕਸਾਨੀ ਸਤ੍ਹਾ ਨੂੰ ਸਿਹਤਮੰਦ ਕਾਰਟੀਲੇਜ ਅਤੇ ਹੱਡੀ ਨਾਲ ਬਦਲਣਾ ਸ਼ਾਮਲ ਹੋ ਸਕਦਾ ਹੈ, ਜੋ ਜਾਂ ਤਾਂ ਤੁਹਾਡੇ ਆਪਣੇ ਗੋਡੇ ਦੀ ਕਿਸੇ ਹੋਰ ਥਾਂ ਤੋਂ ਜਾਂ ਦਾਨ ਕੀਤੇ ਟਿਸ਼ੂ ਤੋਂ ਲਈ ਜਾਂਦੀ ਹੈ। ਜੇ ਵਾਰ-ਵਾਰ ਆਈਆਂ ਮੋਚਾਂ ਨਾਲ ਤੁਹਾਡੇ ਗਿੱਟੇ ਦੇ ਲਿਗਾਮੈਂਟ (ligaments, ਹੱਡੀ ਨੂੰ ਹੱਡੀ ਨਾਲ ਜੋੜਨ ਵਾਲੇ ਬੰਧਨ) ਖਿੱਚੇ ਗਏ ਹਨ, ਤਾਂ ਮੁਰੰਮਤ ਕੀਤੀ ਸਤ੍ਹਾ ਅਤੇ ਜੋੜ ਦੀ ਲੰਮੇ ਸਮੇਂ ਦੀ ਸਿਹਤ ਦੀ ਰੱਖਿਆ ਲਈ ਅਸੀਂ ਉਸੇ ਸਮੇਂ ਉਹਨਾਂ ਨੂੰ ਕੱਸ ਵੀ ਸਕਦੇ ਹਾਂ। ਖ਼ਾਸ ਓਪਰੇਸ਼ਨ ਤੁਹਾਡੇ ਟੁਕੜੇ ਦੇ ਆਕਾਰ, ਡੂੰਘਾਈ ਅਤੇ ਥਾਂ 'ਤੇ ਨਿਰਭਰ ਕਰਦਾ ਹੈ, ਅਤੇ ਸਾਡੇ ਨਾਲ ਮਿਲ ਕੇ ਕੋਈ ਵੀ ਫ਼ੈਸਲਾ ਕਰਨ ਤੋਂ ਪਹਿਲਾਂ ਅਸੀਂ ਤੁਹਾਨੂੰ ਤੁਹਾਡੇ ਲਈ ਢੁਕਵਾਂ ਓਪਰੇਸ਼ਨ ਸਮਝਾਵਾਂਗੇ।
ਕੀ ਉਮੀਦ ਰੱਖੀਏ
ਇਹ ਸਮੱਸਿਆ ਕੋਈ ਇੱਕ ਤੈਅ ਰਸਤਾ ਨਹੀਂ ਫੜਦੀ। ਨੁਕਸਾਨ ਦੇ ਛੋਟੇ ਟੁਕੜੇ ਕਈ ਵਾਰ ਆਰਾਮ ਅਤੇ ਸਮੇਂ ਨਾਲ ਆਪਣੇ ਆਪ ਠੀਕ ਹੋ ਜਾਂਦੇ ਹਨ। ਵੱਡੇ ਟੁਕੜੇ, ਜਾਂ ਉਹ ਜਿਨ੍ਹਾਂ ਵਿੱਚ ਨੁਕਸਾਨਿਆ ਟੁਕੜਾ ਢਿੱਲਾ ਹੋ ਕੇ ਵੱਖ ਹੋ ਗਿਆ ਹੈ, ਆਮ ਤੌਰ 'ਤੇ ਲੱਛਣ ਪੈਦਾ ਕਰਦੇ ਰਹਿੰਦੇ ਹਨ ਅਤੇ ਹੌਲੀ-ਹੌਲੀ ਜੋੜ ਨੂੰ ਹੋਰ ਘਿਸਾ ਸਕਦੇ ਹਨ। ਇਸੇ ਕਰਕੇ ਤੁਹਾਡੇ ਟੁਕੜੇ ਦਾ ਆਕਾਰ, ਡੂੰਘਾਈ ਅਤੇ ਥਾਂ ਇਹ ਤੈਅ ਕਰਦੇ ਹਨ ਕਿ ਅੱਗੇ ਕੀ ਹੋਵੇਗਾ।
ਜੇ ਬਿਨਾਂ ਓਪਰੇਸ਼ਨ ਵਾਲਾ ਇਲਾਜ ਤੁਹਾਡੇ ਲਈ ਕਾਰਗਰ ਹੈ, ਤਾਂ ਅੱਗੇ ਦਾ ਹਾਲ ਸਥਿਰ ਰਹਿੰਦਾ ਹੈ। ਜੋ ਟੁਕੜੇ ਸ਼ੁਰੂਆਤੀ ਆਰਾਮ ਅਤੇ ਬਦਲੀਆਂ ਸਰਗਰਮੀਆਂ ਦੇ ਸਮੇਂ ਨਾਲ ਠੀਕ ਹੋ ਜਾਂਦੇ ਹਨ, ਉਹ ਲੰਮੇ ਸਮੇਂ ਵਿੱਚ ਬਹੁਤ ਘੱਟ ਲੱਛਣਾਂ, ਸਮੱਸਿਆ ਦੇ ਮੁੜ ਆਉਣ ਦੀ ਘੱਟ ਦਰ, ਅਤੇ ਗਿੱਟੇ ਵਿੱਚ ਘਿਸਾਈ ਵਾਲੇ ਗਠੀਏ (ਆਰਥਰਾਈਟਿਸ) ਦੇ ਕਿਸੇ ਖ਼ਾਸ ਵਾਧੇ ਦੀ ਗ਼ੈਰ-ਮੌਜੂਦਗੀ ਨਾਲ ਜੁੜੇ ਹੋਏ ਹਨ। ਜੇ ਇਹ ਠੀਕ ਨਹੀਂ ਹੁੰਦਾ, ਤਾਂ ਲਗਾਤਾਰ ਰਹਿਣ ਵਾਲੇ ਲੱਛਣਾਂ ਜਾਂ ਢਿੱਲੇ ਟੁਕੜੇ ਵਾਲੇ ਜ਼ਿਆਦਾਤਰ ਲੋਕਾਂ ਨੂੰ ਸਰਜਰੀ ਦੀ ਲੋੜ ਪੈਂਦੀ ਹੈ।
ਸਰਜਰੀ ਦਾ ਮਕਸਦ ਦਰਦ ਤੋਂ ਰਾਹਤ ਦੇਣਾ ਅਤੇ ਗਿੱਟੇ ਨੂੰ ਦੁਬਾਰਾ ਕੰਮ ਕਰਨ ਯੋਗ ਬਣਾਉਣਾ ਹੈ। ਇਸ ਸਮੱਸਿਆ ਲਈ ਜ਼ਿਆਦਾਤਰ ਢੁਕਵੇਂ ਓਪਰੇਸ਼ਨਾਂ ਦੇ ਨਤੀਜੇ ਮਿਲਦੇ-ਜੁਲਦੇ ਅਤੇ ਤਸੱਲੀਬਖ਼ਸ਼ ਹੁੰਦੇ ਹਨ, ਅਤੇ ਇਹਨਾਂ ਵਿੱਚੋਂ ਚੋਣ ਮੁੱਖ ਤੌਰ 'ਤੇ ਤੁਹਾਡੇ ਟੁਕੜੇ 'ਤੇ ਨਿਰਭਰ ਕਰਦੀ ਹੈ, ਨਾ ਕਿ ਇਸ ਗੱਲ 'ਤੇ ਕਿ ਕੋਈ ਇੱਕ ਤਕਨੀਕ ਦੂਜੀ ਨਾਲੋਂ ਬਿਹਤਰ ਹੈ। ਦੂਰਬੀਨ ਵਾਲੀ ਸਰਜਰੀ ਨਾਲ ਇਲਾਜ ਕੀਤੇ ਛੋਟੇ ਟੁਕੜਿਆਂ ਲਈ, 50 ਸਾਲ ਤੋਂ ਘੱਟ ਉਮਰ ਦੇ ਉਹਨਾਂ ਲੋਕਾਂ ਵਿੱਚੋਂ 89% ਵਿੱਚ ਚੰਗੇ ਜਾਂ ਬਹੁਤ ਵਧੀਆ ਨਤੀਜੇ ਦੱਸੇ ਗਏ ਹਨ ਜਿਨ੍ਹਾਂ ਦਾ ਟੁਕੜਾ 1.5 cm² ਜਾਂ ਇਸ ਤੋਂ ਛੋਟਾ ਹੈ। ਨਤੀਜੇ ਮਿਲਦੇ-ਜੁਲਦੇ ਹੁੰਦੇ ਹਨ ਚਾਹੇ ਨੁਕਸਾਨ ਕਿਸੇ ਸੱਟ ਤੋਂ ਹੋਇਆ ਹੋਵੇ ਜਾਂ ਨਹੀਂ। ਕੁਝ ਓਪਰੇਸ਼ਨ ਤੁਹਾਡੇ ਸਰੀਰ ਨੂੰ ਖਾਲੀ ਥਾਂ ਵਿੱਚ ਨਵਾਂ ਮੁਰੰਮਤੀ ਟਿਸ਼ੂ ਉਗਾਉਣ ਲਈ ਉਤਸ਼ਾਹਿਤ ਕਰਦੇ ਹਨ, ਅਤੇ ਜ਼ਿਆਦਾਤਰ ਮਾਮਲਿਆਂ ਵਿੱਚ ਇਹ ਟਿਸ਼ੂ ਦਾ ਵਾਧਾ ਵਿਸਥਾਰਪੂਰਵਕ ਸਕੈਨਾਂ ਵਿੱਚ ਦੇਖਿਆ ਜਾ ਸਕਦਾ ਹੈ। ਹੋਰ ਵਿਕਲਪ ਨੁਕਸਾਨੀ ਸਤ੍ਹਾ ਨੂੰ ਸਿਹਤਮੰਦ ਕਾਰਟੀਲੇਜ ਅਤੇ ਹੱਡੀ ਨਾਲ ਬਦਲਦੇ ਹਨ, ਅਤੇ ਜੇ ਪਹਿਲਾ ਓਪਰੇਸ਼ਨ ਕਾਰਗਰ ਨਹੀਂ ਰਿਹਾ ਤਾਂ ਇਹਨਾਂ ਨੂੰ ਸੁਰੱਖਿਅਤ ਢੰਗ ਨਾਲ ਵਰਤਿਆ ਜਾ ਸਕਦਾ ਹੈ।
ਇਹ ਜਾਣਨਾ ਚੰਗਾ ਹੈ ਕਿ ਸਰਜਰੀ ਹਮੇਸ਼ਾ ਕੀ ਠੀਕ ਨਹੀਂ ਕਰ ਸਕਦੀ। ਦੂਰਬੀਨ ਵਾਲੇ ਮਾਈਕ੍ਰੋਫ੍ਰੈਕਚਰ (microfracture) ਤੋਂ ਬਾਅਦ, ਜਿਸ ਵਿੱਚ ਮੁਰੰਮਤ ਨੂੰ ਉਤਸ਼ਾਹਿਤ ਕਰਨ ਲਈ ਹੱਡੀ ਵਿੱਚ ਬਹੁਤ ਛੋਟੇ ਛੇਕ ਕੀਤੇ ਜਾਂਦੇ ਹਨ, ਲੰਮੇ ਸਮੇਂ ਵਿੱਚ ਸਤ੍ਹਾ ਦੇ ਹੇਠਾਂ ਵਾਲੀ ਹੱਡੀ ਪੂਰੀ ਤਰ੍ਹਾਂ ਆਪਣੀ ਆਮ ਉਚਾਈ 'ਤੇ ਵਾਪਸ ਨਹੀਂ ਆ ਸਕਦੀ, ਅਤੇ ਹੱਡੀ ਵਿੱਚ ਤਰਲ ਨਾਲ ਭਰੀਆਂ ਛੋਟੀਆਂ ਖੋੜਾਂ ਕਈ ਵਾਰ ਵਿਗੜ ਸਕਦੀਆਂ ਹਨ। ਕੁਝ ਲੋਕਾਂ ਨੂੰ ਇਲਾਜ ਦੇ ਬਾਵਜੂਦ ਲੱਛਣ ਮਹਿਸੂਸ ਹੁੰਦੇ ਰਹਿੰਦੇ ਹਨ।
ਜੇ ਵਾਰ-ਵਾਰ ਆਈਆਂ ਮੋਚਾਂ ਨਾਲ ਤੁਹਾਡੇ ਗਿੱਟੇ ਦੇ ਲਿਗਾਮੈਂਟ ਖਿੱਚੇ ਗਏ ਹਨ, ਤਾਂ ਟੁਕੜੇ ਦੇ ਇਲਾਜ ਦੇ ਨਾਲ ਹੀ ਉਹਨਾਂ ਨੂੰ ਕਸਵਾਉਣ ਨਾਲ ਮੁਰੰਮਤ ਕੀਤੀ ਸਤ੍ਹਾ ਦੀ ਰੱਖਿਆ ਹੋ ਸਕਦੀ ਹੈ ਅਤੇ ਕਾਰਟੀਲੇਜ ਦਾ ਹੋਰ ਨੁਕਸਾਨ ਹੌਲੀ ਹੋ ਸਕਦਾ ਹੈ। ਤੁਹਾਡਾ ਸਰਜਨ ਤੁਹਾਡੇ ਨਾਲ ਉਸ ਵਿਕਲਪ ਬਾਰੇ ਗੱਲ ਕਰੇਗਾ ਜੋ ਤੁਹਾਡੇ ਟੁਕੜੇ ਅਤੇ ਤੁਹਾਡੇ ਟੀਚਿਆਂ ਲਈ ਢੁਕਵਾਂ ਹੈ।
ਡਾਕਟਰ ਨੂੰ ਕਦੋਂ ਮਿਲਣਾ ਚਾਹੀਦਾ ਹੈ
ਜੇ ਤੁਹਾਨੂੰ ਇੱਕੋ ਗਿੱਟੇ ਵਿੱਚ ਇੱਕ ਤੋਂ ਵੱਧ ਵਾਰ ਮੋਚ ਆਈ ਹੈ, ਜਾਂ ਜੇ ਗਿੱਟੇ ਦੇ ਅੰਦਰ ਡੂੰਘਾ ਦਰਦ ਸਰਗਰਮੀ ਤੋਂ ਬਾਅਦ ਵਾਰ-ਵਾਰ ਮੁੜ ਆਉਂਦਾ ਹੈ ਅਤੇ ਆਰਾਮ ਨਾਲ ਘਟਦਾ ਹੈ, ਤਾਂ ਆਪਣੇ ਜੀਪੀ (ਫ਼ੈਮਿਲੀ ਡਾਕਟਰ) ਨੂੰ ਮਿਲੋ। ਜੇ ਗਿੱਟਾ ਸੁੱਜ ਜਾਂਦਾ ਹੈ ਅਤੇ ਛੂਹਣ 'ਤੇ ਦੁਖਦਾ ਰਹਿੰਦਾ ਹੈ, ਜੇ ਇਹ ਉੱਚੀ-ਨੀਵੀਂ ਜ਼ਮੀਨ 'ਤੇ ਡਾਵਾਂਡੋਲ ਮਹਿਸੂਸ ਹੁੰਦਾ ਹੈ ਜਾਂ ਜਵਾਬ ਦੇ ਜਾਂਦਾ ਹੈ, ਜਾਂ ਜੇ ਇਹ ਅਟਕਦਾ ਹੈ, ਕਲਿੱਕ ਕਰਦਾ ਹੈ ਜਾਂ ਜਾਮ ਹੋ ਜਾਂਦਾ ਹੈ, ਤਾਂ ਮਾਹਰ ਡਾਕਟਰ ਤੋਂ ਜਾਂਚ ਕਰਵਾਉਣ ਲਈ ਕਹੋ। ਇਸਦਾ ਮਤਲਬ ਜੋੜ ਵਿੱਚ ਨੁਕਸਾਨੀ ਕਾਰਟੀਲੇਜ ਦਾ ਢਿੱਲਾ ਟੁਕੜਾ ਹੋ ਸਕਦਾ ਹੈ। ਆਪਣੇ ਲਿਗਾਮੈਂਟਾਂ ਬਾਰੇ ਵੀ ਪੁੱਛੋ: ਵਾਰ-ਵਾਰ ਆਈਆਂ ਮੋਚਾਂ ਉਹਨਾਂ ਨੂੰ ਖਿੱਚ ਸਕਦੀਆਂ ਹਨ, ਅਤੇ ਉਹ ਢਿੱਲਾਪਣ ਜੋੜ ਦੀ ਸਤ੍ਹਾ ਨੂੰ ਲਗਾਤਾਰ ਨੁਕਸਾਨ ਪਹੁੰਚਾਉਂਦਾ ਰਹਿ ਸਕਦਾ ਹੈ। ਜਲਦੀ ਕਦਮ ਚੁੱਕਣਾ ਫ਼ਾਇਦੇਮੰਦ ਹੈ, ਕਿਉਂਕਿ ਖਿੱਚਿਆ ਹੋਇਆ ਲਿਗਾਮੈਂਟ ਅਤੇ ਨੁਕਸਾਨਿਆ ਟੁਕੜਾ ਇੱਕ-ਦੂਜੇ ਨੂੰ ਹੋਰ ਵਿਗਾੜ ਸਕਦੇ ਹਨ।
Evidence & references
This is the clinical evidence summary written for health professionals. It is technical, and it lists the research this page was built from. You do not need to read it to understand your treatment or to make a decision about it.
Anatomy & Pathophysiology
Lesion Morphology and Classification
- Osteochondral fragments of the talus are often loose and turned upside down within the crater, with subchondral bone appearing yellowish and hard [1].
- The Pritsch et al. (1986) classification system for osteochondral lesions of the talus includes stages for intact overlying cartilage, soft overlying cartilage, and frayed overlying cartilage [3].
- The Cheng et al. (1995) classification system for osteochondral lesions of the talus includes stages for smooth/intact but soft or ballotable cartilage, rough surface, fibrillation/fissuring, flap present or bone exposed, loose undisplaced fragment, and displaced fragment [3].
- CT scans in the axial plane can show the crater and fragments of an osteochondral lesion [1].
- Coronal CT scans can locate a lesion as anterior, middle, or posterior, which is often difficult to determine on radiograph [1].
- CT with 2-mm cuts in the coronal and axial planes determines whether a lesion is in the anterior third, middle third, or posterior third of the talar dome [3].
- Lesion size measured on MRI does not accurately reflect arthroscopic measurement in talar osteochondral lesions [2].
Anatomical Considerations for Surgical Approach
- The lateral malleolus is posterior to the tibia, allowing lateral lesions in the middle or posterior third to usually be approached anteriorly without osteotomy [3].
- Osteotomy of the medial malleolus is often necessary to expose posterior or posteromedial lesions of the talus [1, 3].
- An anteromedial approach can be used for posteromedial lesions by "grooving" the anteromedial distal tibial articular surface 6 to 8 mm to expose the lesion without osteotomy of the medial malleolus [3].
- A posteromedial arthrotomy through an anteromedial approach can expose posteromedial lesions of the talus and avoid a medial malleolar osteotomy [3].
- An approach to the posteromedial ankle through the posterior portion of the posterior tibial tendon sheath allows exposure of the talar dome and tibial articular surface while protecting posteromedial tendons, neurovascular structures, and deep posterior fibers of the deltoid ligament [3].
- If osteotomy of the medial malleolus is necessary, surgery on the medial side should be delayed until after closure of the physis [1].
Pathophysiology and Healing
- Retrograde percutaneous drilling through the sinus tarsi preserves intact articular cartilage in early lesions [3].
- Bone grafts are used in conjunction with retrograde drilling to prevent articular collapse due to the difficulty of adequately filling the contours of the lesion [3].
- Surgical-grade calcium sulfate in liquid form can be injected into the defect after drilling to promote healing [3].
- Bone-marrow aspirate harvested from the iliac crest, centrifuged to isolate pluripotent cells, and mixed with calcium graft has been used to promote more rapid healing [3].
- Fibrocartilaginous tissue fills in the defect in the subchondral crater during the postoperative period [1].
Classification
Radiographic Classifications
- Berndt and Harty published a four-part radiographic classification of osteochondral lesions of the talus in 1959 [4].
- In the Berndt and Harty classification, Stage I is described as a small subchondral trabecular compression fracture not seen radiographically [4].
- In the Berndt and Harty classification, Stage II is described as an incomplete avulsion or separation of the fragment [4].
- In the Berndt and Harty classification, Stage III is described as complete avulsion without displacement [4].
- In the Berndt and Harty classification, Stage IV is described as a fragment detached and rotated and possibly within the joint [4].
- The Berndt and Harty classification is based on radiographic criteria that may be difficult to interpret [4].
- The Berndt and Harty classification cannot distinguish a stage I lesion [4].
- Several authors modified the Berndt and Harty classification to include associated MRI findings [4].
Arthroscopic Classifications
- Pritsch et al. (1986) classified the cartilage overlying the lesion into three grades based on visual appearance [3].
- In the Pritsch et al. classification, Grade 1 indicates intact overlying cartilage [3].
- In the Pritsch et al. classification, Grade 2 indicates soft overlying cartilage [3].
- In the Pritsch et al. classification, Grade 3 indicates frayed overlying cartilage [3].
- Cheng et al. (1995) classified the lesion into six stages based on arthroscopic appearance [3].
- In the Cheng et al. classification, Stage 1 is smooth, intact but soft or ballotable [3].
- In the Cheng et al. classification, Stage 2 is a rough surface [3].
- In the Cheng et al. classification, Stage 3 is fibrillation/fissuring [3].
- In the Cheng et al. classification, Stage 4 is a flap present or bone exposed [3].
- In the Cheng et al. classification, Stage 5 is a loose, undisplaced fragment [3].
- In the Cheng et al. classification, Stage 6 is a displaced fragment [3].
- Pritsch and colleagues reported poor correlation between the radiographic appearance of the lesion and the state of the overlying cartilage [4].
- Treatment of osteochondral lesions was based on the visual appearance of the cartilage according to Pritsch and colleagues [4].
Imaging Assessment
- MRI allows identification of stage I lesions [4].
- MRI findings in stable osteochondral lesions include decreased signal intensity on T1-weighted images [4].
- MRI findings in stable osteochondral lesions include either low or increased signal on T2-weighted images [4].
- MRI may be most useful in assessment of stage II osteochondral lesions for evaluation of chondral and subchondral discontinuity indicating lesion instability [4].
- MRI may be most useful in assessment of stage II osteochondral lesions for evaluation of the presence of subchondral cysts [4].
- MRI may overestimate stability [4].
- A combination of MRI assessment and arthoscopic examination may be required to determine stability and treatment requirements [4].
- MRI or CT is the preferred imaging for complete evaluation of a suspected lesion [4].
- The continuity of cartilage and subchondral cortex can be assessed by MRI or CT as an indicator of stability [4].
- Lesion depth can be evaluated by MRI or CT [4].
- Subchondral cysts may be evaluated by MRI [4].
- Signal intensity patterns and cyst size may progress or regress over time [4].
- Signal intensity patterns and cyst size may be less reliable indicators of lesion stability than surface continuity [4].
- CT with 2-mm cuts in the coronal and axial planes determines whether the lesion is in the anterior third, middle third, or posterior third of the talar dome [3].
Clinical Presentation
- Osteochondral lesions of the talus are often difficult to determine as anterior, middle, or posterior on radiograph [1].
- Coronal CT scans locate the lesion whether it is anterior, middle, or posterior [1].
- Axial CT scans show the crater and fragments of the osteochondral lesion [1].
- A "floating" fragment in an osteochondral lesion is a loose fragment turned upside down in the crater [1].
- The subchondral bone in an osteochondral lesion is yellowish and hard [1].
- The fragment in an osteochondral lesion is often loose [1].
Investigations
- Coronal CT scans locate talar osteochondral lesions as anterior, middle, or posterior, a distinction that is often difficult to determine on radiograph [1].
- Axial CT scans demonstrate the crater and fragments of talar osteochondral lesions [1].
- The diagnosis of talar osteochondral lesions involves history, physical examination, and arthroscopy [2].
Treatment
Open Surgical Technique
- A longitudinal incision 7 cm long is made over the antero-medial aspect of the ankle, placed far enough medially to allow for medial malleolar osteotomy if necessary [1].
- The foot is plantarflexed as much as possible to visualize the lesion, and an osteotomy is usually necessary if the lesion is posterior [1].
- An osteotomy is made obliquely across the medial malleolus at the ankle joint level perpendicular to a predrilled hole for a cancellous screw [1].
- The medial malleolus is turned distally using a towel clip, and the ankle is everted to expose the medial and posterior aspects of the talar dome [1].
- The central necrotic area is removed with a small curet, and the crater and fragment are removed with copious irrigation [1].
- Four or five holes are made in the subchondral crater with a small drill to promote vascular ingrowth [1].
- The medial malleolar osteotomy is realigned and secured with a cancellous bone screw, with radiographs taken to check for anatomic alignment [1].
- Postoperatively, the patient wears a cast or patellar tendon-bearing brace for 6 to 8 weeks [1].
- The patient remains non-weight bearing for a total of 8 to 12 weeks while fibrocartilaginous tissue fills the defect [1].
Arthroscopic and Percutaneous Techniques
- Percutaneous arthroscopic drilling is recommended as an alternative to surgical excision for early stages, medial lesions, and lesions in children that have not healed [3].
- Arthroscopic drilling for medial osteochondral lesions does not require osteotomy of the medial malleolus or postoperative immobilization [3].
- Arthroscopic drilling allows for early resumption of daily activities and sports [3].
- The procedure is reported to be as effective and useful in young patients, especially those with open physes [3].
- A specific indication for arthroscopic drilling is an early lesion with mild osteosclerosis of the surrounding talar bone, continuity of the cartilaginous surface, and stability of the osteochondral fragment [3].
- Retrograde percutaneous drilling through the sinus tarsi preserves the intact articular cartilage [3].
- Bone grafts are used in conjunction with retrograde drilling to prevent articular collapse due to difficulty in filling the contours of the lesion [3].
- Surgical-grade calcium sulfate in liquid form has been injected into the defect after drilling [3].
- Bone-marrow aspirate harvested from the iliac crest, centrifuged to isolate pluripotent cells, has been mixed with calcium graft to promote more rapid healing [3].
- CT with 2-mm cuts in the coronal and axial planes determines whether the lesion is in the anterior, middle, or posterior third of the talar dome [3].
- Lateral lesions, even when in the middle or posterior third, usually can be approached anteriorly and removed without an osteotomy [3].
- An anteromedial approach for posteromedial lesions involves "grooving" the anteromedial distal tibial articular surface 6 to 8 mm to expose the lesion without osteotomy of the medial malleolus [3].
- A posteromedial arthrotomy through an anteromedial approach can be used to expose posteromedial lesions of the talus and avoid a medial malleolar osteotomy [3].
- An approach to the posteromedial ankle through the posterior portion of the posterior tibial tendon sheath allows exposure of the talar dome and tibial articular surface while protecting posteromedial tendons, neurovascular structures, and deep posterior deltoid ligament fibers [3].
- Patients undergoing medial malleolar osteotomy are immobilized in a walking boot for 6 weeks and then allowed weight bearing in a walking boot until 12 weeks after surgery [3].
- A patellar tendon-bearing brace is sometimes used after surgery to unload the ankle joint [3].
Classification Systems
- The Pritsch et al. (1986) classification includes stages for intact overlying cartilage, soft overlying cartilage, and frayed overlying cartilage [3].
- The Cheng et al. (1995) classification includes stages for smooth/intact but soft or ballotable cartilage, rough surface, fibrillation/fissuring, flap present or bone exposed, loose undisplaced fragment, and displaced fragment [3].
Complications
- Previous bone marrow stimulation may negatively affect clinical outcome in patients undergoing autologous osteochondral transplantation for osteochondral lesions of the talus [2].
- Arthroscopic quantification of syndesmotic instability is possible in a cadaveric model [2].
- The arthroscopic syndesmotic assessment tool can differentiate between stable and unstable ankle syndesmoses [2].
- Chronic tibiofibular syndesmosis injury has diagnostic efficacy with magnetic resonance imaging and comparative operative treatment options [2].
- Arthroscopic suture anchor repair of the lateral ligament ankle complex has been evaluated in a cadaveric study [2].
- Arthroscopic Brostrom repair with Gould augmentation via an accessory anterolateral port is a technique for lateral instability of the ankle [2].
- Arthroscopic anatomic reconstruction of the lateral ligaments of the ankle with gracilis autograft is a described technique [2].
- Arthroscopic-assisted lateral ligamentous reconstruction is used in combined ankle and subtalar instability [2].
- Arthroscopic treatment of chronic ankle instability has been evaluated in a prospective study of 286 patients [2].
- Activity level and function 2 years after anterior talofibular repair can be compared between arthroscopic repair and open repair procedures [2].
- Combination of modified Brostrom procedure with ankle arthroscopy is used for ankle instability accompanied by intra-articular symptoms [2].
- Open and arthroscopic lateral ligament repair for treatment of chronic ankle instability has been subject to a systematic review [2].
- Arthroscopic repair of chronic lateral ankle instability is a described procedure [2].
- Arthroscopic findings and long-term results are documented for chronic lateral instability [2].
References
[1] Campbell S Operative Orthopaedics 4 Volume Set. RECONSTRUCTION OF THE PATELLOFEMORAL AND PATELLOTIBIAL LIGAMENTS WITH A SEMITENDINOSUS TENDON GRAFT > EXCISION OF OSTEOCHONDRAL FRAGMENT OF THE TALUS.
[2] Campbell S Operative Orthopaedics 4 Volume Set. ARTHROSCOPIC EXAMINATION AND DEBRIDEMENT OF THE ANKLE JOINT > OSTEochondral Lesions of the Talus.
[3] Campbell S Operative Orthopaedics 4 Volume Set. REPAIR OF ACUTE RUPTURE OF LATERAL LIGAMENTS > Classification Systems for Osteochondral Lesions of the Talus > ARTHROSCOPY.
[4] Tachdjian S Pediatric Orthopaedics From The Texas Scottish Rite Hospital For Children E Book. Plate 35.2 Scapulocostal Stabilization for Scapular Winging (Ketenjian Technique) > Osteochondral Lesions of the Talus > Classification.