Bakit iminungkahi ang operasyong ito
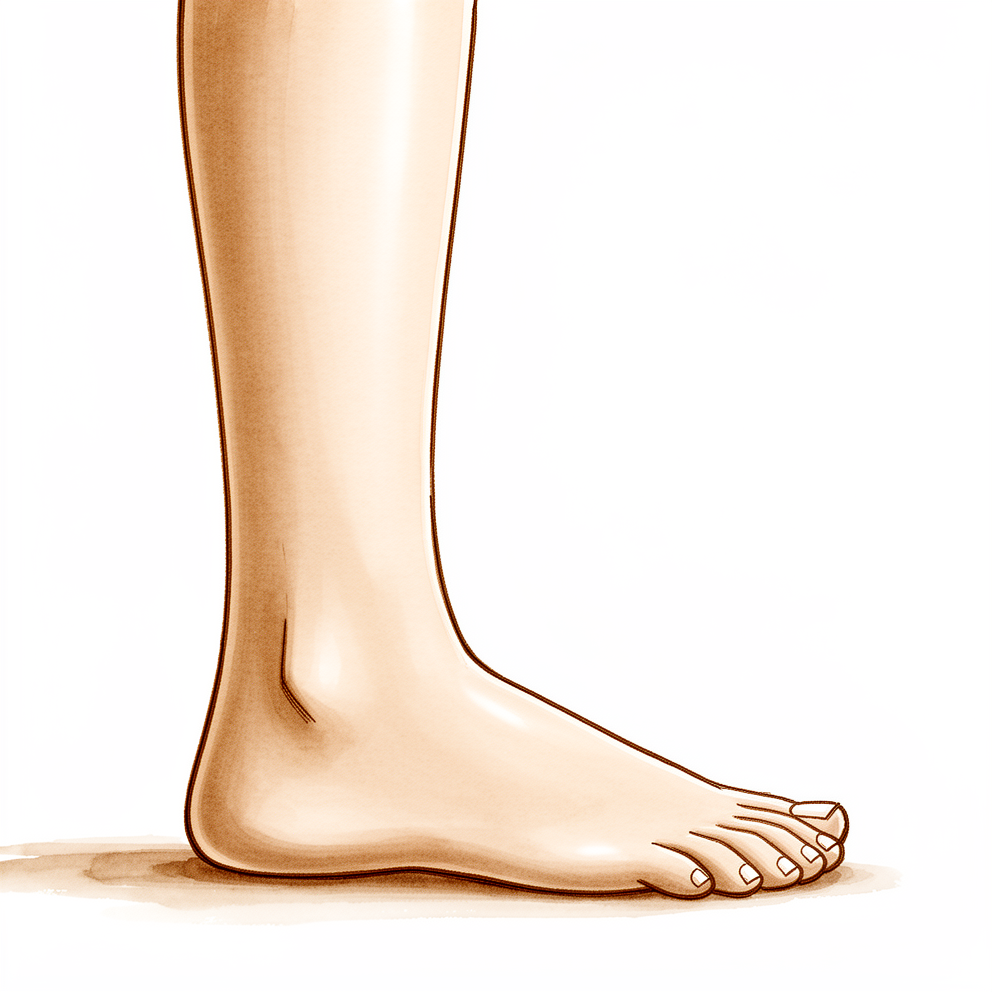
Ang Achilles tendon ay ang matibay na litid sa likod ng iyong bukung-bukong na nagpapahintulot sa iyong tumulak kapag ikaw ay naglalakad o tumatakbo. Kapag ito ay napunit nang lubos, tinatahi ng operasyong ito ang dalawang napunit na dulo pabalik sa isa't isa. Para sa isang kamakailang punit, maaaring irekomenda agad ang surgery, nang walang pagsubok muna sa non-operative care. Ang non-surgical treatment gamit ang brace o boot ay hindi mas mababa kaysa sa surgery para sa one-year outcomes, kaya tatalakayin namin ang dalawang landas na ito kasama ka. Ang open repair ay nagpapababa ng pagkakataon na mapunit muli ang tendon, bagaman mayroon itong mas mataas na pagkakataon ng mga problema sa sugat. Ang pangunahing layunin ay isang tendon na nananatiling buo, upang makayanan mong magdala ng timbang at makabalik sa iyong mga karaniwang aktibidad.
Bago ang operasyon
Sa mga araw bago ang operasyon, sundin ang mga instruksyon sa paghahanda na ibibigay namin sa iyo. Kakailanganin mong itigil ang pagkain at pag-inom pitong oras bago ang iyong operasyon. Humihingi kami ng pitong oras upang maaari kang mauna kung maagang matapos ang listahan sa theatre. Sasabihin sa iyo ng iyong surgeon kung alin sa iyong mga regular na gamot ang dapat itigil at kailan. Magdala ng nakasulat na listahan ng lahat ng iyong iniinom, at mag-ayos ng taong maghahatid sa iyo pauwi pagkatapos. Magsuot ng maluwag at komportableng damit. Ang mga scan tulad ng X-ray, ultrasound o MRI ay maaaring gamitin upang planuhin ang operasyon. Kung mayroon kang iba pang kondisyong medikal, maaaring kailanganin mo ng mga blood test o pagsusuri kasama ang anaesthetist bago ang operasyon.
Sa araw ng operasyon
Darating ka sa surgical admissions unit ng ospital, kung saan ka ire-rehistro at ihahanda para sa theatre. Pagkatapos ay makikipagkita ka sa anaesthetist, ang doktor na magpapatulog sa iyo at mag-aalaga sa iyong sakit. Ang operasyong ito ay ginagawa sa ilalim ng general anaesthetic. Minsan ay nagdaragdag ng regional nerve block para sa post-operative pain relief; tatalakayin ito ng anaesthetist sa iyo sa araw na iyon. Pagkatapos ay dadalhin ka sa operating theatre, kung saan isasagawa ang operasyon.
Kapag tapos na ang operasyon, magigising ka sa recovery area. Mananatili ang mga nurse sa piling mo habang nawawala ang bisa ng anaesthetic. Kapag stable ka na, pupunta ka sa ward o uuwi na sa bahay, depende sa procedure at kung paano ang iyong paggaling.
Ano ang kinapapalooban ng operasyon
Ang Achilles tendon ay ang matibay na litid sa likod ng iyong bukung-bukong. Kapag ito ay napunit, ang dalawang dulo ay humihiwalay na parang isang gasgas na lubid. Ang operasyong ito ay tinatahi ang mga dulong iyon upang muling mapagdugtong.
Gagawa ang iyong surgeon ng isang maliit na hiwa sa ibabaw ng tendon sa likod ng iyong bukung-bukong. Sa isang minimally invasive repair, mas maliit ang hiwa, at ang mga tahi ay ipinapasa sa balat na may kaunti o walang pagbubukas ng tendon sheath. Maaaring gumamit ang surgeon ng isang manipis na camera upang masuri kung ang mga napunit na dulo ay nagdugtong nang tama. Ang mga matitibay na tahi ang nagsisilbing tulay sa pagitan ng malusog na tendon sa itaas at ng buto ng sakong (heel bone) sa ibaba, upang panatilihing magkasama ang mga dulo habang ang mga ito ay gumagaling.
Kapag ang mga dulo ng tendon ay nagdugtong na, itatali ang mga tahi at isasara ang hiwa gamit ang mga tahi at dressing. Lalabas ka ng theatre na ang iyong bukung-bukong ay nasa isang protective position upang hindi mabigatan ang repair.
Ang ilang mga repair ay gumagamit ng teknik na nagpapahintulot sa iyo na maglagay ng bigat sa paa nang mas maaga kaysa sa tradisyonal na open repair. Sasabihin sa iyo ng iyong surgeon kung aling approach ang nakaplano para sa iyo at kung bakit.
Pagkatapos ng operasyon
Magigising ka sa recovery area kasama ang mga nurse sa iyong tabi habang nawawala ang bisa ng anaesthetic. Ang iyong bukung-bukong ay magiging nakabanda at nakapahinga sa isang protective position upang hindi mabigatan ang pagkaka-repair. Bibigyan ka namin ng pain relief upang mapanatili kang komportable, at susuriin namin ang blood supply, pakiramdam, at paggalaw ng paa bago ka umalis. Dapat may kasama ka sa unang 24 oras pagkauwi mo sa bahay. Sasabihin sa iyo ng iyong team kung uuwi ka sa araw ring iyon o mananatili ng isang gabi sa ospital. Sa unang dalawang linggo, huwag itapak ang iyong bigat sa paa maliban kung sinabi ng iyong team ang kabaligtaran. Pananatilihin namin ang benda sa loob ng humigit-kumulang 10 araw; mangyaring huwag itong tanggalin bago ang panahong iyon maliban kung sinabi namin sa iyo. Papalitan o tatanggalin namin ito kapag nakita ka na namin.
Paggaling
Sa unang ilang araw, ang iyong bukung-bukong ay magiging masakit at mamamaga. Pinapanatiling komportable ang pakiramdam sa pamamagitan ng pain relief, at nakatutulong ang pagpapahinga nang nakataas ang paa upang humupa ang pamamaga. Ang ilang pasa sa paligid ng bukung-bukong at hanggang sa paa ay normal at kumukupas sa paglipas ng panahon.
Lalabas ka ng ospital na ang iyong bukung-bukong ay nakaposisyon sa isang protective position upang hindi mabigatan ang repair. Sa unang dalawang linggo, huwag itapak ang iyong bigat sa paa maliban kung sinabi ng iyong team ang kabaligtaran. Pananatilihin naming nakalagay ang dressing sa loob ng humigit-kumulang 10 araw at papalitan o tatanggalin ito kapag nakita ka namin. Pagkatapos nito, gagabayan ka ng iyong physiotherapist sa mga banayad na paggalaw ng bukung-bukong. Magsisimula ka sa malayang pagtuturo ng iyong paa pababa, habang pinipigilan itong tumiklop nang masyadong paitaas. Habang umuusad ang paggaling, maglalagay ka ng mas maraming bigat sa paa at magsisimulang lumakad nang mas malayo. May ilang repair na nagpapahintulot sa pagtapak ng bigat nang mas maaga kaysa sa iba; sasabihin sa iyo ng iyong surgeon kung ano ang nakaplano para sa iyo.
Sa araw-araw, kakailanganin mo ng tulong sa pag-akyat sa hagdan, pamimili, at pagligo sa simula. Kadalasang mas komportable ang pagtulog nang nakatihaya habang nakataas ang paa. Karaniwan nang maaari kang bumalik sa desk work at mga pang-araw-araw na gawain depende sa iyong paggalaw at komportable, at unti-unting babalik sa sports kapag nagbalik na ang iyong lakas at balanse. Maraming tao ang bumabalik sa sports mula humigit-kumulang apat na buwan pagkatapos ng isang minimally invasive repair.
Ang paggaling ay nag-iiba sa bawat tao. Maaaring magkaiba ang iyong timeline, at gagabayan ka ng iyong surgeon at physiotherapist sa bawat hakbang.
Ano ang maaaring maging problema
Karamihan sa mga pasyente ay gumagaling nang maayos, ngunit paminsan-minsan ay maaaring magkaroon ng mga problema. Binabantayan kayo nang maigi ng inyong surgeon at ng team upang maagang matukoy ang anumang isyu.
Ang mga problema sa sugat ang dapat bantayan. Ang balat sa ibabaw ng Achilles tendon ay may mahinang supply ng dugo, kaya ang hiwa ay maaaring mabagal gumaling o ang mga gilid nito ay maaaring bumuka. Bantayan ang pamumula na kumakalat mula sa sugat, pagtagas o discharge, tumitinding sakit, o lagnat. Kung mapansin ang alinman sa mga ito, tumawag sa klinika sa halip na maghintay para sa inyong susunod na bisita. Ang ilang kondisyong pangkalusugan, kabilang ang diabetes at paninigarilyo, ay nagpapataas ng posibilidad ng mga problema sa sugat, kaya kakausapin namin kayo tungkol sa inyong sariling mga panganib bago ang operasyon.
Maaaring magkaroon ng impeksyon sa sugat o mas malalim sa paligid ng tendon. Karaniwan itong nararamdaman bilang isang malalim at tumitibok na sakit (throbbing pain) na hindi nawawala sa mga simpleng painkiller, kasama ang init, pamamaga, at pamumula. Maaari itong may kasamang lagnat o pangkalahatang pakiramdam na hindi mabuti. Ang malalim na impeksyon ay nangangailangan ng agarang gamutan, kaya makipag-ugnayan sa klinika sa mismong araw na iyon, o pumunta sa emergency department kung hindi niyo kami maabot.
Pinapanatili ng mga tahi ang mga dulo ng tendon nang magkasama habang gumagaling ang mga ito, at ang tendon ay maaaring mapunit muli bago ito maging ganap na matibay. Karaniwan itong nangyayari sa isang biglaang pagtulak (push-off), pagkatisod, o pagkahulog. Makakaramdam kayo ng isang matalas na snap o pop sa likod ng inyong bukung-bukong, na may kasamang biglaang panghihina at hirap sa pagtulak. Kung mangyari ito, makipag-ugnayan agad sa klinika o pumunta sa emergency department.
Ang nerve na tumatakbo sa labas ng bukung-bukong ay maaaring mairita habang isinasagawa ang repair. Maaari itong magdulot ng pamamanhid, pangingilig, o pakiramdam na nasusunog pababa sa outer side ng inyong paa. Banggitin ito sa inyong susunod na review, o tumawag nang mas maaga kung ito ay malala.
Maaaring mabuo ang mga blood clot sa malalalim na ugat (deep veins) ng binti pagkatapos ng pinsalang ito at ng operasyon. Ang mga babalang senyales ay kinabibilangan ng biglaang pamamaga, pananakit (tenderness) o pakiramdam na mabigat sa binti, at kahirapan sa paghinga o pananakit ng dibdib kung ang clot ay pumunta sa mga baga. Ang kahirapan sa paghinga o pananakit ng dibdib ay nangangahulugang dapat pumunta agad sa emergency department. Ang mga sintomas sa binti ay nangangahulugang dapat tumawag agad sa klinika.
Ang scar tissue ay maaaring minsan na magdikit sa tendon sa nakapaligid na tissue, na nagdudulot ng pakiramdam na may pumipitik (clicking) o kumakaskas (grinding) o paninigas sa paggalaw. Ipaalam ito sa inyong susunod na review.
Ang table ng mga komplikasyon sa pahinang ito ay naglilista ng mga tipikal na rate kung nais niyo ang mga detalye.
Kailan dapat tumawag sa amin
Tumawag agad sa amin kung kayo ay may lagnat, o kung ang pamumula, discharge, o sakit sa paligid ng sugat ay lumalala. Tumawag agad sa amin kung ang inyong binti (calf) ay namamagâ, maselan, o mabigat. Pumunta sa emergency department kung kayo ay hinihingal o may pananakit ng dibdib, kung nakaramdam kayo ng biglaang snap o pop sa inyong bukung-bukong (ankle) na may kasamang panghihina, o kung nawalan kayo ng pakiramdam sa inyong paa o hindi ito maigalaw. Kung hindi ninyo kami maabot, pumunta sa emergency department.
Evidence & references
This is the clinical evidence summary written for health professionals. It is technical, and it lists the research this page was built from. You do not need to read it to understand your treatment or to make a decision about it.
Anatomy & Pathophysiology
Bony Anatomy
- The ankle mortise is formed by the tibial plafond, medial malleolus, and lateral malleolus [3].
- The ankle mortise articulates with the dome of the talar body [3].
- The talar dome is wider anteriorly and narrower posteriorly [3].
- The ankle mortise widens 1 to 1.5 mm during motion from plantar flexion to dorsiflexion [3].
- Medial and superior clear spaces appear wider with the foot in plantar flexion [3].
- The distal fibula has a convex medial surface that articulates with the concave incisura fibularis of the distal lateral tibia [3].
- The fibula rotates approximately 2 degrees within the incisura during ankle motion and ambulation [3].
- Ankle dorsiflexion results in external rotation and proximal translation of the fibula [3].
Ligamentous Anatomy
- The lateral ankle ligaments function as restraints to varus and inversion forces at the ankle [3].
- The anterior talofibular ligament (ATFL) originates from the anteroinferior aspect of the lateral malleolus, 1 cm proximal to its tip, and extends to the lateral aspect of the talar neck [3].
- The calcaneofibular ligament (CFL) extends from the tip of the lateral malleolus to the lateral aspect of the calcaneus [3].
- The posterior talofibular ligament (PTFL) extends from the posterior lateral malleolus to the posterolateral talus [3].
- The ATFL is the weakest ankle ligament [3].
- The PTFL is the strongest ankle ligament [3].
- The distal tibiofibular joint and fibula provide stability against lateral talar translation [3].
- The deltoid ligament complex is the primary ankle stabilizer during stance [3].
- The deep deltoid ligament extends from the apex of the medial malleolus to the medial talar body [3].
- The deep deltoid ligament functions primarily to resist lateral talar translation and external rotation [3].
- The posterior deep deltoid is the most important component of the deep deltoid ligament [3].
- The superficial deltoid ligament extends from the distal medial malleolus to the navicular bone, sustentaculum tali of the calcaneus, medial talus, and spring ligament [3].
- The superficial deltoid ligament functions primarily to resist valgus and eversion ankle forces [3].
- The deltoid ligament consists of superficial and deep layers, with at most six bands of which only three are constant: the tibionavicular ligament, tibiospring ligament, and deep posterior tibiotalar ligament [8].
- The tibiocalcaneal portion of the superficial deltoid ligament is the strongest component and resists eversion of the calcaneus [8].
- The deep portion of the deltoid ligament is organized into two short, thick, discrete bands: the anterior and posterior deep tibiotalar ligaments [8].
- The anterior and posterior deep tibiotalar ligaments are intra-articular but extrasynovial [8].
- The deep posterior band comprises the largest band of the deltoid complex [8].
- The deep deltoid ligament has the highest load to failure at 713.8 N ± 69.3 compared with the lateral collateral ligaments [8].
- The dominant mode of failure for the deep deltoid ligament is an intrasubstance rupture near its talar insertion [8].
- The failure of the superficial deltoid ligament is most commonly at its insertion on the anterior malleolus [8].
- Valgus tilting of the talus within the mortise requires complete rupture of both the superficial and deep deltoid ligaments [8].
Neurovascular Anatomy
- The superficial peroneal nerve penetrates the deep fascia and lies subcutaneously 8 to 10 cm proximal to the tip of the lateral malleolus, anterior to the subcutaneous border of the fibula shaft [6].
- The deep peroneal nerve accompanies the anterior tibial artery between the tendons of the anterior tibial and extensor digitorum longus muscles, just lateral to the extensor hallucis longus tendon [6].
- The saphenous nerve is located just medial or posterior to the saphenous vein in a slightly deeper plane, 3 to 5 cm proximal to the tip of the medial malleolus [6].
Biomechanics
- The ankle joint is responsible for most sagittal plane motion of the foot and ankle [3].
- Ankle plantar flexion ranges from 23 to 48 degrees [3].
- Ankle dorsiflexion ranges from 10 to 23 degrees [3].
- The ankle joint also contributes to inversion, eversion, and rotation [3].
Investigations
- MRI is sensitive for detecting osteochondral lesions of the ankle, but the edema pattern frequently overestimates the severity of the injury [12, 13].
- Linear fluid signal deep to subchondral bone on MRI indicates an unstable osteochondral lesion [12, 13].
- MRI has a sensitivity of 92% for predicting stable versus unstable osteochondral lesions [12, 13].
- CT scans are helpful for evaluating bony lesions, determining the integrity of subchondral bone, identifying cysts, and preoperative planning for osteochondral lesions [12, 13].
- AP, mortise, and lateral weight-bearing ankle x-rays may not demonstrate subtle osteochondral lesions [12, 13].
- Advanced imaging is often helpful in the diagnosis of foot and ankle injuries when combined with a thorough clinical examination [16].
- MRI is used for the evaluation of chronic Achilles tendon ruptures [1].
- MRI is used for the evaluation of traumatic ligamentous injuries of the ankle and foot [1].
- MRI is used for the evaluation of musculotendinous structures of the ankle [1].
- MRI is used for the evaluation of sports injuries involving the ankle [1].
- MRI is used for the pre-operative evaluation of the anterior talofibular ligament in chronic ankle instability [1].
- MRI is used for the evaluation of anterolateral soft tissue impingement of the ankle [1, 18].
- MRI is used for the evaluation of osteochondral lesions of the talus [1].
- MRI is used for the evaluation of posterior tibial tendon dysfunction [1].
- MRI is used for the diagnosis of plantar plate injury with reference to intraoperative findings [1].
- MRI is used for the evaluation of tibiofibular syndesmotic ligaments [1].
- MRI is used for the evaluation of chronic lateral ankle instability in conjunction with stress radiography [1].
- MRI is used for the evaluation of associations between imaging findings and symptoms in patients with chronic ankle sprain [1].
- MRI is used for the evaluation of accuracy in diagnosing ligamentous and chondral pathology in the ankle [1].
- MRI is used for the evaluation of peroneal tendon abnormalities on routine imaging of the foot and ankle [15].
- MRI is used for the evaluation of entrapment neuropathies of the lower extremity, including the knee, leg, ankle, and foot [19].
- Ultrasonography is used for the examination of the deltoid ligament in bimalleolar equivalent fractures [17].
- Ultrasonography is used for the point-of-care diagnosis and management of superficial peroneal nerve entrapment [19].
- MRI lacks additional diagnostic value for stability assessment of the ankle mortise in supination-external rotation-type ankle fractures [17].
- CT imaging is used to evaluate normal tibiofibular relationships at the syndesmosis [17].
- Preoperative computed tomography scans are used in operative planning for malleolar ankle fractures [17].
- Radiographic evaluation of the normal distal tibiofibular syndesmosis is a standard investigative approach [17].
- Fluoroscopy is used to assess if the syndesmosis is reduced [17].
- Radiographic identification of primary lateral ankle structures is possible [2].
- Gravity stress radiographs are used to assess the effect of ankle position on deltoid ligament integrity and medial clear space measurements [2].
- Stress radiography is used in the evaluation of chronic lateral ankle instability [1].
- The use of advanced imaging is often helpful in diagnosis when combined with a thorough clinical examination for foot and ankle disorders [16].
Treatment
Operative Technique: Lindholm Repair
- The patient is positioned prone for the procedure [14].
- A posterior curvilinear incision is made extending from the midcalf to the calcaneus [14].
- The deep fascia is incised in the midline to expose the tendon rupture [14].
- Ragged ends of the tendon are debrided [14].
- Tendon ends are apposed using a box type of mattress suture made of heavy nonabsorbable suture material or wire [14].
- Fine interrupted sutures are also used to appose the tendon ends [14].
- Two flaps are fashioned from the proximal tendon and gastrocnemius aponeurosis [14].
- Each flap is approximately 1 cm wide and 7 to 8 cm long [14].
- The flaps are left attached at a point 3 cm proximal to the site of rupture [14].
- Each flap is twisted 180 degrees on itself so that its smooth external surface lies next to the subcutaneous tissue [14].
- The flaps are turned distally over the rupture [14].
- Each flap is sutured to the distal stump of the tendon and to one another [14].
- The flaps cover the site of rupture completely [14].
- The wound is closed with care taken to approximate the tendon sheath over the site of repair [14].
Operative Technique: Lynn Repair
- The tendon sheath is opened in the midline [14].
- The foot is held in 20 degrees of plantar flexion during the repair [14].
- The ends of the Achilles tendon are sewn together with 2-0 absorbable sutures without excising the irregular edges [14].
- If the plantaris tendon is intact, its insertion on the calcaneus is divided [14].
- The plantaris tendon is fanned out to form a membrane using forceps, beginning distally [14].
- The fanned-out plantaris membrane is placed over the repair of the Achilles tendon [14].
- The plantaris membrane is sutured in place with interrupted sutures [14].
- When possible, the Achilles tendon is covered for 2.5 cm both proximal and distal to the repair [14].
- If the plantaris tendon is ruptured, it is dissected free from the Achilles tendon for several centimeters [14].
- The ruptured plantaris tendon is divided proximally using a tendon stripper [14].
- The plantaris tendon is pulled distally into the incision and fanned out as a free graft [14].
- The sheath of the Achilles tendon is closed as far distally as possible without tension [14].
Postoperative Care
- Postoperative care for these repairs is the same as that used after treatment of acute rupture of the Achilles tendon [14].
References
[1] Campbell S Operative Orthopaedics 4 Volume Set. REFERENCES > FOOT AND ANKLE.
[2] Campbell S Operative Orthopaedics 4 Volume Set. REPAIR OF ACUTE RUPTURE OF LATERAL LIGAMENTS > ACUTE ANKLE LIGAMENT INJURIES, CHRONIC ANKLE INSTABILITY.
[3] Miller S Review Of Orthopaedics. SECTION 16 PATELLAR TRACKING IN TOTAL KNEE ARTHROPLASTY > BIOMECHANICS OF THE FOOT AND ANKLE.
[6] Campbell S Operative Orthopaedics 4 Volume Set. MULTIPLE Z-PLASTY RELEASE OF A CONGENITAL RING > ANKLE BLOCK.
[8] Orthopaedic Knowledge Update Sports Medicine 6. Ankle and Foot Injuries and Other Disorders > Ankle Sprains > Medial Ankle Injury.
[12] Miller S Review Of Orthopaedics. SECTION 16 PATELLAR TRACKING IN TOTAL KNEE ARTHROPLASTY > OSTEOCHONDRAL LESIONS.
[13] Miller S Review Of Orthopaedics. OSTEOCHONDRAL LESIONS.
[14] Campbell S Operative Orthopaedics 4 Volume Set. ULNAR COLLATERAL LIGAMENT REPAIR WITH AN INTERNAL BRACE > OPEN REPAIR OF ACHILLES TENDON RUPTURE—LINDHOLM.
[15] Campbell S Operative Orthopaedics 4 Volume Set. MULTIPLE Z-PLASTY RELEASE OF A CONGENITAL RING > PERONEAL TENDONS.
[16] Orthopaedic Knowledge Update Sports Medicine 6. Ankle and Foot Injuries and Other Disorders > Summary.
[17] Orthopaedic Knowledge Update Trauma. Ankle Fractures > Annotated References.
[18] Campbell S Operative Orthopaedics 4 Volume Set. ARTHROSCOPIC EXAMINATION AND DEBRIDEMENT OF THE ANKLE JOINT > IMPINGEMENT.
[19] Campbell S Operative Orthopaedics 4 Volume Set. COMBINED HAMMER TOE AND MALLET TOE DEFORMITY WITH ASSOCIATED DOUBLE CORNS > REFERENCES > TARSAL TUNNEL SYNDROME.