Ang iyong nararamdaman
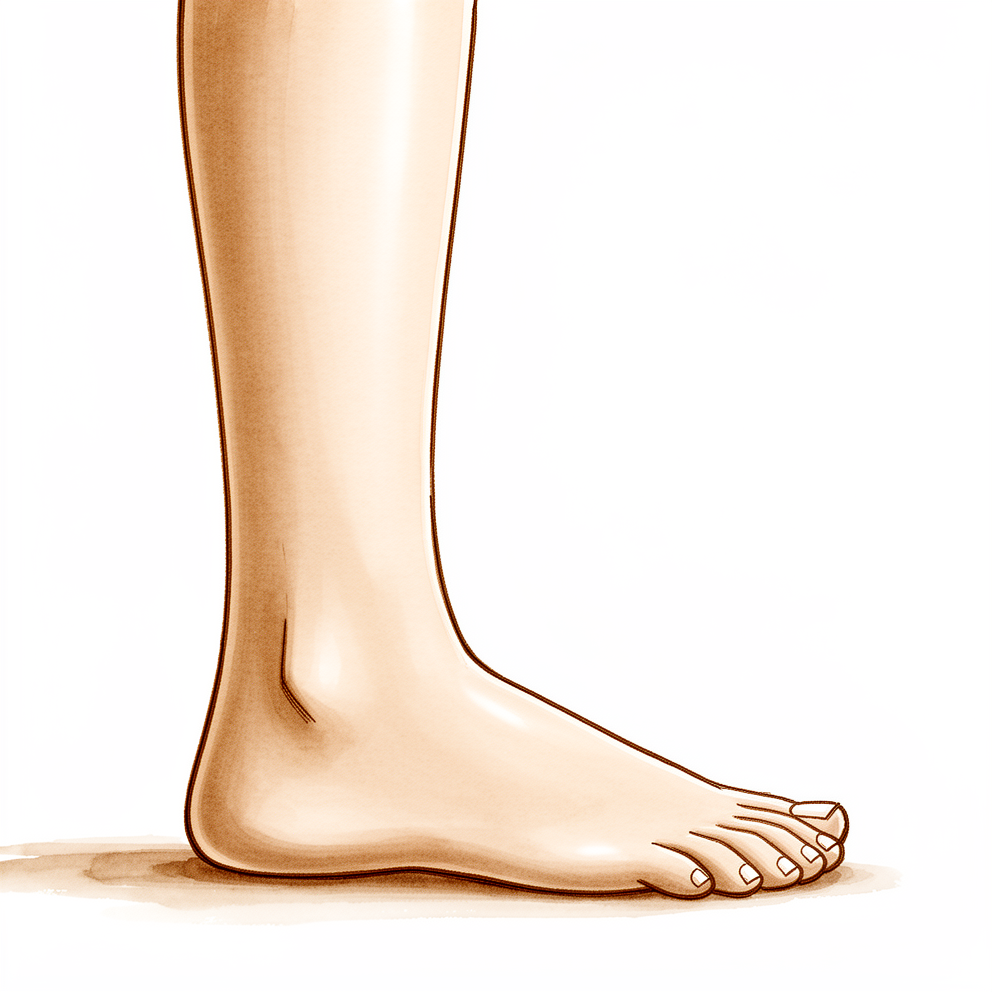
Ang osteochondral lesion ng talus ay isang maliit na bahagi ng napinsalang cartilage at buto sa ibabaw ng talus, ang buto na nasa ilalim ng iyong ankle joint. Ang pinsala ay maaaring magmula sa isang beses na pagkapilay ng bukung-bukong (ankle sprain), mula sa paulit-ulit na pagkapilay sa paglipas ng panahon, o mula sa kombinasyon ng mga sanhi na hindi pa lubos na nauunawaan. Ang ilang mga tao na may ganitong pinsala ay walang nararamdaman. Ang iba naman ay nakakapansin ng malalim na kirot sa bukung-bukong na pabalik-balik.
Ang sakit ay karaniwang nararamdaman sa loob ng ankle joint, at madalas itong lumalala kasabay ng aktibidad. Maaari itong humupa kapag ikaw ay huminto at nagpahinga. Maaari ring mamaga ang iyong bukung-bukong at maging sensitibo (tender) sa paligid ng joint. Kung napilay mo na ang parehong bukung-bukong noon, ang kasaysayang iyon ay madalas na tumutugma sa nangyayari ngayon.
Sa araw-araw, ang kirot ay maaaring magpahirap sa paglalakad, pagtayo nang matagal, at pagtulak gamit ang paa nang higit sa dapat. Ang hindi pantay na lupa, mga hagdan, at sports na nagbibigay ng load sa bukung-bukong ay maaaring magpalala sa nararamdaman. Napapansin ng ilang tao na ang bukung-bukong ay tila naninigas o masakit kapag nagsisimula silang gumalaw muli pagkatapos maupo o magpahinga.
Kung pamilyar ang alinman dito, mahalagang masuri nang maayos ang bukung-bukong. Ang isang scan ay maaaring magpakita ng lokasyon, laki, at tindi ng napinsalang bahagi, dahil ang maliliit na bahagi ng pinsala ay maaaring hindi lumabas sa isang plain X-ray.
Ano ang aktwal na nangyayari
Ang talus ay ang buto na matatagpuan mismo sa ilalim ng iyong ankle joint. Ang itaas na bahagi nito ay nababalutan ng isang makinis at madulas na layer ng cartilage, isang matibay na padding na nagpapahintulot sa dalawang buto na dumulas sa isa't isa nang walang friction. Isipin ito bilang tread ng isang gulong: matibay, bahagyang springy, at ginawa upang tumanggap ng load sa tuwing ikaw ay tatayo o lalakad.
Sa kondisyong ito, ang isang maliit na bahagi ng cartilage na iyon, at kung minsan ang buto sa ilalim nito, ay nagkaroon ng pasa, nagkaroon ng lamat, o lumuwag. Ang puwersa ng pinsala ay umiipit sa mga joint surface nang sapat upang mapinsala ang surface layer. Kung minsan ay walang iisang pinsala: ang bahaging ito ay maaaring mabuo mula sa paulit-ulit na maliliit na impact, mula sa mga problema sa blood supply sa bahaging iyon ng buto, o mula sa mga sanhi na hindi pa lubos na nauunawaan.
Ang mismong napinsalang bahagi ay hindi nakakaramdam ng sakit, dahil ang cartilage ay walang mga nerve. Ang kirot na iyong nararamdaman ay nagmumula sa buto sa ilalim nito. Kapag ikaw ay naglalakad, ang fluid ay naiipit sa mga maliliit na lamat sa butong iyon sa ilalim ng mataas na pressure, na nakaka-irita sa bone surface na mayaman sa supply at nagdudulot ng malalim at paulit-ulit na sakit. Sa paglipas ng panahon, ang pressure ay maaari ring magsanhi ng pagbuo ng isang maliit na cavity na puno ng fluid, isang cyst, sa loob ng buto. Kung ang napinsalang bahagi ay humiwalay at lumutang sa joint, maaari itong sumabit o magdulot ng pamamaga at pag-click.
Ang maliliit na bahagi ng pinsala ay kung minsan ay gumagaling nang kusa sa pamamagitan ng pahinga at panahon. Ang mga mas malalaki, o iyong mga bahagi na lumuwag na, ay may tendensiyang patuloy na magdulot ng mga sintomas at maaaring unti-unting magpalala pa sa pagkapudpod ng joint. Iyan ang dahilan kung bakit ang laki, lalim, at posisyon ng bahaging ito, na maaaring ipakita ng isang scan, ang nagtatakda kung ano ang susunod na hakbang.
Ano ang maaari naming gawin tungkol dito
Ang isang CT scan, na bumubuo ng detalyadong larawan ng buto, ay maaaring magpakita kung saan eksaktong matatagpuan ang damaged patch sa harap, gitna, o likod ng talus. Ang isang MRI scan ay nagpapakita ng cartilage at buto nang detalyado at tumutulong sa amin na husgahan ang laki at lalim ng patch. Ang mga detalyeng ito ang humuhubog sa aming susunod na rekomendasyon.
Para sa maliliit na patch na hindi lumuwag, karaniwan kaming nagsisimula sa non-operative care. Ibig sabihin nito ay pahinga, pagbabago sa bigat ng load sa bukung-bukong, at physiotherapy. Layunin ng physiotherapy na pawiin ang kirot, palakasin ang mga kalamnang sumusuporta sa iyong bukung-bukong, at patatagin ang joint sa hindi pantay na lupa. Bigyan ito ng sapat na pagkakataon bago isaalang-alang ang operasyon. Ang non-operative treatment ay gumagana para sa humigit-kumulang 45% ng mga taong may kondisyong ito. Kung ang iyong patch ay nasa maagang yugto pa lamang, ito ang karaniwang tamang panimula. Ang ilang mas malalalim na patch ay maaari pa ring gamutin sa paraang ito muna, ngunit madalas silang nangangailangan ng operasyon kung patuloy na bumabalik ang mga sintomas.
Kung ang patch ay mas malaki, lumuwag, o ang non-operative care ay hindi nagbigay sa iyo ng sapat na ginhawa, tatalakayin namin sa iyo ang tungkol sa operasyon. Ang layunin ay marating ang damaged area, linisin ang mga maluwag o hindi malusog na tissue, at hikayatin ang paglaki ng bagong tissue sa puwang. Para sa maliliit hanggang katamtamang laki ng patch, ito ay karaniwang ginagawa sa pamamagitan ng keyhole surgery, na tinatawag na arthroscopy, gamit ang isang manipis na camera at maliliit na instrumento sa pamamagitan ng maliliit na hiwa. Para sa mas malalaking patch, ang operasyon ay maaaring kabilangan ng pagpapalit ng damaged surface ng malusog na cartilage at buto, maaaring mula sa ibang bahagi ng iyong sariling tuhod o mula sa donor tissue. Kung ang mga ligament ng iyong bukung-bukong ay nabanat dahil sa paulit-ulit na sprains, maaari namin itong higpitan nang sabay upang protektahan ang repaired surface at ang pangmatagalang kalusugan ng joint. Ang partikular na operasyon ay nakadepende sa laki, lalim, at posisyon ng iyong patch, at ipapaliwanag namin ang angkop para sa iyo bago kayo magdesisyon nang magkasama.
Ano ang dapat asahan
Walang iisang takbo na sinusunod ang kondisyong ito. Ang maliliit na bahagi ng pinsala ay kung minsan ay gumagaling nang kusa sa pamamagitan ng pahinga at panahon. Ang mas malalaking bahagi, o iyong mga bahagi kung saan ang napinsalang piraso ay lumuwag, ay may tendensiyang patuloy na magdulot ng mga sintomas at maaaring unti-unting magpalala sa pagkapudpod ng kasukasuan. Iyan ang dahilan kung bakit ang laki, lalim, at posisyon ng iyong pinsala ang nagtatakda ng susunod na mangyayari.
Kung epektibo para sa iyo ang non-operative care, ang outlook ay stable. Ang mga pinsalang gumagaling sa pamamagitan ng paunang panahon ng pahinga at pagbabago ng aktibidad ay nauugnay sa minimal na mga sintomas sa katagalan, mababang rate ng pagbalik ng problema, at walang makabuluhang paglala ng wear-and-tear arthritis sa bukung-bukong. Kung hindi ito gumagaling, karamihan sa mga taong may mga sintomas na nananatili o may maluwag na bahagi ay nangangailangan ng operasyon.
Layunin ng operasyon na maibsan ang sakit at mapagana muli ang bukung-bukong. Karamihan sa mga makatwirang operasyon para sa kondisyong ito ay humahantong sa magkatulad at kasiya-siyang mga resulta, at ang pagpili sa pagitan nila ay nakadepende pangunahin sa iyong pinsala kaysa sa pagiging mas mahusay ng isang teknik kaysa sa iba. Para sa maliliit na pinsala na ginagamot sa pamamagitan ng keyhole surgery, ang mabuti o mahusay na mga resulta ay naiuulat sa 89% ng mga taong wala pang 50 taong gulang na ang pinsala ay 1.5 cm² o mas maliit. Magkatulad ang mga resulta, nagmula man ang pinsala sa isang aksidente o injury o hindi. Ang ilang mga operasyon ay hinihikayat ang iyong katawan na magpalaki ng bagong repair tissue sa puwang, at ang paglaki ng tissue na ito ay makikita sa mga detalyadong scan sa karamihan ng mga kaso. Ang ibang mga opsyon ay pinapalitan ang napinsalang ibabaw ng malusog na cartilage at buto, at ang mga ito ay maaaring gamitin nang ligtas kung ang naunang operasyon ay hindi gumana.
Mahalagang malaman kung ano ang hindi laging kayang ayusin ng operasyon. Pagkatapos ng keyhole microfracture, kung saan gumagawa ng maliliit na butas sa buto upang hikayatin ang paggaling, ang buto sa ilalim ng ibabaw ay maaaring hindi ganap na bumalik sa normal nitong taas sa katagalan, at ang maliliit na cavities na puno ng likido sa buto ay kung minsan ay maaaring lumala. Ang ilang mga tao ay patuloy na nakakapansin ng mga sintomas sa kabila ng paggamot.
Kung ang mga ligament ng iyong bukung-bukong ay nabanat dahil sa paulit-ulit na sprains, ang paghihigpit sa mga ito kasabay ng paggamot sa pinsala ay maaaring protektahan ang inayos na ibabaw at pabagalin ang karagdagang pinsala sa cartilage. Tatalakayin ng iyong surgeon ang opsyon na angkop sa iyong pinsala at sa iyong mga layunin.
Kailan dapat magpatingin
Magpatingin sa iyong GP kung higit sa isang beses mo nang napilay ang parehong bukung-bukong, o kung may malalim na kirot sa loob ng bukung-bukong na pabalik-balik pagkatapos ng aktibidad at nababawasan kapag nagpapahinga. Humingi ng pagsusuri ng isang espesyalista kung namamagâ at nananatiling maselan ang bukung-bukong, kung pakiramdam nito ay hindi matatag o bumibigay sa hindi pantay na lupa, o kung ito ay sumasabit, tumutunog (clicks), o nagla-lock. Maaaring nangangahulugan ito ng isang maluwag na piraso ng sirang cartilage sa joint. Magtanong din tungkol sa iyong mga ligament: ang paulit-ulit na pilay ay maaaring magpahaba sa mga ito, at ang kaluwagang iyon ay maaaring patuloy na makapinsala sa surface ng joint. Mahalagang kumilos nang maaga, dahil ang isang nahabang ligament at isang sirang patch ay maaaring magpalala sa isa't isa.
Evidence & references
This is the clinical evidence summary written for health professionals. It is technical, and it lists the research this page was built from. You do not need to read it to understand your treatment or to make a decision about it.
Anatomy & Pathophysiology
Lesion Morphology and Classification
- Osteochondral fragments of the talus are often loose and turned upside down within the crater, with subchondral bone appearing yellowish and hard [1].
- The Pritsch et al. (1986) classification system for osteochondral lesions of the talus includes stages for intact overlying cartilage, soft overlying cartilage, and frayed overlying cartilage [3].
- The Cheng et al. (1995) classification system for osteochondral lesions of the talus includes stages for smooth/intact but soft or ballotable cartilage, rough surface, fibrillation/fissuring, flap present or bone exposed, loose undisplaced fragment, and displaced fragment [3].
- CT scans in the axial plane can show the crater and fragments of an osteochondral lesion [1].
- Coronal CT scans can locate a lesion as anterior, middle, or posterior, which is often difficult to determine on radiograph [1].
- CT with 2-mm cuts in the coronal and axial planes determines whether a lesion is in the anterior third, middle third, or posterior third of the talar dome [3].
- Lesion size measured on MRI does not accurately reflect arthroscopic measurement in talar osteochondral lesions [2].
Anatomical Considerations for Surgical Approach
- The lateral malleolus is posterior to the tibia, allowing lateral lesions in the middle or posterior third to usually be approached anteriorly without osteotomy [3].
- Osteotomy of the medial malleolus is often necessary to expose posterior or posteromedial lesions of the talus [1, 3].
- An anteromedial approach can be used for posteromedial lesions by "grooving" the anteromedial distal tibial articular surface 6 to 8 mm to expose the lesion without osteotomy of the medial malleolus [3].
- A posteromedial arthrotomy through an anteromedial approach can expose posteromedial lesions of the talus and avoid a medial malleolar osteotomy [3].
- An approach to the posteromedial ankle through the posterior portion of the posterior tibial tendon sheath allows exposure of the talar dome and tibial articular surface while protecting posteromedial tendons, neurovascular structures, and deep posterior fibers of the deltoid ligament [3].
- If osteotomy of the medial malleolus is necessary, surgery on the medial side should be delayed until after closure of the physis [1].
Pathophysiology and Healing
- Retrograde percutaneous drilling through the sinus tarsi preserves intact articular cartilage in early lesions [3].
- Bone grafts are used in conjunction with retrograde drilling to prevent articular collapse due to the difficulty of adequately filling the contours of the lesion [3].
- Surgical-grade calcium sulfate in liquid form can be injected into the defect after drilling to promote healing [3].
- Bone-marrow aspirate harvested from the iliac crest, centrifuged to isolate pluripotent cells, and mixed with calcium graft has been used to promote more rapid healing [3].
- Fibrocartilaginous tissue fills in the defect in the subchondral crater during the postoperative period [1].
Classification
Radiographic Classifications
- Berndt and Harty published a four-part radiographic classification of osteochondral lesions of the talus in 1959 [4].
- In the Berndt and Harty classification, Stage I is described as a small subchondral trabecular compression fracture not seen radiographically [4].
- In the Berndt and Harty classification, Stage II is described as an incomplete avulsion or separation of the fragment [4].
- In the Berndt and Harty classification, Stage III is described as complete avulsion without displacement [4].
- In the Berndt and Harty classification, Stage IV is described as a fragment detached and rotated and possibly within the joint [4].
- The Berndt and Harty classification is based on radiographic criteria that may be difficult to interpret [4].
- The Berndt and Harty classification cannot distinguish a stage I lesion [4].
- Several authors modified the Berndt and Harty classification to include associated MRI findings [4].
Arthroscopic Classifications
- Pritsch et al. (1986) classified the cartilage overlying the lesion into three grades based on visual appearance [3].
- In the Pritsch et al. classification, Grade 1 indicates intact overlying cartilage [3].
- In the Pritsch et al. classification, Grade 2 indicates soft overlying cartilage [3].
- In the Pritsch et al. classification, Grade 3 indicates frayed overlying cartilage [3].
- Cheng et al. (1995) classified the lesion into six stages based on arthroscopic appearance [3].
- In the Cheng et al. classification, Stage 1 is smooth, intact but soft or ballotable [3].
- In the Cheng et al. classification, Stage 2 is a rough surface [3].
- In the Cheng et al. classification, Stage 3 is fibrillation/fissuring [3].
- In the Cheng et al. classification, Stage 4 is a flap present or bone exposed [3].
- In the Cheng et al. classification, Stage 5 is a loose, undisplaced fragment [3].
- In the Cheng et al. classification, Stage 6 is a displaced fragment [3].
- Pritsch and colleagues reported poor correlation between the radiographic appearance of the lesion and the state of the overlying cartilage [4].
- Treatment of osteochondral lesions was based on the visual appearance of the cartilage according to Pritsch and colleagues [4].
Imaging Assessment
- MRI allows identification of stage I lesions [4].
- MRI findings in stable osteochondral lesions include decreased signal intensity on T1-weighted images [4].
- MRI findings in stable osteochondral lesions include either low or increased signal on T2-weighted images [4].
- MRI may be most useful in assessment of stage II osteochondral lesions for evaluation of chondral and subchondral discontinuity indicating lesion instability [4].
- MRI may be most useful in assessment of stage II osteochondral lesions for evaluation of the presence of subchondral cysts [4].
- MRI may overestimate stability [4].
- A combination of MRI assessment and arthoscopic examination may be required to determine stability and treatment requirements [4].
- MRI or CT is the preferred imaging for complete evaluation of a suspected lesion [4].
- The continuity of cartilage and subchondral cortex can be assessed by MRI or CT as an indicator of stability [4].
- Lesion depth can be evaluated by MRI or CT [4].
- Subchondral cysts may be evaluated by MRI [4].
- Signal intensity patterns and cyst size may progress or regress over time [4].
- Signal intensity patterns and cyst size may be less reliable indicators of lesion stability than surface continuity [4].
- CT with 2-mm cuts in the coronal and axial planes determines whether the lesion is in the anterior third, middle third, or posterior third of the talar dome [3].
Clinical Presentation
- Osteochondral lesions of the talus are often difficult to determine as anterior, middle, or posterior on radiograph [1].
- Coronal CT scans locate the lesion whether it is anterior, middle, or posterior [1].
- Axial CT scans show the crater and fragments of the osteochondral lesion [1].
- A "floating" fragment in an osteochondral lesion is a loose fragment turned upside down in the crater [1].
- The subchondral bone in an osteochondral lesion is yellowish and hard [1].
- The fragment in an osteochondral lesion is often loose [1].
Investigations
- Coronal CT scans locate talar osteochondral lesions as anterior, middle, or posterior, a distinction that is often difficult to determine on radiograph [1].
- Axial CT scans demonstrate the crater and fragments of talar osteochondral lesions [1].
- The diagnosis of talar osteochondral lesions involves history, physical examination, and arthroscopy [2].
Treatment
Open Surgical Technique
- A longitudinal incision 7 cm long is made over the antero-medial aspect of the ankle, placed far enough medially to allow for medial malleolar osteotomy if necessary [1].
- The foot is plantarflexed as much as possible to visualize the lesion, and an osteotomy is usually necessary if the lesion is posterior [1].
- An osteotomy is made obliquely across the medial malleolus at the ankle joint level perpendicular to a predrilled hole for a cancellous screw [1].
- The medial malleolus is turned distally using a towel clip, and the ankle is everted to expose the medial and posterior aspects of the talar dome [1].
- The central necrotic area is removed with a small curet, and the crater and fragment are removed with copious irrigation [1].
- Four or five holes are made in the subchondral crater with a small drill to promote vascular ingrowth [1].
- The medial malleolar osteotomy is realigned and secured with a cancellous bone screw, with radiographs taken to check for anatomic alignment [1].
- Postoperatively, the patient wears a cast or patellar tendon-bearing brace for 6 to 8 weeks [1].
- The patient remains non-weight bearing for a total of 8 to 12 weeks while fibrocartilaginous tissue fills the defect [1].
Arthroscopic and Percutaneous Techniques
- Percutaneous arthroscopic drilling is recommended as an alternative to surgical excision for early stages, medial lesions, and lesions in children that have not healed [3].
- Arthroscopic drilling for medial osteochondral lesions does not require osteotomy of the medial malleolus or postoperative immobilization [3].
- Arthroscopic drilling allows for early resumption of daily activities and sports [3].
- The procedure is reported to be as effective and useful in young patients, especially those with open physes [3].
- A specific indication for arthroscopic drilling is an early lesion with mild osteosclerosis of the surrounding talar bone, continuity of the cartilaginous surface, and stability of the osteochondral fragment [3].
- Retrograde percutaneous drilling through the sinus tarsi preserves the intact articular cartilage [3].
- Bone grafts are used in conjunction with retrograde drilling to prevent articular collapse due to difficulty in filling the contours of the lesion [3].
- Surgical-grade calcium sulfate in liquid form has been injected into the defect after drilling [3].
- Bone-marrow aspirate harvested from the iliac crest, centrifuged to isolate pluripotent cells, has been mixed with calcium graft to promote more rapid healing [3].
- CT with 2-mm cuts in the coronal and axial planes determines whether the lesion is in the anterior, middle, or posterior third of the talar dome [3].
- Lateral lesions, even when in the middle or posterior third, usually can be approached anteriorly and removed without an osteotomy [3].
- An anteromedial approach for posteromedial lesions involves "grooving" the anteromedial distal tibial articular surface 6 to 8 mm to expose the lesion without osteotomy of the medial malleolus [3].
- A posteromedial arthrotomy through an anteromedial approach can be used to expose posteromedial lesions of the talus and avoid a medial malleolar osteotomy [3].
- An approach to the posteromedial ankle through the posterior portion of the posterior tibial tendon sheath allows exposure of the talar dome and tibial articular surface while protecting posteromedial tendons, neurovascular structures, and deep posterior deltoid ligament fibers [3].
- Patients undergoing medial malleolar osteotomy are immobilized in a walking boot for 6 weeks and then allowed weight bearing in a walking boot until 12 weeks after surgery [3].
- A patellar tendon-bearing brace is sometimes used after surgery to unload the ankle joint [3].
Classification Systems
- The Pritsch et al. (1986) classification includes stages for intact overlying cartilage, soft overlying cartilage, and frayed overlying cartilage [3].
- The Cheng et al. (1995) classification includes stages for smooth/intact but soft or ballotable cartilage, rough surface, fibrillation/fissuring, flap present or bone exposed, loose undisplaced fragment, and displaced fragment [3].
Complications
- Previous bone marrow stimulation may negatively affect clinical outcome in patients undergoing autologous osteochondral transplantation for osteochondral lesions of the talus [2].
- Arthroscopic quantification of syndesmotic instability is possible in a cadaveric model [2].
- The arthroscopic syndesmotic assessment tool can differentiate between stable and unstable ankle syndesmoses [2].
- Chronic tibiofibular syndesmosis injury has diagnostic efficacy with magnetic resonance imaging and comparative operative treatment options [2].
- Arthroscopic suture anchor repair of the lateral ligament ankle complex has been evaluated in a cadaveric study [2].
- Arthroscopic Brostrom repair with Gould augmentation via an accessory anterolateral port is a technique for lateral instability of the ankle [2].
- Arthroscopic anatomic reconstruction of the lateral ligaments of the ankle with gracilis autograft is a described technique [2].
- Arthroscopic-assisted lateral ligamentous reconstruction is used in combined ankle and subtalar instability [2].
- Arthroscopic treatment of chronic ankle instability has been evaluated in a prospective study of 286 patients [2].
- Activity level and function 2 years after anterior talofibular repair can be compared between arthroscopic repair and open repair procedures [2].
- Combination of modified Brostrom procedure with ankle arthroscopy is used for ankle instability accompanied by intra-articular symptoms [2].
- Open and arthroscopic lateral ligament repair for treatment of chronic ankle instability has been subject to a systematic review [2].
- Arthroscopic repair of chronic lateral ankle instability is a described procedure [2].
- Arthroscopic findings and long-term results are documented for chronic lateral instability [2].
References
[1] Campbell S Operative Orthopaedics 4 Volume Set. RECONSTRUCTION OF THE PATELLOFEMORAL AND PATELLOTIBIAL LIGAMENTS WITH A SEMITENDINOSUS TENDON GRAFT > EXCISION OF OSTEOCHONDRAL FRAGMENT OF THE TALUS.
[2] Campbell S Operative Orthopaedics 4 Volume Set. ARTHROSCOPIC EXAMINATION AND DEBRIDEMENT OF THE ANKLE JOINT > OSTEochondral Lesions of the Talus.
[3] Campbell S Operative Orthopaedics 4 Volume Set. REPAIR OF ACUTE RUPTURE OF LATERAL LIGAMENTS > Classification Systems for Osteochondral Lesions of the Talus > ARTHROSCOPY.
[4] Tachdjian S Pediatric Orthopaedics From The Texas Scottish Rite Hospital For Children E Book. Plate 35.2 Scapulocostal Stabilization for Scapular Winging (Ketenjian Technique) > Osteochondral Lesions of the Talus > Classification.