Patients › Shoulder
Fijación de fracturas de clavícula
Clavicle fixation (ORIF) — restoring alignment and stability for displaced clavicle fractures.
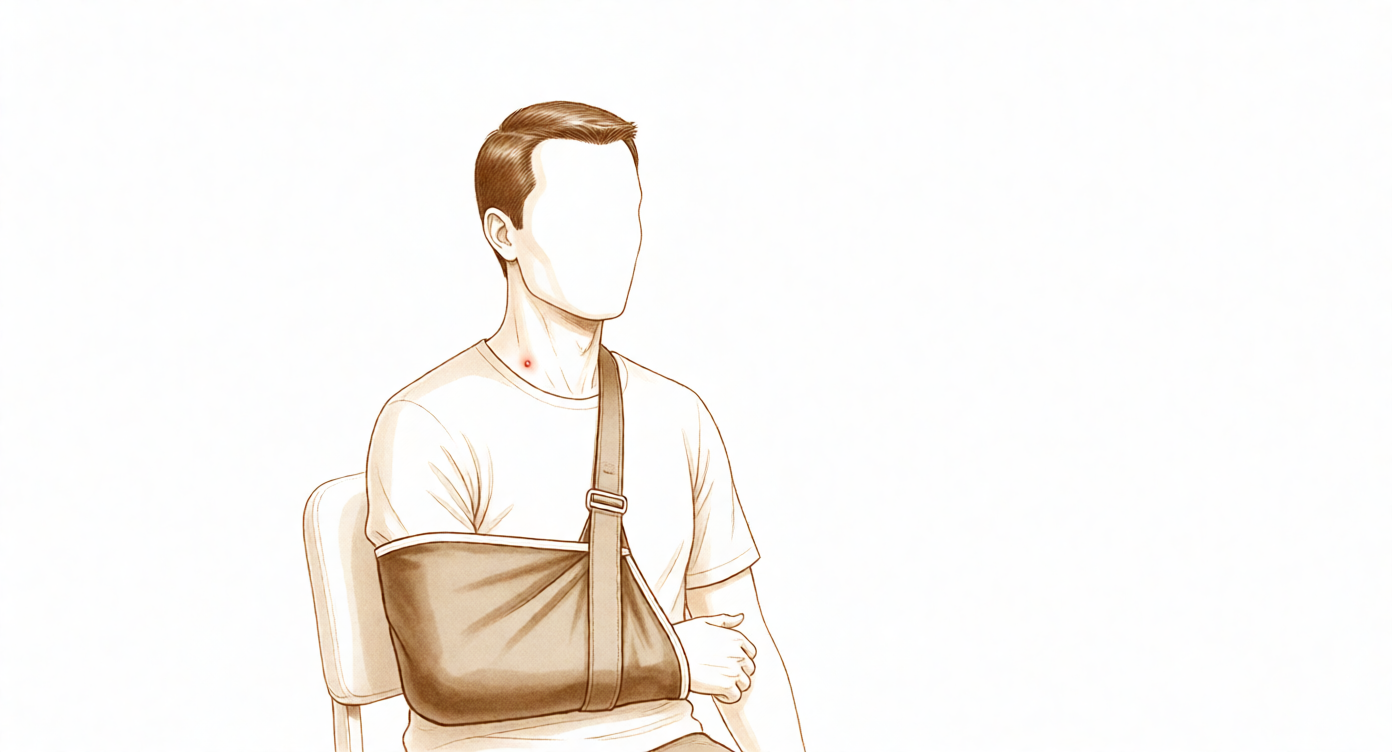
¿Por qué se ha recomendado esta operación?
El Dr. Kieran Hirpara, cirujano de extremidades superiores en el Mater Private Hospital Rockhampton, adapta el tratamiento a su lesión específica. Por lo general, los pacientes son derivados a nuestra clínica por su médico de cabecera; si un fisioterapeuta le ha sugerido que nos consulte, igualmente necesitará una derivación de su médico de cabecera para poder acceder al reembolso de Medicare. En la consulta, tomamos su historia clínica, lo examinamos y, si es necesario, solicitamos estudios de imagen. Las radiografías suelen mostrar dónde se ha roto la clavícula y hasta qué punto se han desplazado sus fragmentos.
La clavícula puede fracturarse en su tercio medio o más cerca de cualquiera de sus extremos. Muchas de estas fracturas sanan bien sin cirugía, por lo que normalmente iniciamos con un tratamiento no quirúrgico, como el reposo con cabestrillo y fisioterapia. En adultos, consideramos la cirugía cuando la fractura presenta un desplazamiento significativo: por ejemplo, cuando el hueso se ha acortado 2 cm, cuando los fragmentos están completamente fuera de posición o cuando se ha fragmentado en varias piezas. La cirugía también puede ser recomendada si la fractura no ha sanado o si lo ha hecho en una posición inadecuada. En adolescentes, la mayoría de las fracturas de clavícula se tratan sin intervención quirúrgica. El objetivo de la operación es mantener el hueso estable para que pueda unirse, aliviar el dolor y restaurar la fuerza y el movimiento del hombro.
Antes de la operación
En los días previos a la cirugía, confirmaremos el plan con usted y responderemos a cualquier pregunta. Deberá abstenerse de comer y beber durante siete horas antes de la operación. Solicitamos un ayuno un poco más prolongado que en otros hospitales para poder adelantar su cirugía si la lista de quirófanos se agiliza. Si toma medicamentos de forma regular, traiga una lista por escrito de los mismos y le indicaremos cuáles debe suspender. En la mayoría de los casos no se requieren exámenes especiales antes de esta operación. No obstante, si padece otras afecciones médicas, podría necesitar análisis de sangre o una consulta con el anestesista. Organice que alguien lo lleve a casa después de la intervención, ya que no podrá conducir por sí mismo. Use ropa holgada y cómoda que sea fácil de quitarse.
El día de la intervención
Acudirá a la unidad de admisiones quirúrgicas del hospital, donde se le registrará y preparará para la cirugía. Conocerá al anestesista, el médico encargado de controlar su sueño y el dolor durante la operación. Esta intervención se realiza bajo anestesia general; usted permanecerá completamente dormido durante todo el procedimiento. En algunos pacientes también se aplica un bloqueo nervioso regional para aliviar el dolor postoperatorio; el anestesista decide al respecto ese mismo día según sus circunstancias individuales. Posteriormente, será llevado al quirófano, donde se lleva a cabo la operación.
Una vez finalizada la operación, despertará en la sala de recuperación. Las enfermeras permanecerán a su lado y lo vigilarán mientras la anestesia va desapareciendo. Cuando su estado sea estable, será trasladado a una sala de hospitalización o podrá volver a casa ese mismo día, según el tipo de intervención y cómo evolucione su recuperación. Si regresa a casa, la persona designada para llevarlo lo acompañará.
Descripción del procedimiento quirúrgico
Se trata de una cirugía abierta que se realiza mediante una única incisión sobre la zona de la clavícula fracturada. En la mesa de operaciones, usted se colocará en posición semisedente, similar a la de alguien sentado en una silla de playa; además, se colocará un pequeño cojín detrás del hombro para elevarlo ligeramente. Esto permite al cirujano tener una visión clara y un acceso libre a la zona afectada.
El cirujano volverá a colocar los fragmentos fracturados en su posición normal y los fijará con una placa y tornillos. La placa está diseñada para seguir la curvatura natural en forma de “S” de la clavícula, de modo que se adapte perfectamente a ella. Pequeños tornillos atraviesan la placa e incrustan en el hueso a ambos lados de la fractura, garantizando su estabilidad durante el proceso de curación. Si el hueso se ha fragmentado en varias piezas, se puede utilizar un tornillo pequeño para volver a alinear algún fragmento suelto antes de colocar la placa.
En caso de que la fractura se encuentre cerca del extremo externo de la clavícula, el cirujano podría añadir refuerzos de sutura resistentes que conecten la clavícula con un hueso cercano del hombro; estos ayudan a mantener estable el fragmento externo mientras se une al resto del hueso. Si previamente la fractura no sanó, el cirujano también podría colocar material de injerto óseo alrededor de la zona de fractura para favorecer su unión.
Una vez que el hueso queda firmemente fijado, el cirujano verifica que todo esté estable y luego cierra la incisión mediante puntos de sutura. Sobre la herida se aplica un vendaje antes de que usted abandone el quirófano. Todo el procedimiento se planifica previamente mediante radiografías de su clavícula, que muestran cuánto se han desplazado los fragmentos y cuántos son en total.
Después de la operación
La mayoría de los pacientes permanecen una noche en el hospital tras esta operación, aunque algunos pueden volver a casa el mismo día. Despertará en la sala de recuperación y, una vez estabilizado, será trasladado a una habitación. Para mayor comodidad, su brazo descansará en un cabestrillo sencillo, el cual se retira durante los ejercicios y para lavarse. El personal de enfermería controlará periódicamente su dolor y le administrará medicación para mantenerlo bajo control. Alguien debe acompañarle durante las primeras 24 horas después de regresar a casa. Use el cabestrillo cuando se mueva por la casa; camine en breves intervalos en lugar de permanecer quieto. Dejamos el vendaje puesto durante unos 10 días; por favor, no lo retire antes de ese plazo a menos que se lo indiquemos. Lo cambiaremos o lo quitaremos cuando venga a la consulta.
Recuperación
Durante los primeros días, el hombro le dolerá y la zona sobre la clavícula se hinchará, pudiendo presentar hematomas. Esto forma parte normal del proceso de curación. El descanso, mantener el brazo en el cabestrillo y tomar los analgésicos según las indicaciones ayudarán a aliviarlo. La mayoría de las personas notan que el dolor disminuye progresivamente durante las primeras dos semanas, a medida que la hinchazón desaparece.
El brazo se mantiene en un cabestrillo sencillo para mayor comodidad; este se retira durante los ejercicios y para lavarse. Su fisioterapeuta le guiará en movimientos suaves al principio, y posteriormente incrementará su fuerza y amplitud de movimiento a medida que el hueso se une. En casa, podrá realizar tareas ligeras con la otra mano, pero evite levantar objetos con el brazo afectado, estirarse por encima de la cabeza o apoyarse en él hasta que se le indique que es seguro. Al principio, dormir con algunas almohadas como soporte suele resultar más cómodo.
A medida que la hinchazón disminuye y recupera el movimiento, la vida cotidiana se vuelve más fácil. Podrá vestirse, escribir y usar un teclado mucho antes de poder levantar objetos pesados. Una vez que su cirujano le autorice conducir, generalmente en la revisión a las seis semanas, podrá volver al volante; nuestra guía sobre conducción tras una cirugía de miembro superior explica los detalles al respecto. El regreso al trabajo y a la práctica deportiva dependerá de las características de su empleo o deporte; su cirujano le asesorará al respecto conforme evolucione su recuperación.
Cada persona sana a su propio ritmo, por lo que su cronograma puede variar. Su cirujano y fisioterapeuta le guiarán en cada revisión y ajustarán el plan según su progreso.
Qué puede salir mal
La mayoría de los pacientes evolucionan bien, pero en ocasiones pueden surgir problemas. Su cirujano y el equipo lo vigilarán de cerca para detectar cualquier anomalía a tiempo.
La infección es lo que más vigilamos después de la cirugía. Podría notar un dolor profundo y palpitante que no cede con analgésicos comunes, enrojecimiento que se extiende desde la herida o secreción de líquido. A veces se siente fiebre y escalofríos. Infórmenos de inmediato si observa alguno de estos signos, ya que la infección requiere tratamiento rápido.
La placa y los tornillos se encuentran cerca de la piel sobre la clavícula, por lo que se pueden palpar a través de ella. Algunas personas perciben que el metal roza o se engancha, especialmente al acostarse sobre ese lado o al llevar una correa de bolso sobre el hombro. Si esta irritación resulta molesta, se pueden extraer los implantes en una intervención posterior. Comente este tema en su revisión médica en lugar de soportarlo.
La entumecimiento cerca de la cicatriz es frecuente. Los pequeños nervios cutáneos alrededor de la clavícula suelen estirarse durante la cirugía, provocando una zona de entumecimiento o hormigueo bajo la incisión. Por lo general, esto se nota más que limita sus actividades; no obstante, mencione este detalle en su próxima cita para que quede registrado.
En casos muy raros, la cirugía puede afectar a los nervios o vasos sanguíneos más grandes situados bajo la clavícula. Los signos de alerta incluyen debilidad repentina, hormigueo en todo el brazo, o que el brazo se vea pálido, frío o hinchado. Estas situaciones requieren atención urgente; por ello, acuda al servicio de urgencias si aparecen.
En ocasiones, el hueso no se une correctamente o lo hace en una posición menos óptima de lo esperado. Notaría dolor persistente y debilidad en el lugar de la fractura, sin mejoría conforme a lo previsto. Comuníquenoslo en la siguiente revisión si el hombro no evoluciona como habíamos acordado.
También pueden presentarse problemas en la herida, como separación de los bordes, cicatriz gruesa o sensible; además, la acumulación de sangre bajo la herida puede provocar hinchazón repentina en los primeros días. Contacte a la clínica ante cualquier inquietud relacionada con la herida.
En la tabla de complicaciones de esta página se detallan las tasas típicas, por si desea conocer los datos exactos.
¿Cuándo deben llamarnos?
Llámenos si tiene fiebre, o si la piel alrededor de la herida se vuelve más roja, hinchada o comienza a exudar líquido. Llámenos si el dolor empeora repentinamente o no disminuye con los analgésicos. Acuda a urgencias si siente dolor o hinchazón en la pantorrilla, o si tiene dificultad para respirar, ya que estos pueden ser signos de un coágulo sanguíneo. Acuda a urgencias si su brazo se entumece, se siente frío o pálido, o si no puede moverlo. Si le preocupa cualquier cosa, llame a la clínica. Preferimos que nos lo comunique a tiempo.
¿Dónde leer más sobre esta afección?
Esta página trata sobre la operación en sí. La afección que se trata con ella, incluyendo lo que demuestran las evidencias sobre cuándo la cirugía es útil y cuándo no, se explica con mayor detalle en la página Fractura de clavícula.
Evidence & references
This is the clinical evidence summary written for health professionals. It is technical, and it lists the research this page was built from. You do not need to read it to understand your treatment or to make a decision about it.
Anatomy & Pathophysiology
Clavicle Anatomy
- The clavicle is the first bone to ossify, occurring in the fifth week of gestation [6].
- The clavicle is the only long bone to ossify by intramembranous ossification [6].
- The medial (sternal) epiphysis of the clavicle is the last ossification center to fuse, occurring at age 20 to 25 years [6].
- The primary blood supply to the clavicle is periosteal, and no nutrient artery is present [6].
Shoulder Girdle Architecture
- The scapula is attached to the axial skeleton by the clavicle, specifically via the acromioclavicular (AC) and sternoclavicular (SC) joints [5].
- The scapula is separated from the chest wall by thin gliding fibro-fatty tissue, allowing smooth excursion over the chest wall [5].
- The scapula has only one true diarthrodial articulation, the acromioclavicular (AC) joint [6].
- Normal shoulder motion is approximately two-thirds glenohumeral and one-third scapulothoracic [6].
- The scapular spine is an osseous ridge that separates the supraspinatus and infraspinatus fossae [6].
- The acromion has three ossification centers: the metacromion (base), the mesoacromion (middle), and the preacromion (tip) [6].
- Failure of fusion of the acromial ossification centers results in os acromiale [6].
- The coracobrachialis muscle and the short head of the biceps tendon originate from the coracoid process [6].
- The pectoralis minor muscle inserts onto the medial coracoid process [6].
- The subchondral bone of the glenoid is relatively flat, with articular concavity augmented by cartilage and a circumferential labrum [6].
- The glenoid averages 5° of retroversion in relation to the axis of the scapular body [6].
- The superior shoulder suspensory complex (SSSC) provides a stable connection between the scapula and the axial skeleton [6].
- The SSSC is composed of the glenoid, the coracoid process, the coracoclavicular ligaments, the distal clavicle, the AC joint, and the acromion [6].
- The superior strut of the SSSC comprises the middle clavicle [6].
- The inferior strut of the SSSC comprises the lateral scapular border and spine of the scapula [6].
- The basic part of the scapula is the body, which is triangular when viewed anteroposteriorly with its base situated superiorly and its apex inferiorly [5].
- The glenoid is connected with the flat body of the scapula by the scapular neck [5].
- The hook-shaped coracoid process curves forwards from the superior surface of the scapular neck [5].
- The scapular spine ends in a flattened bony process, the acromion, which curves forwards [5].
- The distribution of bony mass in the scapula is highly uneven, with the highest concentration in the glenoid, the scapular neck (including the base of the coracoid process), and the lateral border of the scapular body [5].
- Two bony pillars transmit compressive forces from the glenoid fossa: the lateral pillar and the spinal pillar [5].
- The lateral pillar connects the inferior border of the glenoid with the inferior angle [5].
- The spinal pillar arises from the central part of the glenoid and continues medially to become part of the base of the scapular spine [5].
- The two pillars, connected by a markedly thinner medial border of the scapular body, form the basic load-bearing structure known as the biomechanical body of the scapula [5].
- The weakest bone in the scapula is located primarily in the central part of the biomechanical body, specifically in the infraspinous fossa [5].
- The weakest area of the circumference of the biomechanical body is the spinomedial angle, which is the connection of the scapular spine and the medial border of the scapula [5].
- In most scapular body fractures, one of the main fracture lines passes through the spinomedial angle [5].
Proximal Humerus Anatomy
- The proximal humerus anatomy comprises four main parts: the humeral head, greater tuberosity (GT), lesser tuberosity (LT), and humeral shaft [3].
- The articular head of the humerus is spherical and has a diameter of 37 to 57 mm [3].
- The most superior portion of the articular surface of the humeral head averages 8 mm above the greater tuberosity [3].
- Humeral version averages 29.8 degrees, with a range of 10 to 55 degrees [3].
- The humeral head is inclined approximately 130 degrees with respect to the humeral shaft [3].
- The neck-shaft angle measures an average of 135 degrees [4].
- The humeral head is retroverted an average of 30 degrees [4].
- The humeral head averages 19° of retroversion and 41° of inclination (neck-shaft angle) [6].
- The bicipital groove lies between the greater and lesser tuberosities and serves as a pathway for the long head of the biceps [3].
- The distal aspect of the bicipital groove is internally rotated with respect to the proximal portion [3].
- The anatomic neck of the proximal humerus is located at the junction of the articular surface and the tuberosities [3].
- The surgical neck represents an indistinct region (metadiaphyseal junction) below the tuberosities but above the humeral shaft [3].
- The greater tuberosity is located in a posterior-superior location with respect to the humeral shaft [3].
- The greater tuberosity serves as the attachment site for the supraspinatus, infraspinatus, and teres minor tendons of the rotator cuff [3].
- The lesser tuberosity is located on the anterior aspect of the proximal humerus [3].
- The lesser tuberosity serves as the attachment site for the subscapularis tendon [3].
- The glenoid is a convex structure of shallow depth shaped like an inverted pear [3].
- The glenoid cavity is a shallow socket, approximately one-third the size of the humeral head [4].
- The acromion, the coracoacromial ligament, and the coracoid process form the coracoacromial arch [3].
- The coracoacromial arch is a rigid bony-ligamentous structure that imparts stability to the shoulder girdle [3].
- The rotator cuff, subacromial bursa, and subdeltoid bursa pass underneath the coracoacromial arch [3].
- The proximal humerus has three centers of ossification: the humeral head (4 to 6 months), the greater tuberosity (1 to 3 years), and the lesser tuberosity (3 to 5 years) [6].
- The ossification centers of the proximal humerus fuse to the shaft at age 17 to 20 years [6].
Vascular Supply
- The proximal humerus receives its blood supply from the anterior and posterior humeral circumflex branches from the third division of the axillary artery [3].
- The posterior humeral circumflex artery travels with the axillary nerve, enters the quadrilateral space posteriorly, and anastomoses with a branch of the anterior circumflex to supply the posterior cuff [3].
- The anterior humeral circumflex artery (AHCA) arises from the axillary artery at the inferior border of the subscapularis [3].
- The AHCA provides vascular inflow to the humeral head by way of its terminal anterolateral branch known as the artery of Laing (also known as the arcuate artery) [3].
- The ascending branch of the AHCA courses parallel to the lateral aspect of the long head biceps tendon and enters the humeral head at the interface of the bicipital groove and greater tuberosity [3].
- The major blood supply to the humeral head is through the ascending branch of the anterior humeral circumflex artery, which penetrates the head at the bicipital groove and becomes the arcuate artery [4].
- The anterolateral ascending branch of the anterior humeral circumflex artery provides the primary blood supply to the humeral head [6].
- The anterolateral ascending branch of the anterior humeral circumflex artery travels proximally in the lateral aspect of the intertubercular groove [6].
- The terminal intraosseous portion of the anterior humeral circumflex artery enters at the proximal aspect of the intertubercular groove as the arcuate artery [6].
- Injury to the arcuate artery may result in osteonecrosis of the humeral head [3].
- Additional extraosseous collateral branches can permit humeral head perfusion despite complete ligation of the arcuate artery [3].
Joints and Ligaments
- The sternoclavicular (SC) joint is the only true diarthrodial articulation between the upper appendicular and axial skeletons [6].
- The posterior SC joint capsule and ligaments are the primary stabilizers to anterior and posterior translation of the medial clavicle [6].
- The AC joint is a small diarthrodial joint with an interposed fibrocartilaginous disk [6].
- The superior and posterior AC ligaments are the primary stabilizers to anterior and posterior (horizontal) translation of the clavicle [6].
- The coracoclavicular ligaments (conoid: medial; trapezoid: lateral) are the primary stabilizers to superior (vertical) translation of the distal clavicle [6].
- The rotator cuff stabilizes the glenohumeral joint via joint compression [6].
- Static stabilizers of the glenohumeral joint include articular congruity, the glenoid labrum, concavity-compression, negative intra-articular pressure, and the glenohumeral capsule and ligaments [6].
- The glenoid labrum provides concavity and up to 50% of marginal glenoid socket depth [6].
- The rotator interval is defined medially by the base of the coracoid, superiorly by the supraspinatus tendon, and inferiorly by the subscapularis tendon [6].
- The rotator interval contains the coracohumeral (CH) ligament, the superior glenohumeral ligament (SGHL), and the intra-articular portion of the long head of the biceps tendon [6].
- Laxity of the rotator interval results in inferior laxity (the sulcus sign) [6].
- Contracture of the rotator interval is seen with adhesive capsulitis [6].
- The CH ligament restricts external rotation in adduction and is a static restraint to inferior and posterior translation in adduction and external rotation [6].
- The SGHL is a primary static restraint against anterior translation with the arm at the side [6].
- With the CH ligament, the SGHL forms a pulley that provides restraint against medial subluxation of the long head of the biceps tendon [6].
- The middle glenohumeral ligament (MGHL) is a primary static restraint against anterior translation with the arm in external rotation and 45° of abduction [6].
- The anterior band of the inferior glenohumeral ligament (AB-IGHL) is a primary static restraint against anterior-inferior dislocation of the glenohumeral joint in 90° of abduction and external rotation [6].
- The posterior band of the IGHL (PB-IGHL) is a primary static restraint against posterior-inferior translation in internal rotation and adduction [6].
- The superior transverse scapular ligament arises from the medial base of the coracoid overlying the suprascapular notch [6].
- The suprascapular artery runs superior to the superior transverse scapular ligament, and the nerve runs deep to the ligament [6].
- Entrapment of the suprascapular nerve at the superior transverse scapular ligament causes denervation of both the supraspinatus and the infraspinatus [6].
- The spinoglenoid ligament overlies the suprascapular nerve at the spinoglenoid notch [6].
- Entrapment, traction, or compression of the suprascapular nerve at the spinoglenoid notch causes denervation of the infraspinatus [6].
Muscular Mechanics and Fracture Displacement
- External loads transferred to the shoulder girdle are initially offset by joint surface anatomy, joint volume, atmospheric pressure, and joint fluid cohesion and adhesion [3].
- Moderate and large loads are counterbalanced by the deltoid and rotator cuff and by the capsulolabral and bone structures, respectively [3].
- Following a fracture of the proximal humerus, displacement of each part occurs in a predictable manner based on deforming forces created by tendinous insertions [3].
- The subscapularis inserts on the lesser tuberosity and causes medial displacement [3].
- The supraspinatus and infraspinatus insert on the greater tuberosity and cause superior and posterior displacement [3].
- The pectoralis major inserts on the humeral shaft and displaces it medially [3].
- The rotator cuff consists of four muscles: the subscapularis, supraspinatus, infraspinatus, and teres minor [4].
- The teres major is not a rotator cuff muscle [4].
- The rotator cuff muscles serve as depressors of the humeral head to allow the deltoid to efficiently abduct the humerus [4].
- The infraspinatus and teres minor are external rotators, while the subscapularis is an internal rotator of the humerus [4].
- The deltoid and pectoralis major muscles, along with the rotator cuff, cause predictable displacement of fractures around the proximal humerus [4].
- Fractures of the anatomic neck have a poor prognosis because of complete disruption of the blood supply to the head [4].
- Surgical neck fractures are common, and with these, the blood supply to the head is preserved [4].
- A fracture involving the anatomic neck is prognostically worse than fractures involving other regions of the proximal humerus with respect to the potential disruption of the vascular supply to the humeral head and subsequent development of avascular necrosis [3].
Bursae and Synovial Structures
- The subacromial bursa and the subscapular bursa are two bursae in the shoulder region with particular clinical importance [7].
- The subscapular bursa lies between the subscapularis tendon and the neck of the scapula [7].
- The subscapular bursa communicates with the joint cavity between the superior and middle glenohumeral ligaments [7].
- The subscapular bursa protects the tendon of the subscapularis at the point where it passes under the base of the coracoid process and over the neck of the scapula [7].
- The subscapular bursa is linked to the coracoid process by a suspensory ligament [7].
- In 28% of specimens dissected by Colas and colleagues, the subscapular bursae merged with the subcoracoid bursae, forming a unique wide bursa [7].
- The subscapular bursa often houses loose bodies in the shoulder [7].
- The subscapular bursa is a region in which synovitis of the shoulder may be most intense, where small fringes or villi can project into the joint cavity [7].
- A bursa may be present between the infraspinatus muscle and the capsule, which is uncommon and not in communication with the joint cavity [7].
- DePalma and colleagues described six common variations or types of recesses in the anterior capsule [7].
- Type 1 recesses (30.2%) have one synovial recess above the middle glenohumeral ligament [7].
- Type 2 recesses (2.0%) have one synovial recess below the middle glenohumeral ligament [7].
- Type 3 recesses (40.6%) have one recess above and one below the middle glenohumeral ligament [7].
- Type 4 recesses (9.0%) have one large recess above the inferior ligament, with the middle glenohumeral ligament being absent [7].
- Type 5 recesses (5.1%) have the middle glenohumeral ligament manifested as two small synovial folds [7].
- Type 6 recesses (11.4%) have no synovial recesses, although all the ligaments are well defined [7].
- DePalma believed that if the capsule arises at the labrum or glenoid border of the scapula, few, if any, recesses would be present [7].
- DePalma believed that if the capsule begins farther medially on the scapula or glenoid neck, the synovial recesses are larger and more numerous [7].
- DePalma believed that the end result of such recesses was a thin, weakened anterior capsule that could predispose the shoulder to instability [7].
- Plancher and colleagues found the average area of the rotator interval to be 20.96 mm [7].
- Dynamic testing has shown that the subscapularis and supraspinatus dimensions as well as the total area of the rotator interval decrease significantly with internal rotation and open with external rotation [7].
- Imbrication procedures are performed with the arm in a neutral position to avoid loss of motion or insufficient tightening [7
Investigations
Plain Radiography
- The purpose of shoulder imaging is to help establish the diagnosis, determine the severity of the pathoanatomy, assist in surgical planning, and enable the surgeon to illustrate the condition of the shoulder to the patient [2].
- Standardized plain films are almost always sufficient to garner the information needed for shoulder care [2].
- Proper radiographic technique is as important as proper surgical technique to achieve the desired outcome [2].
- The first key radiographic view is the anteroposterior (AP) view taken in the plane of the scapula such that the x-ray beam passes through the glenohumeral joint [2].
- The AP view in the plane of the scapula shows the superoinferior position of the humeral head relative to the glenoid, the presence of osteophytes on the humeral head and glenoid, narrowing of the joint space, and the degree of medial displacement of the humerus in relation to the lateral acromial line [2].
- The AP view also shows the quality of the humeral and glenoid bone, the presence of loose bodies, and whether there is humeral head collapse or deformity [2].
- The second key radiographic view is the axillary view taken with the arm in the functional position of elevation in the plane of the scapula [2].
- The axillary view is oriented so that both the spinoglenoid notch and the scapular neck are visible [2].
- The axillary view demonstrates a different perspective of humeral anatomy, the amount of glenoid bone, the shape of the glenoid, its version in relation to the plane of the scapula, and the relationship of the humeral head to the glenoid fossa [2].
- The axillary view is referred to as the “truth view” because it demonstrates the glenohumeral relationships in the functional position of elevation [2].
- CT scans have the disadvantage of being taken with the arm in the adducted position, unlike the axillary truth view [2].
- Many “axillary views” sent for consultation are taken without standardization, making it impossible to determine important features of the glenohumeral joint [2].
- When taken properly, standardized anteroposterior and axillary views indicate the thickness of the cartilage space between the humerus and the glenoid, relative positions of the humeral head and the glenoid, presence of osteophytes, degree of osteopenia, and extent of bony deformity and erosion [2].
- Joint space narrowing is most evident on the axillary truth view as opposed to images made with the arm at the side [2].
- The axillary truth view can show posterior subluxation or “functional decentering” that is not evident in images taken with the arm at the side [2].
- The degree of posterior subluxation can be measured as the position of the center of the humeral head in relation to the plane of the scapula [2].
- The degree of posterior subluxation can be measured as the position of the center of the humeral head in relation to the glenoid face [2].
- The degree of posterior subluxation can be measured as the point of contact of the humeral articular surface on the glenoid articular surface [2].
- The point of contact of the humeral articular surface on the glenoid articular surface reflects the degree of centering of the net humeral joint reaction force on the glenoid [2].
- Malcentering of the joint reaction force leads to posterior instability, posterior glenoid wear, and “rocking horse” loosening of prosthetic glenoid components [2].
- At least two X-ray views should be obtained for shoulder imaging: an anteroposterior in the plane of the glenoid and an axillary projection with the arm in abduction to show the relationship of the humeral head to the glenoid [11].
Computed Tomography
- CT scans may offer a few degrees of increased precision in the measurement of glenoid version [2].
- The precision offered by CT scans for measuring glenoid version does not improve the quality of the surgery or the clinical outcome [2].
- Three-dimensional reconstructions can reveal fine details of the shoulder anatomy, but this additional information rarely changes the planning or conduct of the arthroplasty [2].
- Computed tomography (CT) is helpful for planning fracture surgery and shoulder joint replacement [11].
Magnetic Resonance Imaging
- Magnetic resonance imaging (MRI) is useful to identify osteonecrosis of the humeral head, or a bone tumour [11].
- MRI can identify labral tears and rotator cuff tears [11].
- The accuracy of MRI for identifying labral tears and rotator cuff tears is enhanced by combining the scan with arthrography [11].
Ultrasound
- Ultrasound is a simple and accurate test for identifying rotator cuff tears and calcific tendinitis [11].
- Ultrasound can be useful in guiding injections or barbotage (aspirating calcific deposits in the rotator cuff) [11].
- The most commonly performed joint examination using ultrasonography is the shoulder examination [9].
- The accuracy of shoulder ultrasonography depends on the skill of the scanner operator and an awareness of pitfalls that are encountered [9].
General Imaging Principles
- The shoulder is a three-dimensional structure that cannot be represented by a single planar view [13].
- Critical relationships, such as the degree of centering of the humeral head, change with the position of the arm [13].
- Shoulder pathology may be found in a large number of different bones and soft tissues [13].
- Overlying and superimposed structures as well as metallic implants may complicate imaging the structures of interest [13].
- Surgeons need to develop a judicious approach to imaging that yields the information necessary to treat the patient while avoiding the tendency to "over-image" [13].
- Unless a specific research protocol is in place, the temptation to “overimage” should be resisted, obtaining only the scans or reconstructions that are necessary for the care of the patient [2].
References
[2] Rockwood And Matsen S The Shoulder. Arthroscopic Management of Prearthritic and Arthritic Conditions of the Shoulder and the Postarthroplasty Shoulder > Radiographic Evaluation.
[3] Rockwood And Matsen S The Shoulder. Shoulder and Elbow Specialty Clinic Workers’ Survey > ANATOMY.
[4] A Lange Medical Book Current Diagnosis Treatment In Orthopedics Fifth Edition. 2Musculoskeletal Trauma Surgery > SHOULDER AND ARM INJURIES.
[5] Rockwood And Green S Fractures In Adults. 29: Principles of Nonunion and Bone Defect Treatment > Applied Anatomy Related to Scapular Fractures.
[6] Aaos Comprehensive Orthopaedic Review 3. Anatomy of the Shoulder, Arm, and Elbow > I. Shoulder.
[7] Rockwood And Matsen S The Shoulder. Developmental Anatomy of the Shoulder and Anatomy of the Glenohumeral Joint > Bursae.
[9] Orthopaedic Knowledge Update Sports Medicine 6. Diagnostic Ultrasonography and Ultrasonography-Guided Procedures > Annotated References.
[11] Apley And Solomon S Concise System Of Orthopaedics And Trauma. INVESTIGATION.
[13] Rockwood And Matsen S The Shoulder. Developmental Anatomy of the Shoulder and Anatomy of the Glenohumeral Joint > SENIOR EDITOR COMMENTARY.