Patients › Rehabilitation
Anterior Bankart Repair
Rehabilitation protocol after arthroscopic anterior Bankart (labral) repair for anterior shoulder instability — apprehension-position precautions and staged return to sport.
This protocol guides your recovery after an arthroscopic anterior Bankart repair with Dr Kieran Hirpara at Mater Private Hospital Rockhampton. It pairs a plain-English explanation of each stage with a structured programme you can share with your physiotherapist; bring this page or its PDF to your first appointment so your rehabilitation stays coordinated. Your physiotherapist may adjust the plan depending on how your recovery progresses.
If you have any concerns about your wound after surgery, get in touch with the rooms. It is often helpful to take a photo of the wound and email it for review.
What to expect
A Bankart repair fixes the torn rim of cartilage (the labrum) and the stretched capsule back onto the front of the socket, after the shoulder has dislocated or come partly out of joint towards the front. That repair is soft tissue, and like a healing tendon it needs time to knit firmly back onto the bone: roughly twelve weeks before it is reliably strong. This whole programme is built around protecting that healing.
The single most important rule is to protect the front of the shoulder early by limiting how far the arm rotates outwards. Turning the arm outwards (especially with the arm raised out to the side) pulls directly on the repair at the front. So outward rotation is kept small at first and opened up only in careful steps, reaching full by around twelve weeks.
Recovery is staged rather than rushed. Movement comes back first, then strength, then the demands of sport and heavier work. Soft-tissue labral repairs heal more slowly than the bony Latarjet operation, so the timeline here is deliberately patient: most people return to contact or overhead sport at four to six months, once they have met the targets, not on a fixed date.
The procedure
Your Bankart repair is done arthroscopically (keyhole). Through small incisions, the torn labrum and capsule at the front of the shoulder are re-attached to the rim of the socket with small anchors and stitches, restoring the bumper and the tension that keep the ball centred in the socket. The job of rehabilitation is to protect that re-attachment while it heals, then gradually rebuild full movement, strength and confidence in the shoulder.
Wearing your sling
You will wear a simple shoulder sling, not a special brace. Dr Hirpara uses a simple sling held in neutral rotation (forearm resting across the stomach); no abduction pillow, wedge or "gunslinger" brace is needed. Your protection comes from the sling and from keeping the arm out of the at-risk position, not from the shape of the brace.
- Wear the sling for 6 weeks for daytime support, especially when you are out of the house or around other people.
- You do not sleep in the sling. It is daytime support only; sleep out of it, with your arm comfortable and supported on a pillow. While you are asleep, keep your arm in front of you and tucked in towards your body: do not let it fall out to the side and turn outwards (the position described below).
- Take it off for showering and for your exercises (once you have been shown how). Whenever the sling is off, keep your arm relaxed, in front of you, and by your side.
- Use ice if the shoulder is swollen or sore, especially after exercise.
Watch your posture while you are using the sling: keep your ears, shoulders and hips in line and avoid slumping.
Key precautions — do NOT
- Do NOT put your arm into the "hand-up" or throwing position (arm raised out to the side and rotated outwards, as if waving or about to throw). This is the position the shoulder dislocates in, and it pulls directly on the front repair. A simple guide some people use is "always keep your elbows where you can see them": keep the arms in front of you.
- Do NOT actively rotate the arm outwards past the limits below in the early weeks. Outward rotation is opened up in stages: only a small amount (around 20°, well short of the straight-ahead position) in the first weeks, building to full by about 12 weeks.
- Do NOT actively move the shoulder under its own power until about 6 weeks: let your good arm or a stick do the work before then.
- Do NOT reach behind your back, do up a bra, or put your hand in a back pocket early.
- Do NOT lift, push, pull, or bear weight through the operated arm for 6 weeks.
- Do NOT do push-ups, bench press, wide-grip or chest-fly weights, military (overhead) press, or pull-downs behind the neck until late in the programme; these all load or stretch the front of the shoulder.
- Do NOT force or stretch into the position that feels like the shoulder might slip; pain or a feeling of apprehension is a signal to stop.
- Do NOT drive while the sling is required (6 weeks).
Phase I: Protection (weeks 0–6)
Kieran Hirpara 4.0
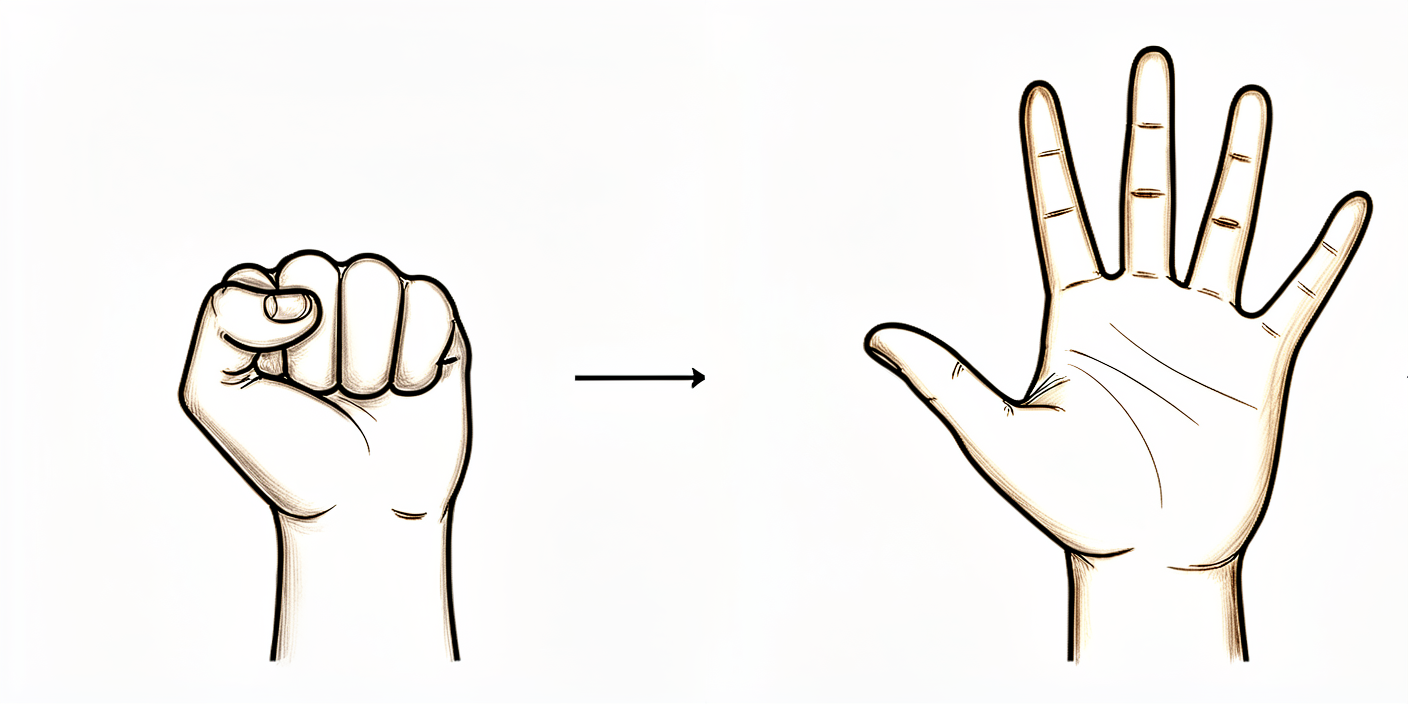
Open and close hand
Make a tight fist with your hand, then open it fully. This keeps your hand moving and helps prevent stiffness and swelling.
10 times per hour
Kieran Hirpara 4.0
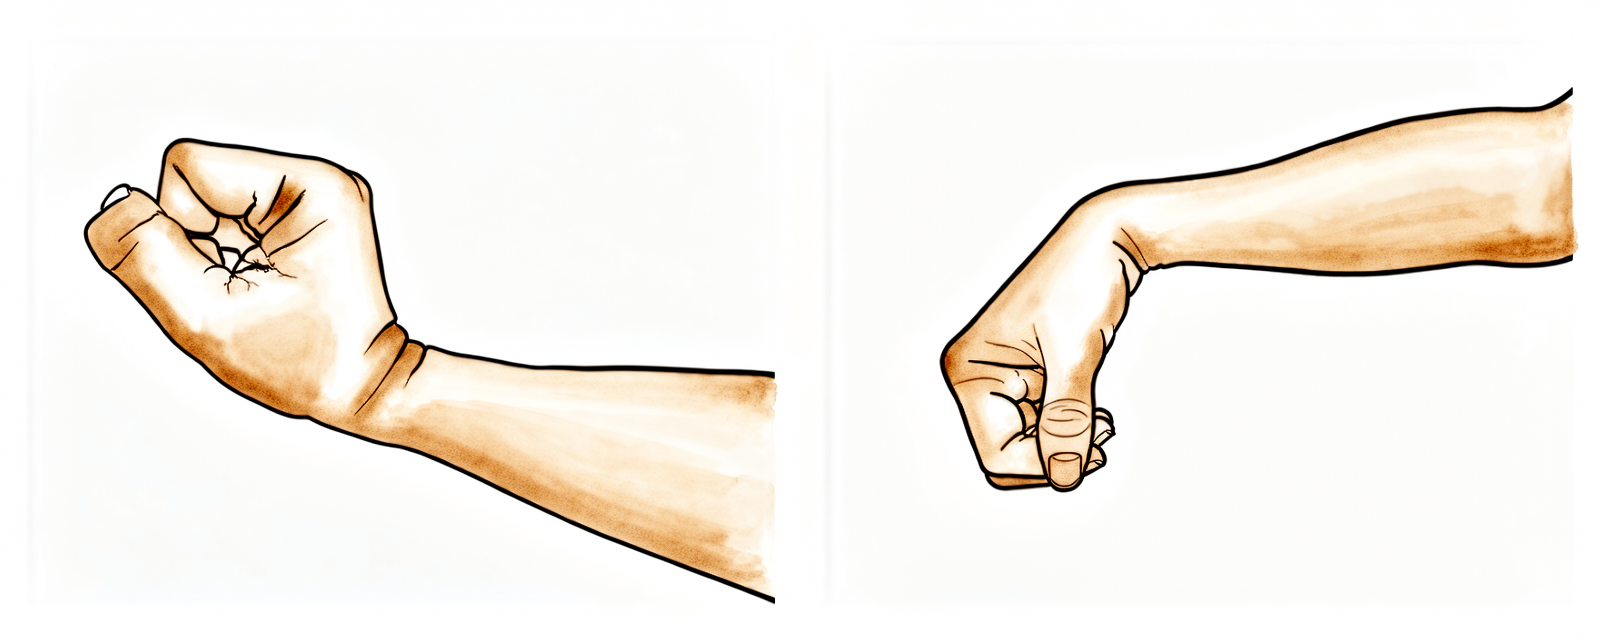
Wrist bends
Gently bend your wrist forwards, then back, as far as is comfortable.
10–15 times per hour
Kieran Hirpara 4.0
Elbow bends
With your palm facing up, gently bend your elbow as far as you can, then straighten your arm again. Keep your upper arm tucked at your side. Do NOT let the arm rotate outwards as you do this.
10–15 times, 2–3 times a day
Kieran Hirpara 4.0
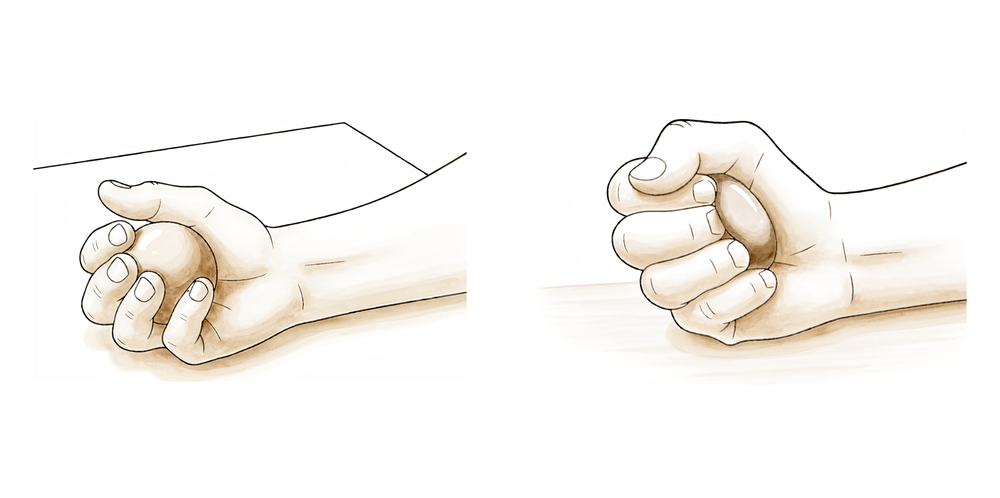
Ball squeeze
Gently squeeze a soft ball or a rolled-up sock in your hand, then release. This keeps the hand and forearm active while the shoulder rests.
10–15 times, a few times a day
Kieran Hirpara 4.0
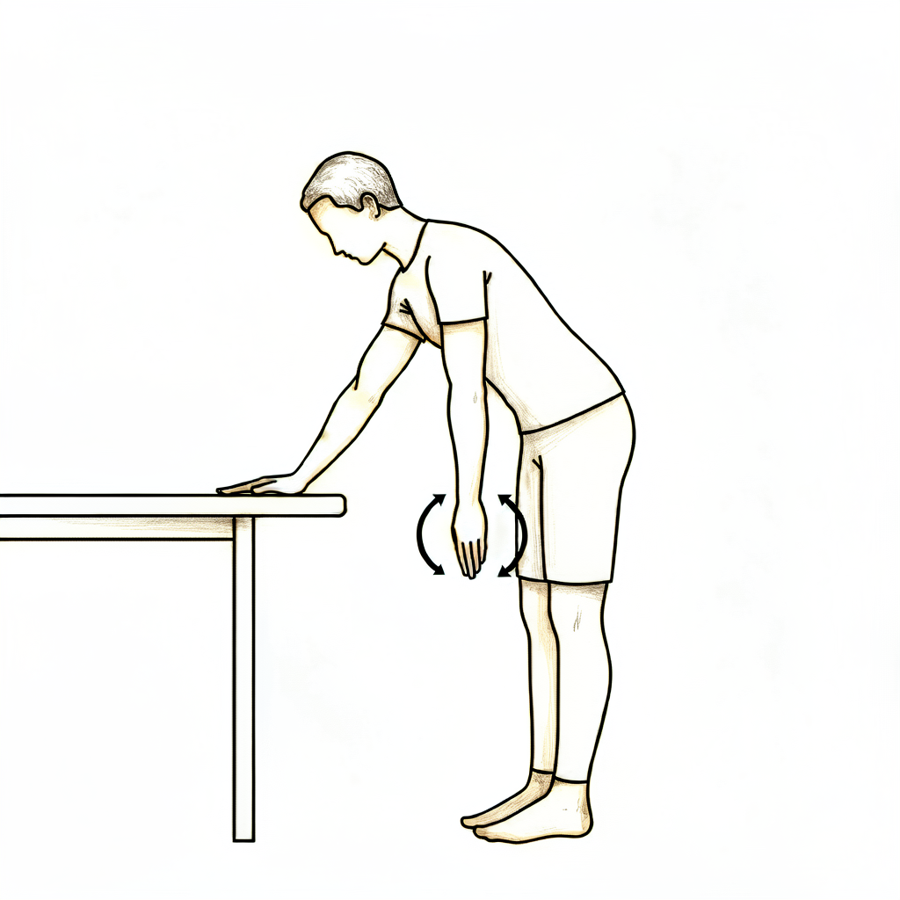
Pendulum swings
Lean forwards and let your operated arm hang down, completely relaxed. Make small circles — clockwise, then the other way — by rocking your body, NOT by using your shoulder muscles. Keep the circle small (under about 20 cm) and keep the arm hanging straight down — do not let it swing out to the side and turn outwards. Your operated arm stays relaxed throughout.
10 in each direction, 2–3 times a day
Kieran Hirpara 4.0
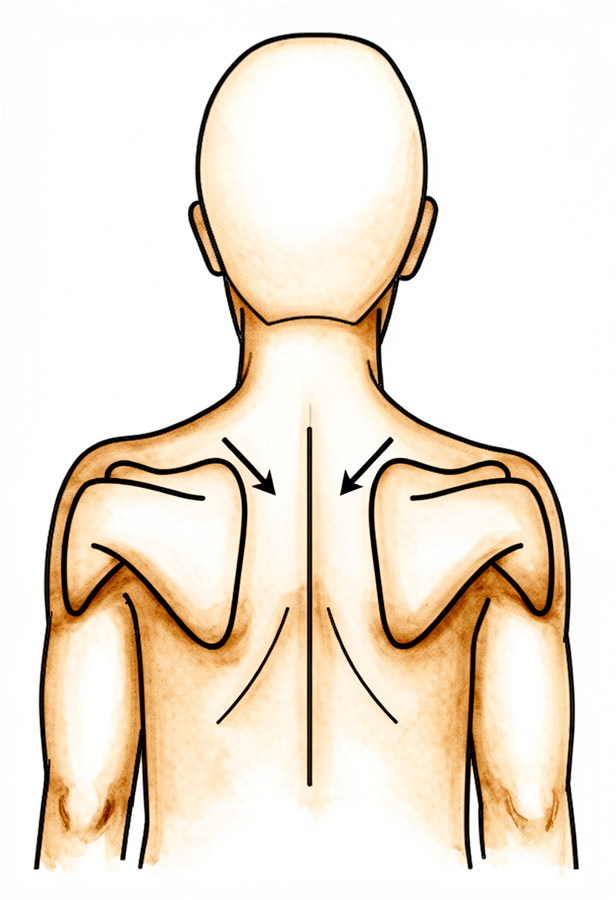
Shoulder-blade setting
Gently squeeze your shoulder blades downwards and together, hold, then relax. This is a light muscle-activation drill — your arm does not move and your shoulder stays relaxed.
Hold 5 seconds, 5 times, 2–3 times a day
Kieran Hirpara 4.0
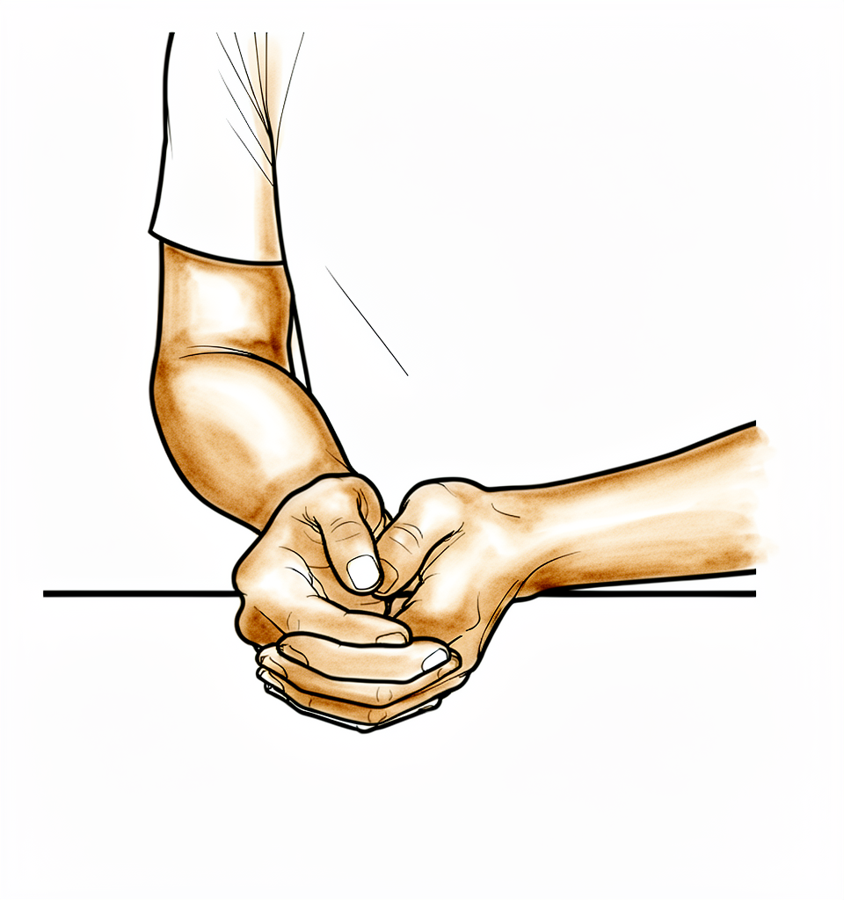
Assisted external rotation to neutral
From about week 2, only if your physiotherapist directs it. With your elbow tucked at your side and bent to 90° and your hand resting across your stomach, use your good hand to gently guide the forearm outwards — but only a SMALL amount (about a quarter turn, roughly 20°) and never past the straight-ahead (neutral) position in these early weeks. Stay strictly within the limit your physiotherapist sets and never force it. This is the motion that stresses the repair, so it is deliberately kept small.
As guided by your physiotherapist, within the set limit
The first six weeks are about one thing: protecting the repair at the front of the shoulder while it starts to heal onto the bone. You stay in the simple sling for daytime support, sleep out of it (with the arm kept in front, never out-and-rotated), manage swelling with ice, and do gentle drills that keep your hand, wrist and elbow moving without loading or stretching the repair. There is no active shoulder movement under your own power yet; your good arm or a stick does the work for you, and you stay completely relaxed.
- Sling: simple sling in neutral rotation for daytime support; sleep OUT of the sling but keep the arm in front and tucked in; off for exercises and hygiene.
- Movement allowed: assisted and passive movement only (nothing under your own shoulder power). From about week 2, gentle assisted forward lift towards about 90° (halfway up), and assisted outward rotation only a small amount (around 20°, not reaching the straight-ahead position). Keep the arm in front of the body throughout; never out to the side and rotated outwards.
- Exercises: pendulum swings; gentle hand, wrist and elbow movement; ball squeezes; shoulder-blade setting; from about week 3, gentle pain-free muscle-setting holds (pressing the arm very lightly into a wall or your other hand and holding, without rotating the arm, no turning in or out yet) as your physiotherapist directs; and, from about week 2 if your physiotherapist directs it, small-range assisted outward rotation strictly within the set limit.
Ready for the next phase when: your pain is settling and controlled with simple pain relief (about 3/10 or less); you have completed the six weeks of sling protection; your wound has healed with no signs of a problem; you can tolerate the gentle assisted movements within their limits without any feeling that the shoulder might slip; and there is no sign the repair has been over-stressed.
Phase II: Restoring movement and rotation (weeks 6–12)
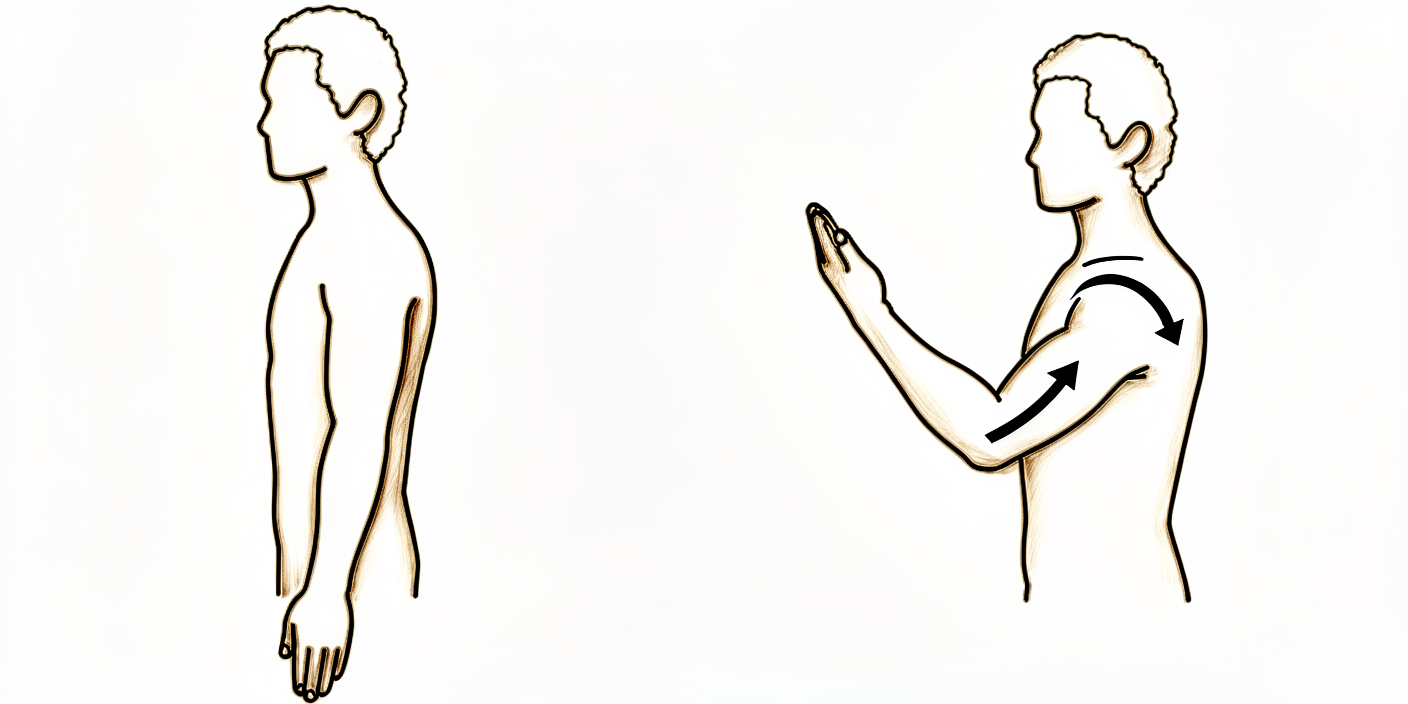
Kieran Hirpara 4.0
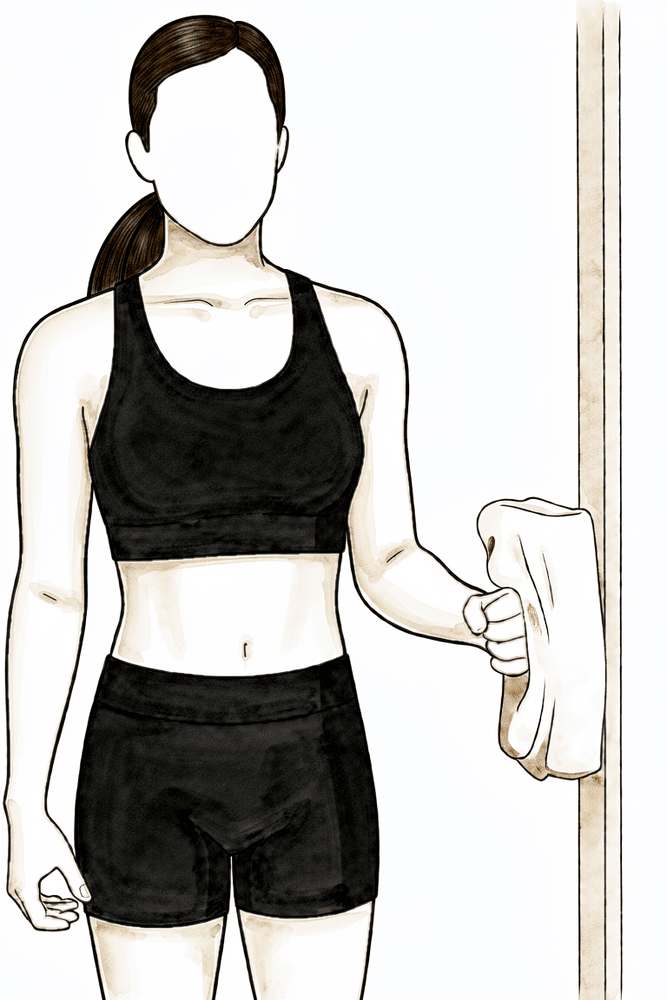
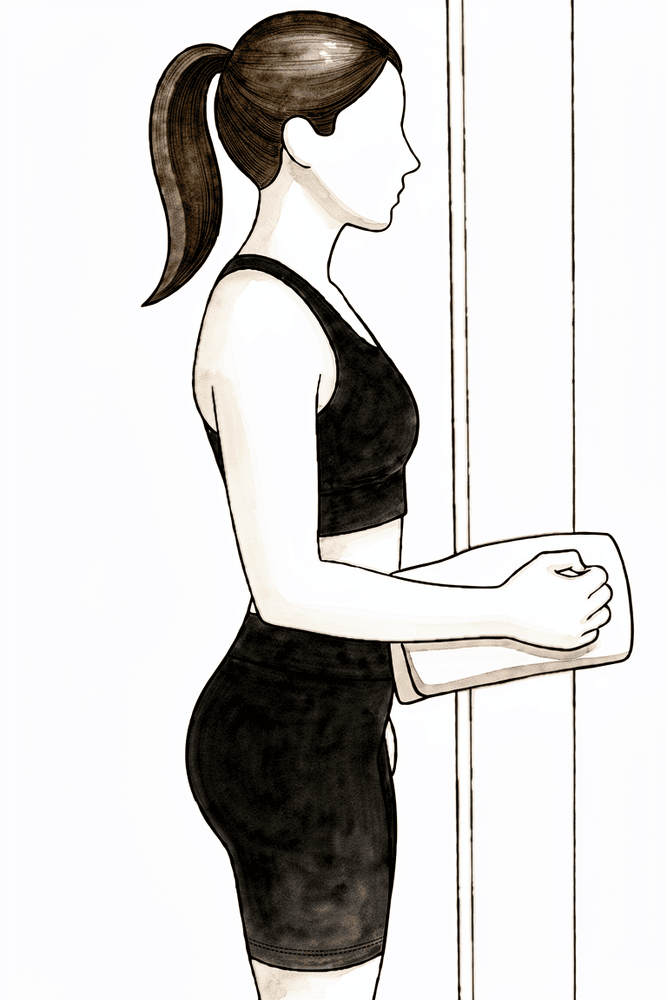
Isometric external rotation
From about week 6–8, once your physiotherapist agrees. Stand with your elbow tucked at your side and bent to 90°, the back of your hand near a wall or door frame. Press the back of your hand gently outwards into the surface WITHOUT letting the arm move — a gentle effort, about a quarter of your strength, with no pain. Hold, then relax. Build this up slowly, because outward rotation is the direction the repair is most sensitive to.
Hold ~5 seconds, gentle (~25% effort), as guided by your physiotherapist
Kieran Hirpara 4.0
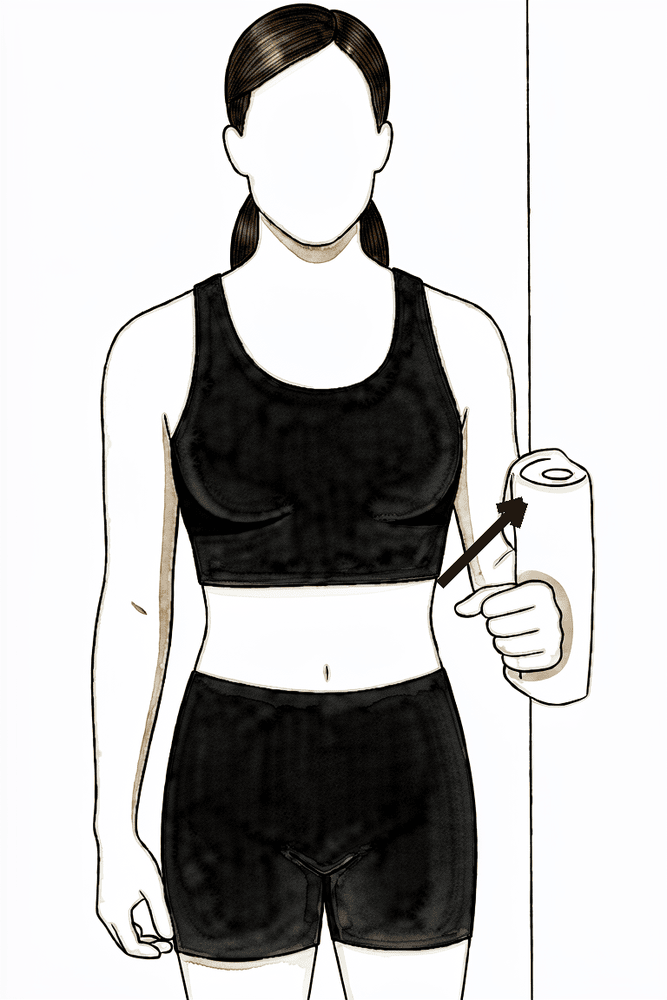
Isometric internal rotation
From about week 6–8, once your physiotherapist agrees. Stand with your elbow tucked at your side, palm against a wall. Press the palm gently inwards WITHOUT letting the arm move — about a quarter effort, with no pain. Hold, then relax.
Hold ~5 seconds, gentle (~25% effort), as guided by your physiotherapist
Kieran Hirpara 4.0
Isometric arm-out-to-the-side
From about week 6–8, once your physiotherapist agrees. Stand side-on with the outside of your upper arm near a wall, elbow at your side. Press the arm gently outwards into the wall WITHOUT letting it move — about a quarter effort, no pain. Hold, then relax.
Hold ~5 seconds, gentle (~25% effort), as guided by your physiotherapist
Kieran Hirpara 4.0
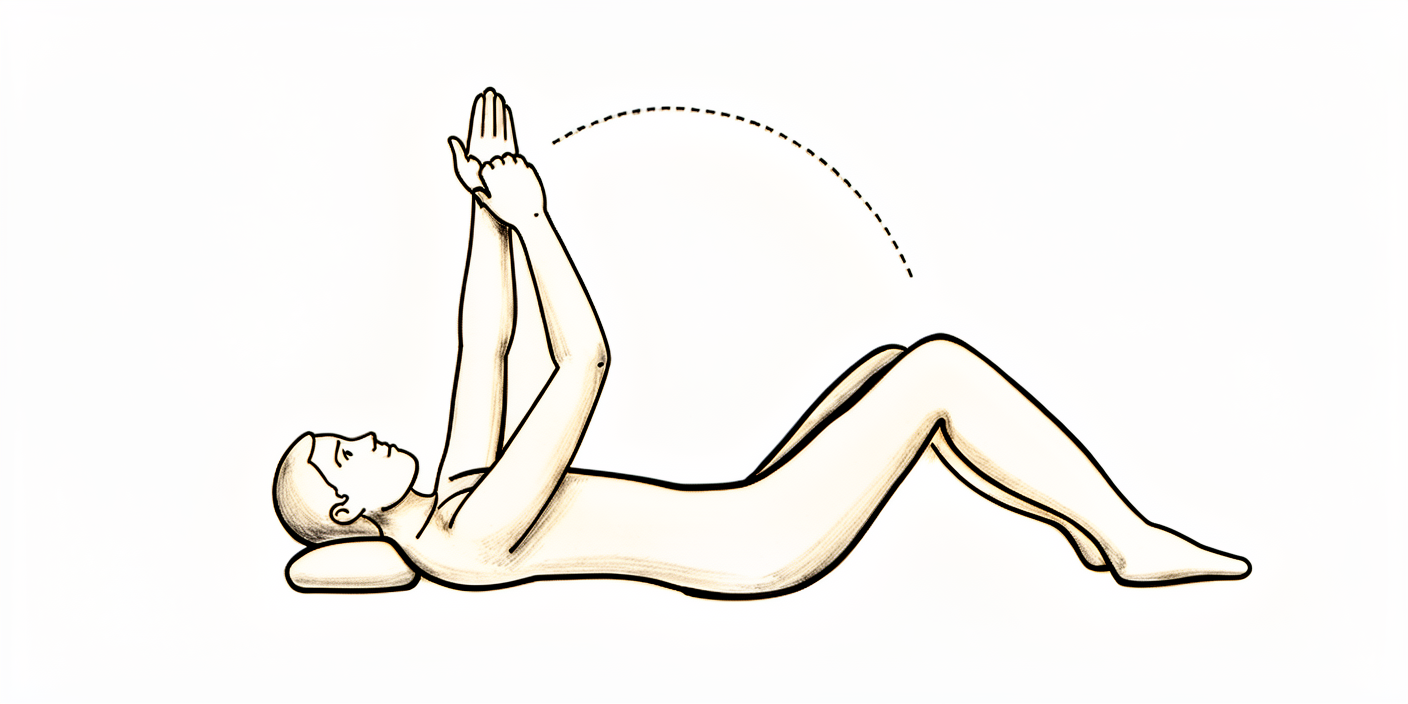
Assisted forward lift in lying
Lying on your back, hold a stick in both hands and use your good arm to lift the operated arm forwards and up — the operated shoulder stays relaxed. Move smoothly, never force, and lower with control. Build the height gradually within the range your physiotherapist sets.
10 times, 2–3 times a day
Kieran Hirpara 4.0
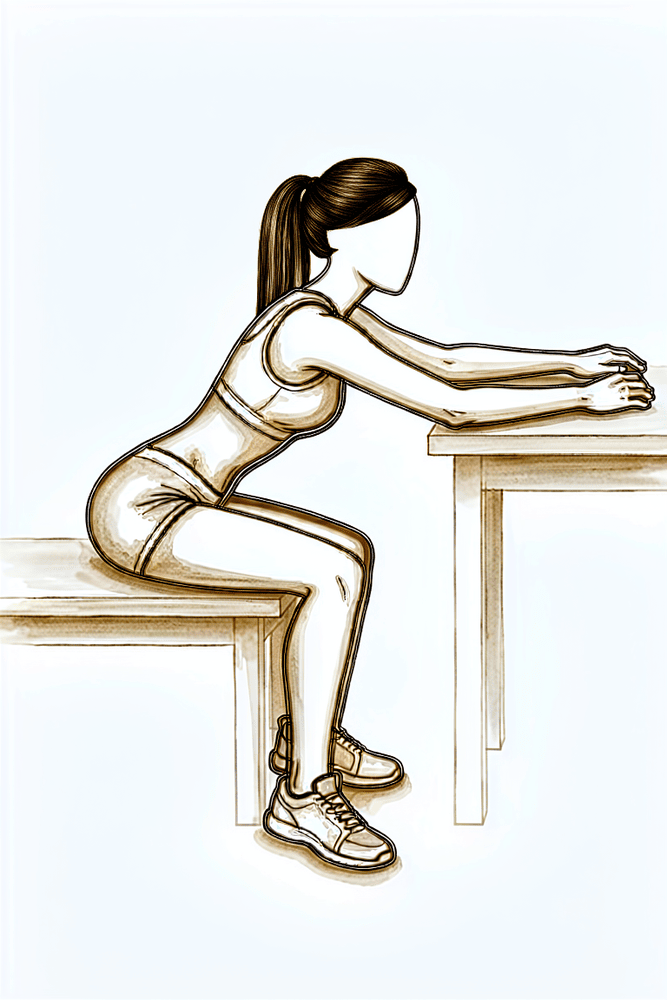
Seated table slide
Sit at a table with your operated hand on a towel. Slide the hand forwards along the surface so the arm reaches forwards and up, letting the table take the weight, then slide back. Keep the arm in front of you — do not slide it out to the side and let it turn outwards.
10 times, 2–3 times a day
Kieran Hirpara 4.0
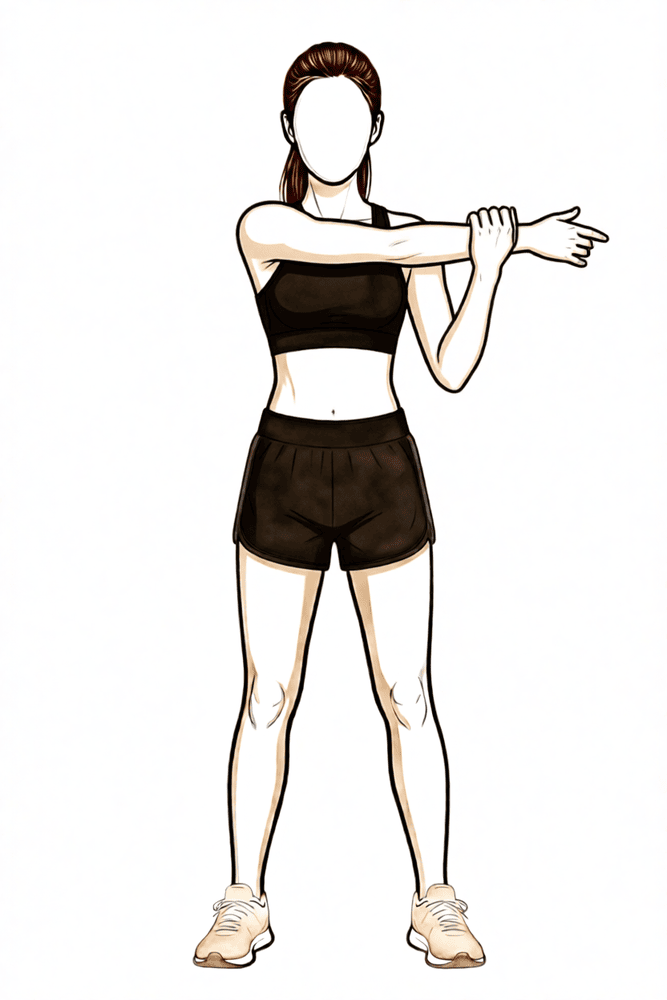
Cross-body stretch
From about week 6–8 if your physiotherapist directs it. Use your good hand to draw the operated arm gently across your chest until you feel a comfortable stretch at the back of the shoulder. Keep it gentle — do not force. This stretches the back of the shoulder and does not stress the front repair.
Hold 10–20 seconds, a few times, as guided by your physiotherapist
The sling is now off and the focus is restoring movement, not power. You progress from assisted movement to moving the arm under your own power, and, importantly, outward rotation is gradually opened up: from around 30–45° early in this phase towards full by about twelve weeks. This is done in steps, never forced, because the front repair is still maturing. Light muscle-activation (isometric) drills are added as movement improves.
- Sling: off.
- Movement allowed: assisted movement building to movement under your own power. Forward lift progresses towards full overhead. Outward rotation is advanced in stages: roughly 30–45° early in this phase, then opened up towards full by about week 12. Reaching behind the back is reintroduced gently and late in this phase.
- Exercises: assisted forward lift in lying; seated table slide; gentle isometric (press-and-hold) external rotation, internal rotation and arm-out-to-the-side drills; cross-body stretch for the back of the shoulder.
Ready for the next phase when: you can lift the arm forwards under your own power to nearly full height with good control (no shrugging or hitching of the shoulder blade); your outward rotation has progressed to full or nearly full and is comfortable; gentle isometrics are tolerated without a pain flare-up afterwards; and you have no feeling that the shoulder might slip during everyday movements.
Phase III: Strengthening (weeks 12–16)
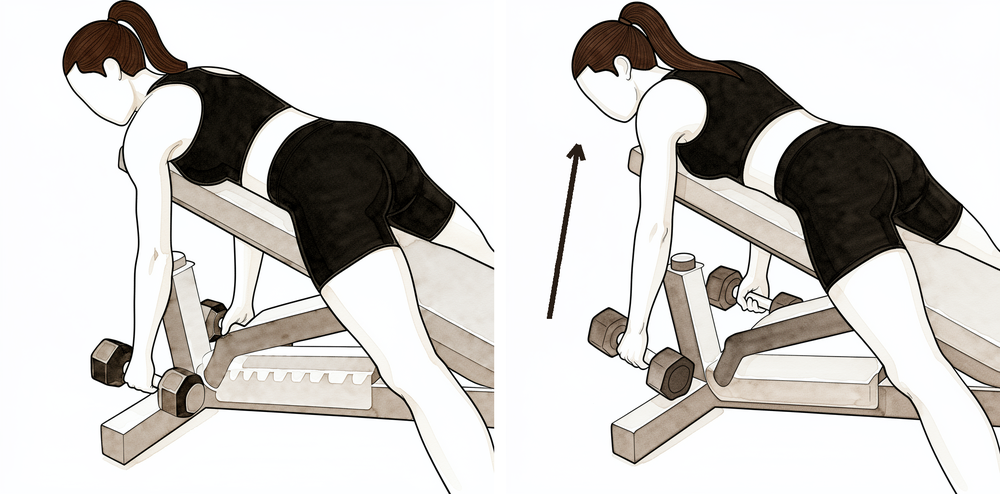
Kieran Hirpara 4.0
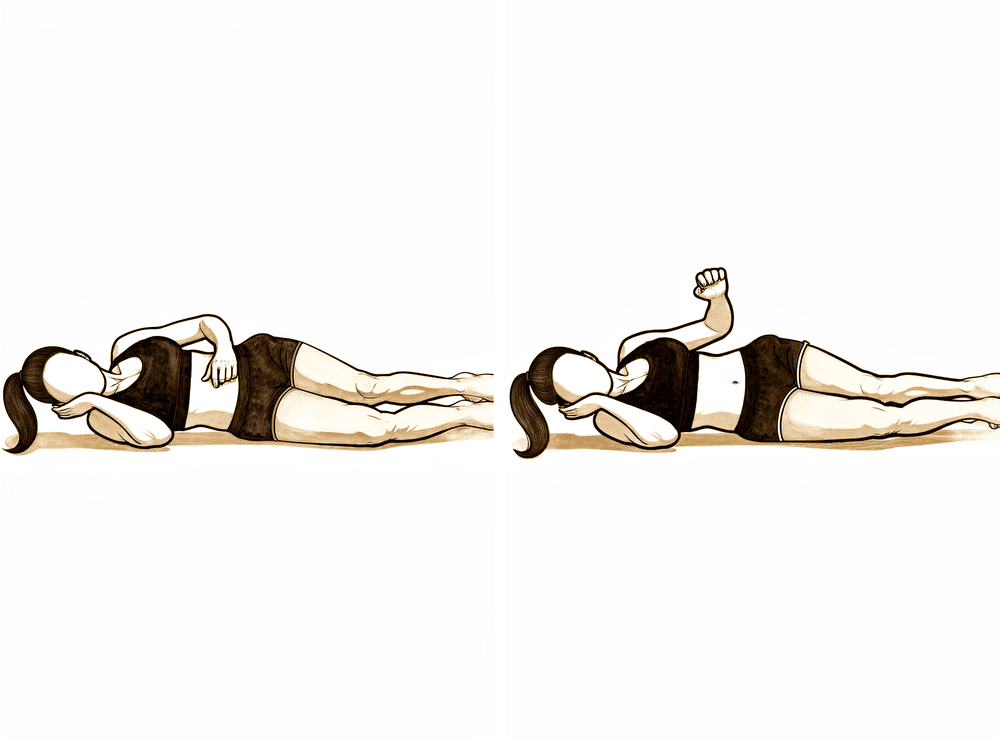
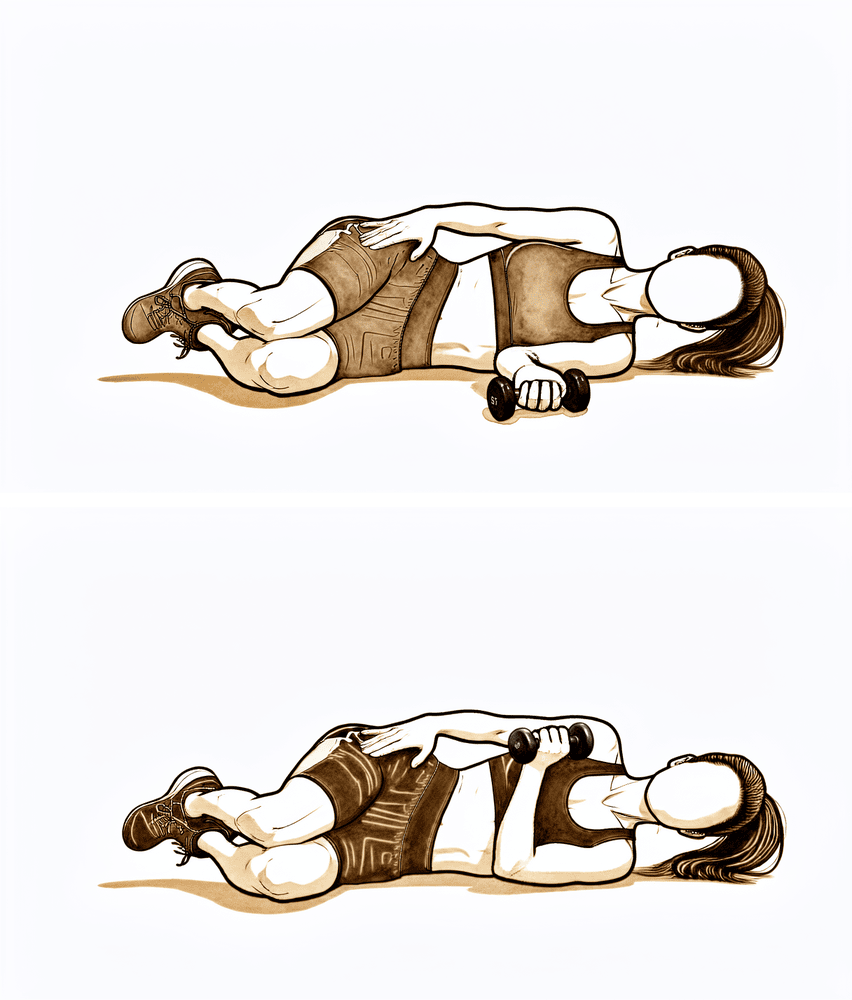
Sidelying outward rotation
From about week 12. Lie on your good side, operated elbow tucked at your waist and bent to 90°. Rotate the operated forearm upwards towards the ceiling, then lower with control. Start with no weight, staying within the range your physiotherapist sets. This rebuilds the outward-rotation strength last, as it is the direction the repair is most protective of.
As guided by your physiotherapist
Kieran Hirpara 4.0
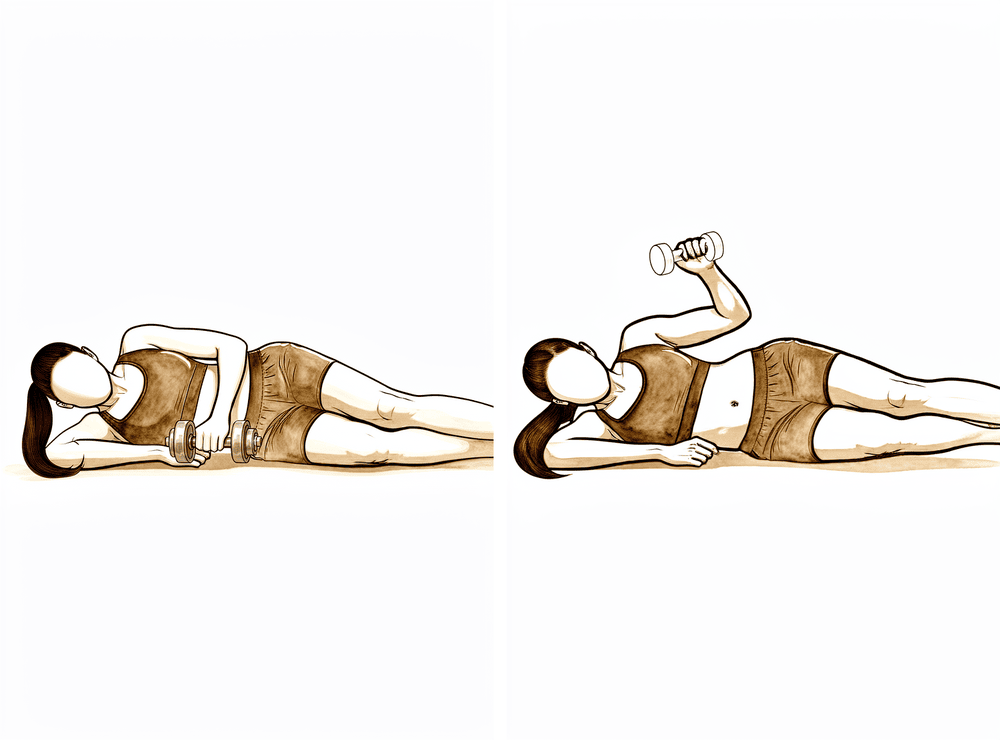
Sidelying outward rotation with a light weight
The sidelying outward rotation as before, now with a light weight, building the load gradually. Keep the elbow tucked in at your waist. Stop if the shoulder is painful.
As guided by your physiotherapist
Kieran Hirpara 4.0
Sidelying inward rotation with a light weight
From about week 12. Lie on your operated side, elbow tucked at your waist and bent to 90°, holding a light weight. Lift the forearm upwards towards your stomach, then lower with control.
As guided by your physiotherapist
Kieran Hirpara 4.0
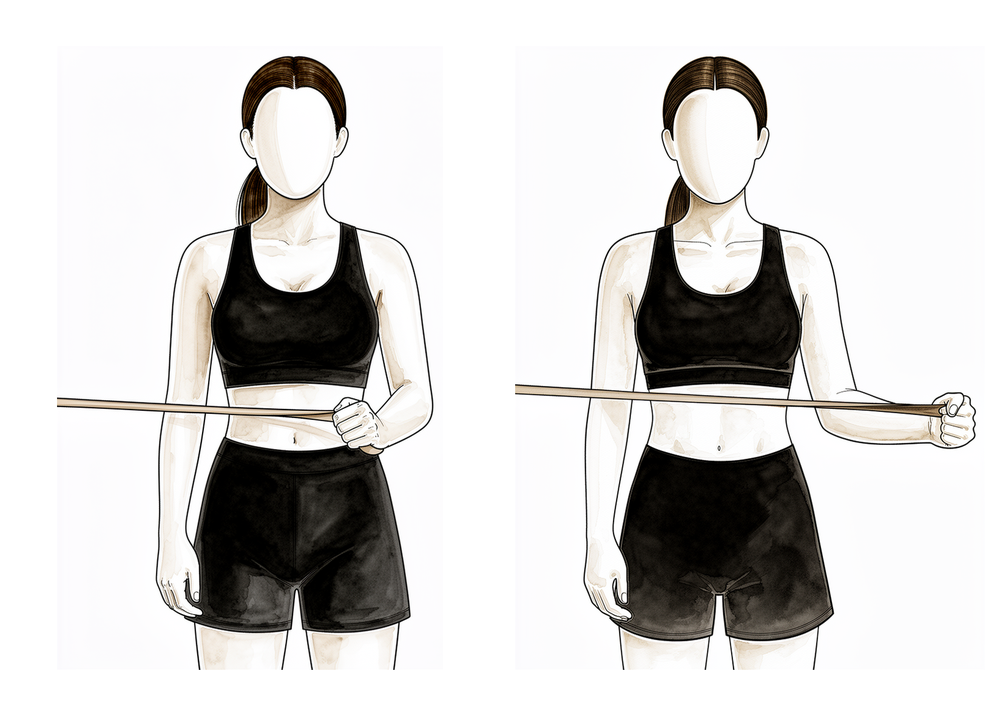
External rotation with a band
From about week 12, once full rotation is comfortable. Keep your elbow tucked at your side and bent to 90°. Rotate the forearm outwards against a light band, then return with control. Use a light band and many repetitions, not heavy resistance.
As guided by your physiotherapist
Kieran Hirpara 4.0
Internal rotation with a stick
From about week 12. Hold a stick behind your back and use your good hand to draw the operated hand gently up your back, then lower with control. Keep it comfortable and within your physiotherapist's limits.
As guided by your physiotherapist

Kieran Hirpara 4.0
Sleeper stretch
From about week 12, if your physiotherapist directs it. Lie on your operated side with the arm forwards and elbow bent. Use your top hand to gently press the forearm down towards the bed until you feel a comfortable stretch at the back of the shoulder. Gentle only — do not force.
Hold 10–20 seconds, a few times, as guided by your physiotherapist
Kieran Hirpara 4.0
Rhythmic stabilisation
With your arm supported in front of you at about shoulder height, have your physiotherapist (or your good hand) apply small, gentle pushes from different directions while you hold the arm still and steady — do not let it move. This trains the shoulder's stabilising muscles to react. Keep all the efforts gentle.
As guided by your physiotherapist
By twelve weeks the repair is strong enough to begin proper strengthening, and the focus shifts from regaining movement to rebuilding strength, endurance and control. Resistance work with light bands and light weights starts now: high repetitions, low loads. The rotator-cuff muscles that hold the shoulder in are strengthened in all directions, with outward rotation built up carefully as the direction the repair is most sensitive to. Always keep movements controlled and pain-free.
- Sling: none; full movement expected.
- Exercises: sidelying outward rotation (progressing to a light weight); sidelying inward rotation with a light weight; external rotation with a light band, elbow at the side; internal rotation with a stick; sleeper stretch for the back of the shoulder. Your physiotherapist may also add rhythmic stabilisation (gentle hold-steady drills where they push lightly on your arm and you resist) to retrain the shoulder's control. This is hands-on work with no diagram.
Ready for the next phase when: you have full, pain-free movement under your own power with even shoulder-blade control; no pain or swelling after strengthening sessions; rotation strength is building steadily towards the other side; and you have no apprehension or instability with everyday loaded tasks.
Phase IV: Return to sport and work (4–6 months)
Kieran Hirpara 4.0
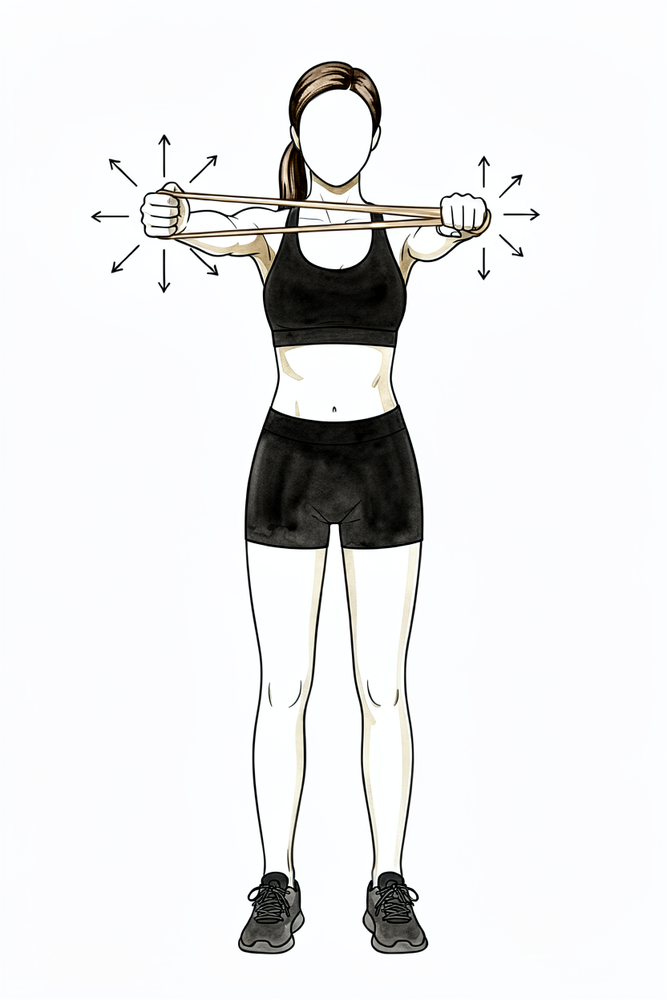
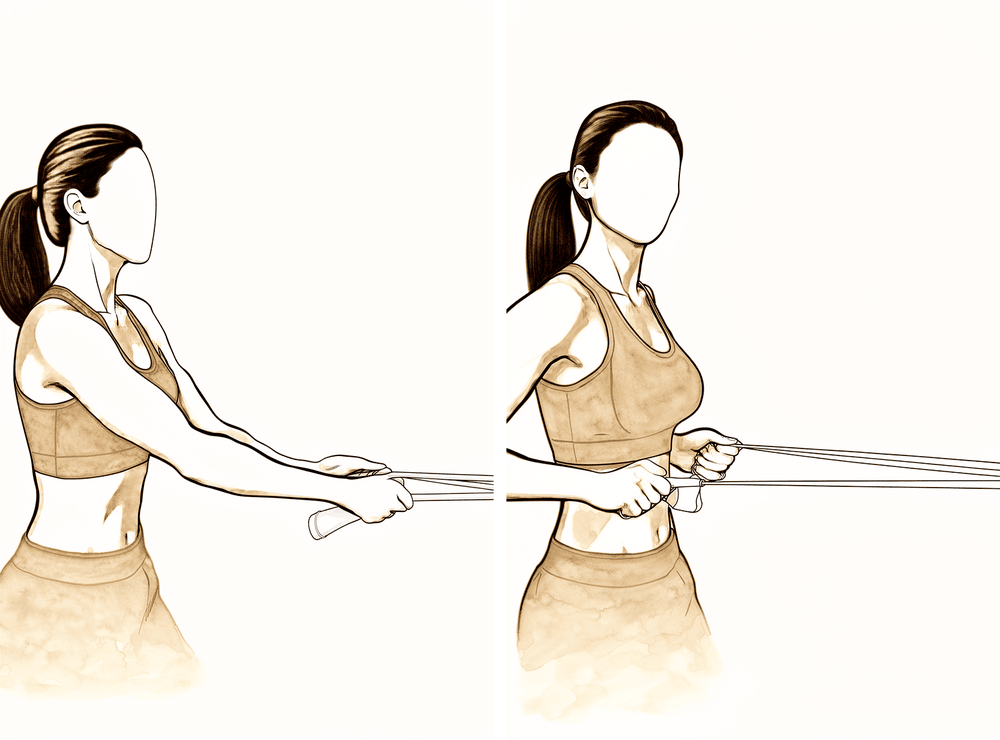
Resistance-band row
With a band anchored in front of you, pull the handles towards you, drawing your elbows back and squeezing your shoulder blades together, then return with control. Keep your elbows close to your sides and in front of you — do not let them drift backwards behind the line of your body. Light band, high repetitions.
As guided by your physiotherapist
Kieran Hirpara 4.0
Shoulder-blade pull with a weight
Draw your shoulder blades back and down against a light weight or band, hold briefly, then release with control. This builds the muscles that steady the shoulder blade and support the repaired shoulder.
As guided by your physiotherapist
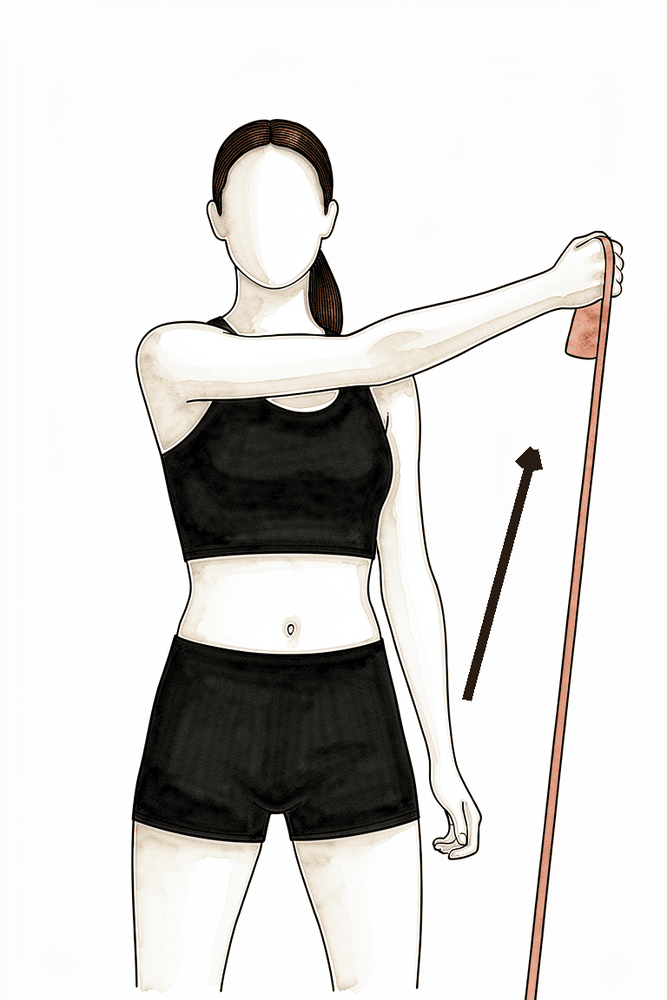
Kieran Hirpara 4.0
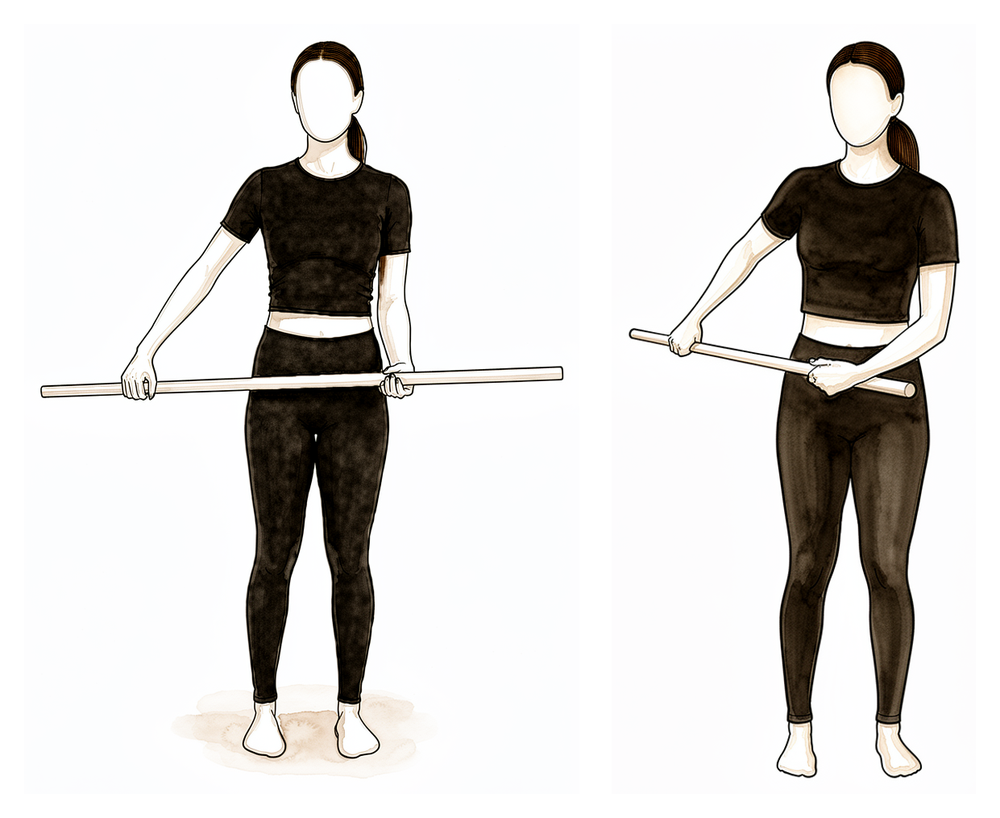
Diagonal band pattern (reaching down and across)
From about week 12, once you have full comfortable movement. With a light band, move the arm in a smooth diagonal line — from up and out, down and across towards the opposite hip, then back. This trains the shoulder in the natural diagonal patterns used in daily tasks and sport. Keep it controlled and pain-free.
As guided by your physiotherapist
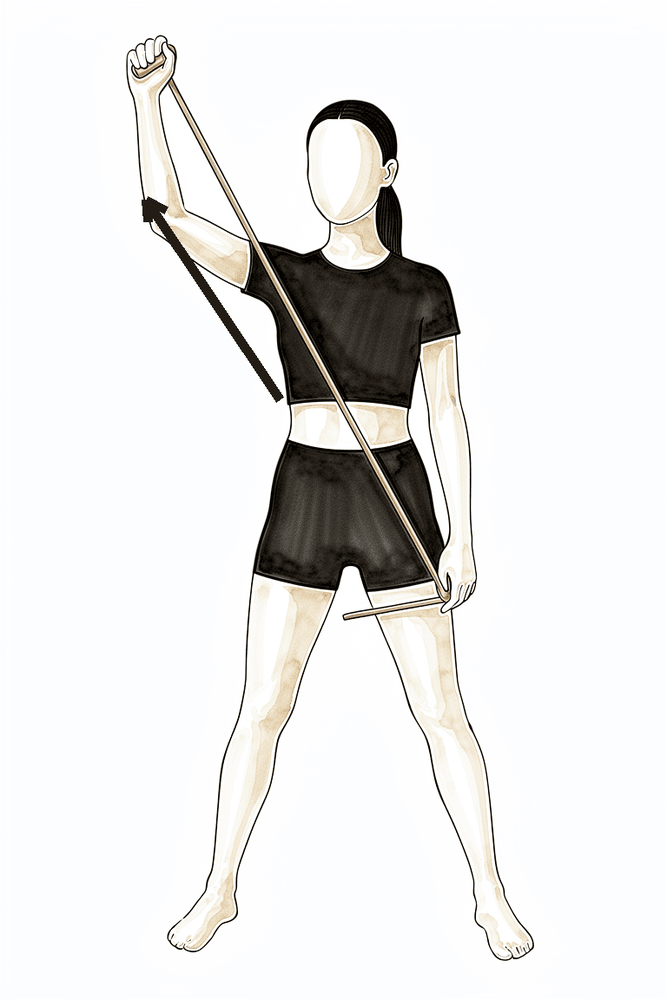
Kieran Hirpara 4.0
Diagonal band pattern (reaching up and across)
From late in this phase, once outward rotation is full and comfortable. With a light band, move the arm in a smooth diagonal line — from down and across the body, up and out overhead, then back. Because this pattern takes the arm into the raised, rotated-out position, introduce it only when your physiotherapist agrees you are ready. Keep it controlled and pain-free.
As guided by your physiotherapist
This phase is the bridge from a strong, controlled shoulder back to the demands of sport and heavier work. You keep the range you have won and build the strength, power and endurance to use it confidently. Returns are staged, not sudden; for overhead and contact sport, an interval programme that builds up volume and intensity step by step is the safest route back.
- Sling: none.
- Exercises: progressive cuff and shoulder-blade strengthening (resistance-band rows, shoulder-blade pulls); diagonal band patterns that train the shoulder through natural reaching lines, with the overhead-and-rotated pattern added only when outward rotation is full and comfortable; then sport- and work-specific conditioning and controlled higher-speed drills as appropriate.
Ready to return when: your strength is at least 85% of the other side and the balance between your outward- and inward-rotation strength is good; you have full, pain-free movement with no feeling of instability under load; and you pass the task-specific tests for your sport or job. Return to contact or overhead sport is usually around 4–6 months, based on meeting these criteria and on Dr Hirpara's and your physiotherapist's clearance, not the calendar alone.
Returning to sport and work
The return to sport and work is criteria-based: pain-free, with full range, balanced strength, and no feeling that the shoulder might slip, and signed off by both Dr Hirpara and your physiotherapist, not decided by the calendar alone.
- Light, sedentary work: within a few weeks, with the arm protected.
- Strengthening: light resistance from about 12 weeks.
- Throwing and overhead sport: not before 4 months, and only after a graded build-up.
- Contact and collision sport: usually 4–6 months, criteria-based.
A soft-tissue Bankart repair heals more slowly than the bony Latarjet operation, so the return is typically a little later; patience here protects the repair and lowers the chance of the shoulder coming out again.
After your protocol
This protocol works alongside the practice's general recovery advice; see managing post-operative pain and wound care.
Evidence & references
Anterior Stabilisation — Arthroscopic Bankart Repair: Rehabilitation Evidence
Topic: Arthroscopic capsulolabral (Bankart) repair for anterior glenohumeral instability. Compiled: 2026-06-16. Sources: local RAG Orthopaedic corpus (154k articles) + published fellowship/PT "standard of care" protocols. Core early precaution: protect the anterior repair -> limit external rotation (ER) (and combined abduction+ER) in the early weeks, because anterior-inferior capsulolabral healing is stressed by ER. This is the mirror image of the posterior protocol.
Consensus phased timeline
The two published academic protocols below are highly concordant. ER limits are given as degrees in the scapular plane / at the side and at 90 deg abduction.
| Phase | Week window | Sling/brace | ROM allowed & restrictions | AROM / strengthening | RTS |
|---|---|---|---|---|---|
| I - Immediate post-surgical / protection | 0-3 wk | Sling at ALL times (neutral rotation, ~30-45 deg abduction per MGH); remove only for shower + elbow/wrist ROM; sleep in sling 6 wk | No shoulder AROM. PROM begins wk 2: flexion <90 deg, ER in scapular plane <20 deg. Avoid abduction+ER (anterior capsule stress); no reaching behind back | Scapular setting, ball squeezes; submaximal isometrics start wk 3 (avoid ER/IR initially) | None |
| II - Protection / PROM | 4-5 wk | Continue sling | PROM progressed: flexion to ~140 deg, ER to 30-45 deg (at side / scapular plane / and at 90 deg abd per MGH), full IR, full abduction in scapular plane | AAROM; submaximal RC isometrics (ER, IR, flexion, abd, ext); periscapular strengthening | None |
| III - Intermediate / AROM | 6-8 wk | Wean / discontinue sling | ER to 50-65 deg scapular plane, ER to ~75 deg at 90 deg abd, flexion to ~160 deg. Begin AROM (gravity-minimised -> resisted). Begin posterior-capsule stretches (cross-arm, sleeper) | Begin isotonic RC + rhythmic stabilisation (closed->open chain). NO push-ups/pec flys (anterior stress) | None |
| IV - Strengthening / transitional | 8-12 (-16) wk | None | Progress ER (BWH: 65 deg at 20 deg abd, 75 deg at 90 deg abd wk 8-10; then all planes to tolerance). Full PROM/AROM by ~12 wk | Progressive RC + periscapular strengthening, PNF diagonals, light resistance until wk 12. Avoid contact sport | None |
| V - Return to activity / strengthening | 12-16 wk | None | Full ROM | Heavier strengthening, Thrower's 10, closed-chain push-up progression. Light golf/tennis (no serve until 4 mo) | Begin sport-specific / interval programs |
| VI - Unrestricted RTS | 4-6 months | None | Full | Throwing/overhead not before 4 months. Plyometrics, interval throwing | Full RTS on criteria + MD clearance |
Active ROM start: ~week 6. Strengthening start: isometrics wk 3; isotonic RC wk 6-8. RTS: sport-specific ~12-16 wk; throwing/overhead >=4 months; full/contact 4-6 months, criterion-based.
RTS criteria (criterion-based, both protocols)
Surgeon clearance; pain-free without instability/apprehension; adequate ROM for task; strength >=85% of uninvolved arm (handheld dynamometry / isokinetic); ER/IR ratio >64%; symmetric scapular mechanics; functional/endurance tests >85% (MGH battery).
Weight-lifting precautions (anterior-specific)
Avoid wide-grip bench press, military press, lat pulls behind the head; "always see your elbows" (avoid the abduction+ER position that re-stresses the anterior repair).
Key controversies & evidence flags
- Immobilisation position - ER vs IR (first-time DISLOCATION, mostly non-operative, but informs surgical positioning debate).
- Basic-science rationale (Itoi): a randomised cadaveric/MRI program showed the anterior labrum is better reduced (less separation/displacement) in external rotation, and that abduction further improves Bankart-lesion reduction (Abd-60ER > Add-ER/Add-IR). Itoi's RCT reported ER immobilisation x3 wk cut recurrence ~46%.
- Meta-analyses split: Hurley et al (JISAKOS 2021) meta-analysis - ER immobilisation reduced recurrence and improved RTP, with higher compliance. Whelan et al (AJSM 2015, meta-analysis of RCTs), Liu et al (Injury 2014) and Vavken et al (JSES 2014) - no significant benefit of ER over IR. Net: genuinely controversial; best-evidence (multiple RCT meta-analyses) does NOT consistently support ER bracing. Most post-Bankart-repair protocols (BWH/MGH above) use a standard neutral-rotation sling, not an ER brace.
-
Evidence strength: STRONG but conflicting (multiple RCTs + >=4 meta-analyses, opposite conclusions).
-
Accelerated vs conservative post-Bankart rehab. An RCT (NCT03347019, "Accelerated Rehabilitation After Arthroscopic Bankart Repair") exists; broader literature (Kim & Saper systematic review, Arthroscopy SM&R 2020; DeFroda et al, Sports Health 2018) finds wide protocol variability and a lack of high-level evidence to define the optimal pace, especially in adolescents/young adults. Evidence: WEAK / consensus-only.
-
Return-to-sport timing & criteria. International consensus (Hurley/Matache, Arthroscopy 2021/2022, Parts I & III) supports criteria-based rather than purely time-based RTS; Ryan (Arthroscopy 2025 editorial) and Kim et al (AJSM 2022 systematic review/meta-analysis) note RTS criteria reduce recurrence but remain hard to validate. Contact/collision athletes: Dickens et al (AJSM 2017, prospective multicentre) - surgical stabilisation gives ~90% successful RTS and far lower recurrence than non-op in contact athletes. Evidence: consensus + good prospective cohort; criteria-based RTS = moderate.
-
Bankart vs Latarjet for the same patient (context). Delgado et al (OJSM 2025, matched-pair long-term) and Beletsky et al (Sports Health 2020, protocol comparison) - Latarjet patients return to sport substantially faster (~19.6 wk vs ~32.4 wk for Bankart, p<0.001 in Beletsky) because bony fixation heals faster than soft-tissue labral repair (which needs ~12 wk). Relevant when choosing procedure in contact athletes / bone loss.
CITATIONS
Published rehabilitation protocols (URLs)
- Brigham & Women's Hospital, Dept. of Rehabilitation Services - Arthroscopic Anterior Stabilization (with or without a Bankart Repair) Protocol (rev. 2016): https://www.brighamandwomens.org/assets/bwh/patients-and-families/rehabilitation-services/pdfs/shoulder-arthroscopic-anterior-stabilization-protocol.pdf
- Massachusetts General Brigham Sports Medicine - Rehabilitation Protocol for Anterior Bankart Repair (rev. 10/2021): https://www.massgeneral.org/assets/MGH/pdf/orthopaedics/sports-medicine/physical-therapy/rehabilitation-protocol-for-anterior-bankart.pdf
- BWH - Open Anterior Stabilization (with or without a Bankart) Protocol: https://www.brighamandwomens.org/assets/bwh/patients-and-families/rehabilitation-services/pdfs/shoulder-open-shoulder-anterior-stabilization-protocol.pdf
Local RAG corpus (article / journal / year)
- Marcaccio SE, Kaarre J, Steuer F, et al. Anterior Glenohumeral Instability. Journal of Bone and Joint Surgery. 2024. (3-phase framework; RTS 4-6 mo; criteria-based testing.) [consensus/review]
- Hurley ET, Matache BA, Wong I, et al. Anterior Shoulder Instability Part I - Diagnosis, Nonoperative Management, and Bankart Repair - An International Consensus Statement. Arthroscopy. 2021;38(2). [consensus]
- Matache BA, Hurley ET, Wong I, et al. Anterior Shoulder Instability Part III - Revision Surgery, Rehabilitation and Return to Play, and Clinical Follow-up - An International Consensus Statement. Arthroscopy. 2021;38(2). [consensus]
- Whelan DB, Kletke SN, Schemitsch G, Chahal J. Immobilization in External Rotation Versus Internal Rotation After Primary Anterior Shoulder Dislocation: A Meta-analysis of Randomized Controlled Trials. The American Journal of Sports Medicine. 2015. [STRONG - meta-analysis of RCTs; no ER benefit]
- Hurley ET, Fried JW, Alaia MJ, et al. Immobilisation in external rotation after first-time traumatic anterior shoulder instability reduces recurrent instability: a meta-analysis. Journal of ISAKOS. 2021;6(1). [STRONG - meta-analysis; favours ER]
- Itoi E, Kitamura T, Hitachi S, et al. Arm Abduction Provides a Better Reduction of the Bankart Lesion During Immobilization in External Rotation After an Initial Shoulder Dislocation. The American Journal of Sports Medicine. 2015. [basic science / imaging]
- Liu A, Xue X, Chen Y, et al. The external rotation immobilisation does not reduce recurrence rates or improve quality of life after primary anterior shoulder dislocation: A systematic review and meta-analysis. Injury. 2014. [STRONG - meta-analysis; no ER benefit]
- Vavken P, Sadoghi P, Quidde J, et al. Immobilization in internal or external rotation does not change recurrence rates after traumatic anterior shoulder dislocation. Journal of Shoulder and Elbow Surgery. 2014;23(1). [STRONG - meta-analysis]
- Kim K, Saper MG. Postoperative Management Following Arthroscopic Bankart Repair in Adolescents and Young Adults: A Systematic Review. Arthroscopy, Sports Medicine, and Rehabilitation. 2020;2(6). [systematic review - notes protocol variability / weak evidence]
- Kim M, Haratian A, Fathi A, et al. Can We Identify Why Athletes Fail to Return to Sports After Arthroscopic Bankart Repair? A Systematic Review and Meta-analysis. The American Journal of Sports Medicine. 2022. [systematic review/meta-analysis]
- Ryan PM. Editorial Commentary: Criteria on the Basis of Return to Sport Evaluation After Arthroscopic Bankart Repair. Arthroscopy. 2025;41(8). [expert editorial]
- Dickens JF, Rue J, Cameron KL, et al. Successful Return to Sport After Arthroscopic Shoulder Stabilization Versus Nonoperative Management in Contact Athletes With Anterior Shoulder Instability: A Prospective Multicenter Study. The American Journal of Sports Medicine. 2017;45(11). [prospective cohort - contact athletes]
- Beletsky A, Cancienne JM, Manderle BJ, et al. A Comparison of Physical Therapy Protocols Between Open Latarjet Coracoid Transfer and Arthroscopic Bankart Repair. Sports Health. 2020. [protocol comparison - Bankart RTS ~32 wk vs Latarjet ~20 wk]
- Bartl C, Schumann K, Paul J, et al. Arthroscopic Capsulolabral Revision Repair for Recurrent Anterior Shoulder Instability. The American Journal of Sports Medicine. 2011;39(3). (ER restricted to 0 deg for 6 wk; flexion/abd limited to 90 deg for 6 wk - example surgical protocol.)
Overall evidence grade for the phased protocol itself: CONSENSUS / institutional standard-of-care (Level V) - no single RCT defines the canonical timeline; the immobilisation-position question is the only part addressed by RCT-level meta-analysis (and is unresolved).