Patients › Rehabilitation
Rotator Cuff Repair
Staged rehabilitation protocol after rotator cuff repair at Mater Private Hospital Rockhampton, with the early exercise program.
This protocol guides your recovery after a rotator cuff repair with Dr Kieran Hirpara at Mater Private Hospital Rockhampton. It pairs a plain-English explanation of each stage with a structured programme you can share with your physiotherapist; bring this page or its PDF to your first appointment so your rehabilitation stays coordinated. Your physiotherapist may adjust the plan depending on how your recovery progresses.
If you have any concerns about your wound after surgery, get in touch with the rooms. It is often helpful to take a photo of the wound and email it for review.
What to expect
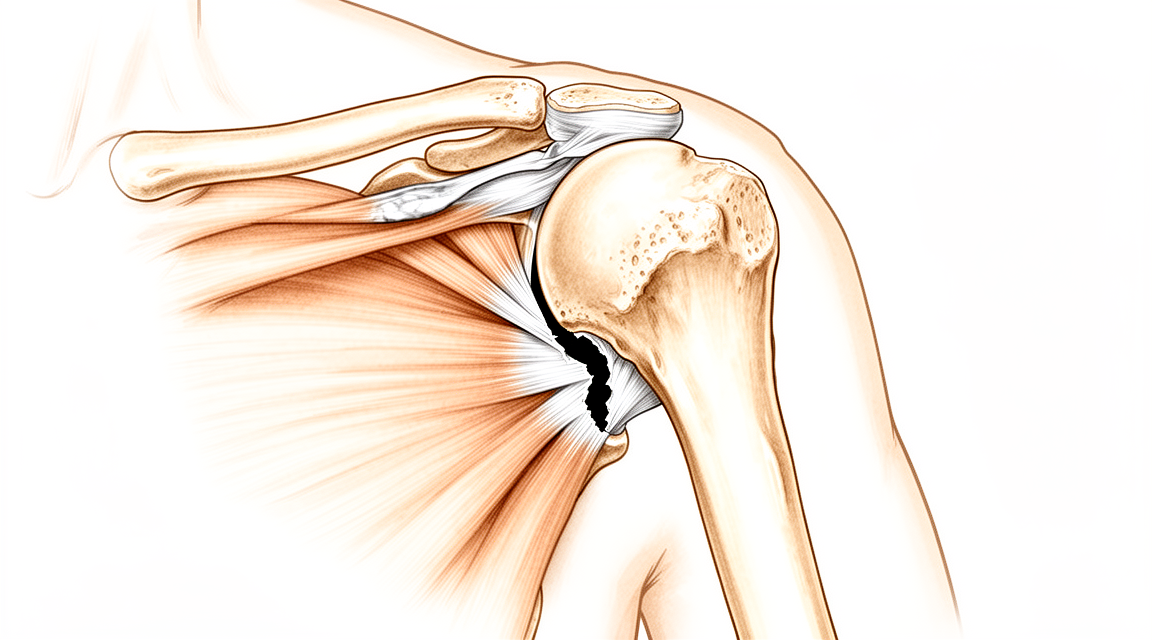
A rotator cuff repair re-attaches torn tendon back onto the bone, and that biological re-attachment is what this whole programme protects. The repair is still soft at six weeks and keeps maturing for many months: in healing studies it has only around a quarter of its normal strength at six weeks, roughly half at twelve weeks, and it does not approach full strength until at least six months. That is why movement and load are added back in stages rather than all at once.
It is tempting to push early, but the evidence is reassuring. For the common smaller and medium tears, any extra range you gain from early movement is temporary, and by one year there is no difference between starting early and starting a little later. Patience in the first weeks costs you nothing in the long run, and it protects the repair when it is at its weakest. There is also good evidence that starting aggressive therapy in the very first week does more harm than good, so the early weeks are deliberately gentle.
The single most useful thing you can do for your shoulder is to protect the repair early. Most re-tears happen in the first three to six months, and patients who do not follow the early restrictions are far more likely to re-tear. Sticking to the protocol matters more than any exercise.
Rotator cuff repairs are often combined with other procedures in the same operation: most commonly a subacromial decompression, distal clavicle excision, biceps tenodesis or suprascapular nerve release. When that happens, this protocol governs the whole recovery: the repaired tendon is the slowest-healing part, and its timeline sets the pace.
Your timeline depends on the size of the tear that was repaired. It is the single biggest thing that sets the pace, because larger tears heal more slowly and are more likely to re-tear. Dr Hirpara will tell you which group your repair falls into, and the page splits the programme into two clearly labelled tracks below:
- Small / medium tears: one or two tendons, good tissue quality.
- Large / massive tears: bigger tears, two or more tendons, or poorer tissue quality. The steps are the same, but held longer and progressed more cautiously: protected motion is kept up longer, active movement comes back later, and strengthening is delayed.
The procedure
Your rotator cuff repair is done arthroscopically (keyhole), or occasionally through a small open incision. The torn tendon is re-attached to its bony footprint on the top of the upper arm bone, and the job of rehabilitation is to protect that re-attachment while it heals, then gradually rebuild full movement, strength and function.
Wearing your sling
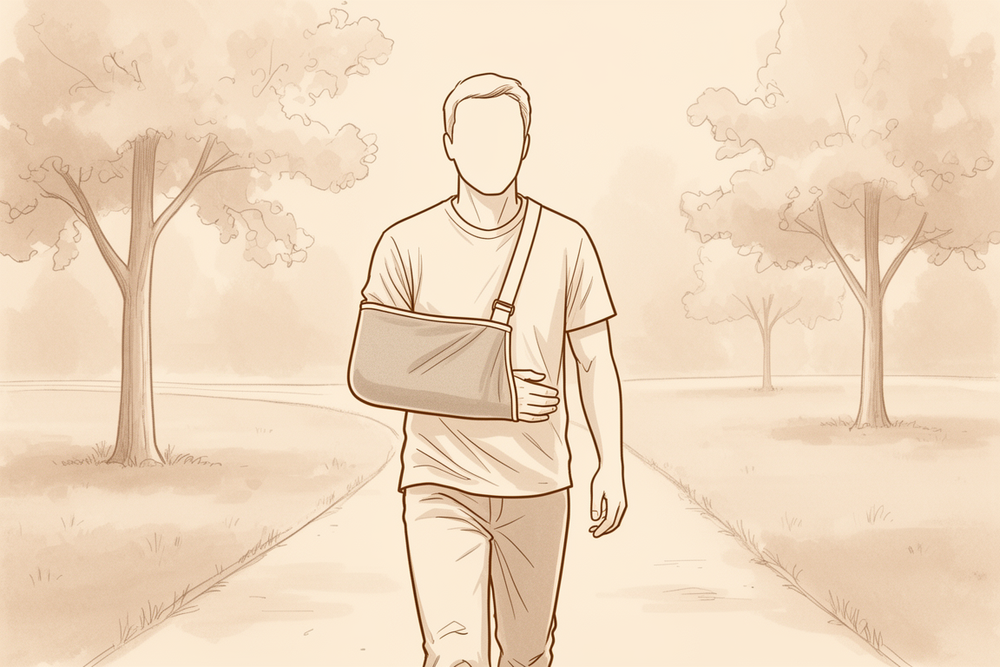
You will wear a simple shoulder sling, not an abduction-pillow sling. There is no proven difference in outcomes between the two, and the simple sling is far easier to live with. Dr Hirpara uses a simple sling for every cuff repair, including large and massive tears.
- Wear the sling for 6 weeks for daytime support, especially when you are out of the house or around other people.
- You do not sleep in the sling. It is daytime support only; sleep out of it, with your arm comfortable and supported on a pillow.
- Take it off for showering and for your exercises (once you have been shown how). Whenever the sling is off, keep your arm relaxed and by your side.
- Use ice if the shoulder is swollen or sore, especially after exercise.
- For pain relief, take regular paracetamol plus an anti-inflammatory (such as ibuprofen) unless you have been told otherwise, as set out in managing post-operative pain. A dose before your exercises helps.
Watch your posture while you are using the sling: keep your ears, shoulders and hips in line and avoid slumping. Good posture protects your back and helps stop the shoulder stiffening.
Key precautions — do NOT
- Do NOT actively move the shoulder under its own power until about 6 weeks (the repair is only about 20% of normal strength at 4 weeks).
- Do NOT lift, push, pull, or bear weight through the hand or arm for 6 weeks.
- Do NOT rotate the arm outward past the straight-ahead (neutral) position early.
- If the front cuff tendon (subscapularis) was repaired: keep active external rotation within about 30° for the first 12 weeks, and do not actively rotate the arm inward (against resistance) in that time; this protects the front repair. Your surgeon will tell you if this applies to you.
- Do NOT do "empty-can" (thumb-down) raises. Ever.
- Do NOT reach behind your back early, and avoid any sudden jerk or push.
- Do NOT drive while the sling is required (6 weeks).
Small / medium tears
This is the track for tears of one or two tendons with good tissue. Where a phase gives a week number, this is your timing.
Small-medium tears — Phase I: Protection (weeks 0–6)
Kieran Hirpara 4.0
Circulation and deep breathing
To reduce the risk of post-operative complications, aim to walk for at least 30 minutes a day (this does not have to be all at once), and take 4–6 deep breaths every hour.
Throughout the day
Kieran Hirpara 4.0
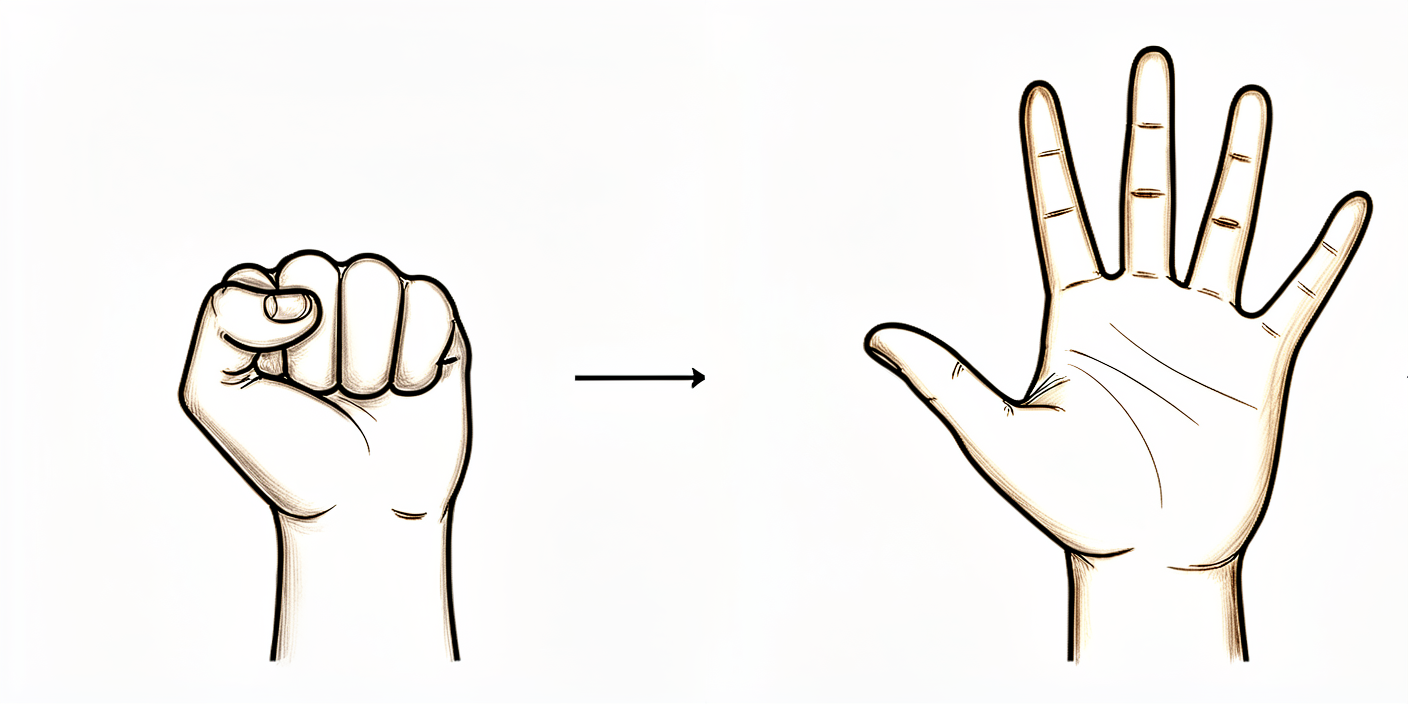
Open and close hand
Make a tight fist with your hand, then open it fully. This keeps your hand moving and helps prevent stiffness and swelling.
10 times per hour
Kieran Hirpara 4.0
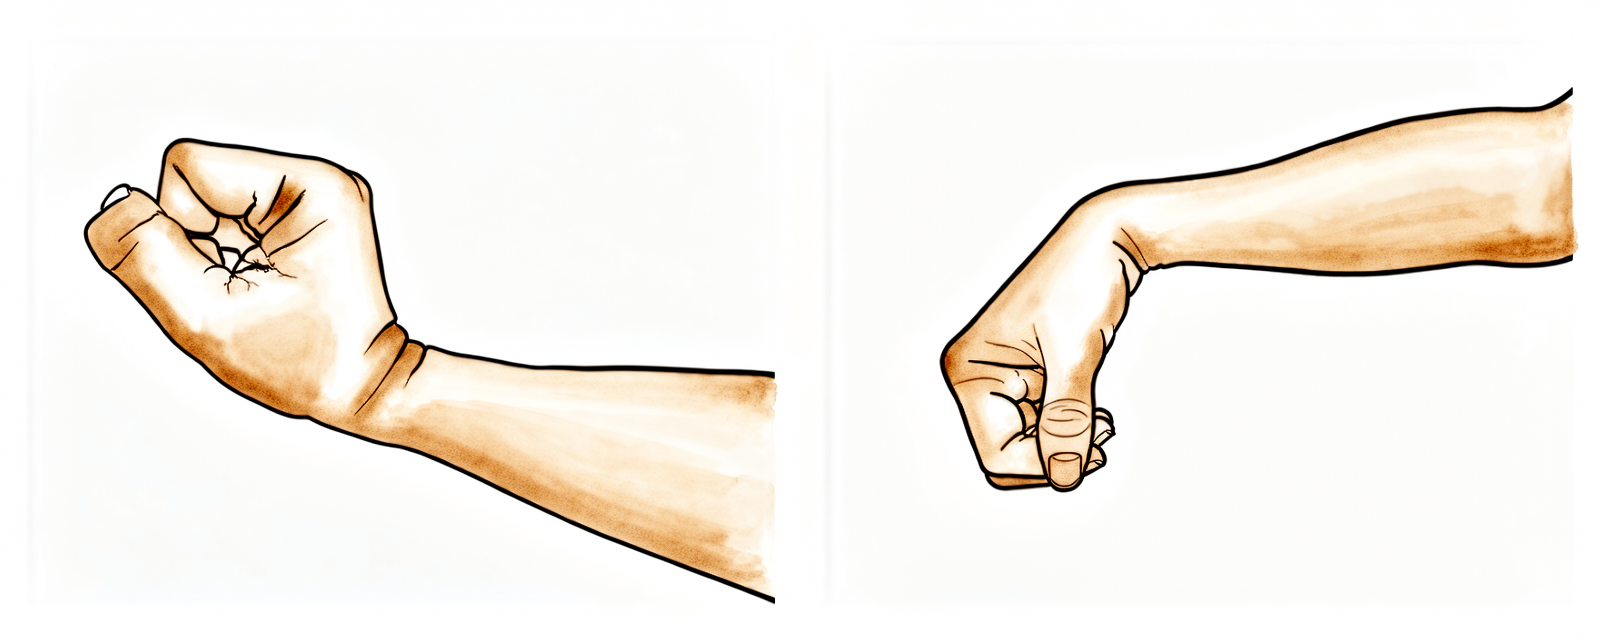
Active wrist bends
Gently bend your wrist forwards, then back, as far as is comfortable.
10–15 times per hour
Kieran Hirpara 4.0
Active elbow bends
With your palm facing up, gently bend your elbow as far as you can, then straighten your arm again. Keep your upper arm tucked at your side.
10–15 times, 2–3 times a day
Kieran Hirpara 4.0
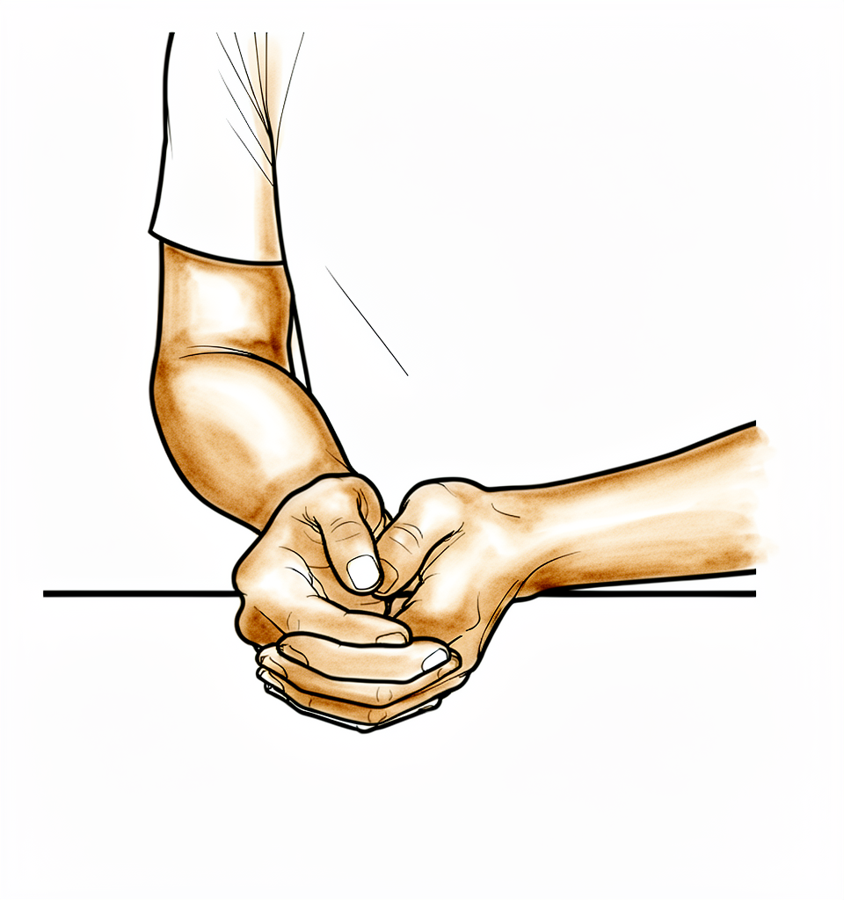
Pendulum swings
Lean forwards and let your operated arm hang down, completely relaxed. Make small circles — clockwise, then the other way — by rocking your body, NOT by using your shoulder muscles. Also rock the arm gently forwards/backwards and side to side. Keep the circle small (under about 20 cm). Your operated arm stays relaxed throughout — you are not lifting it.
10 in each direction, 2–3 times a day
Kieran Hirpara 4.0
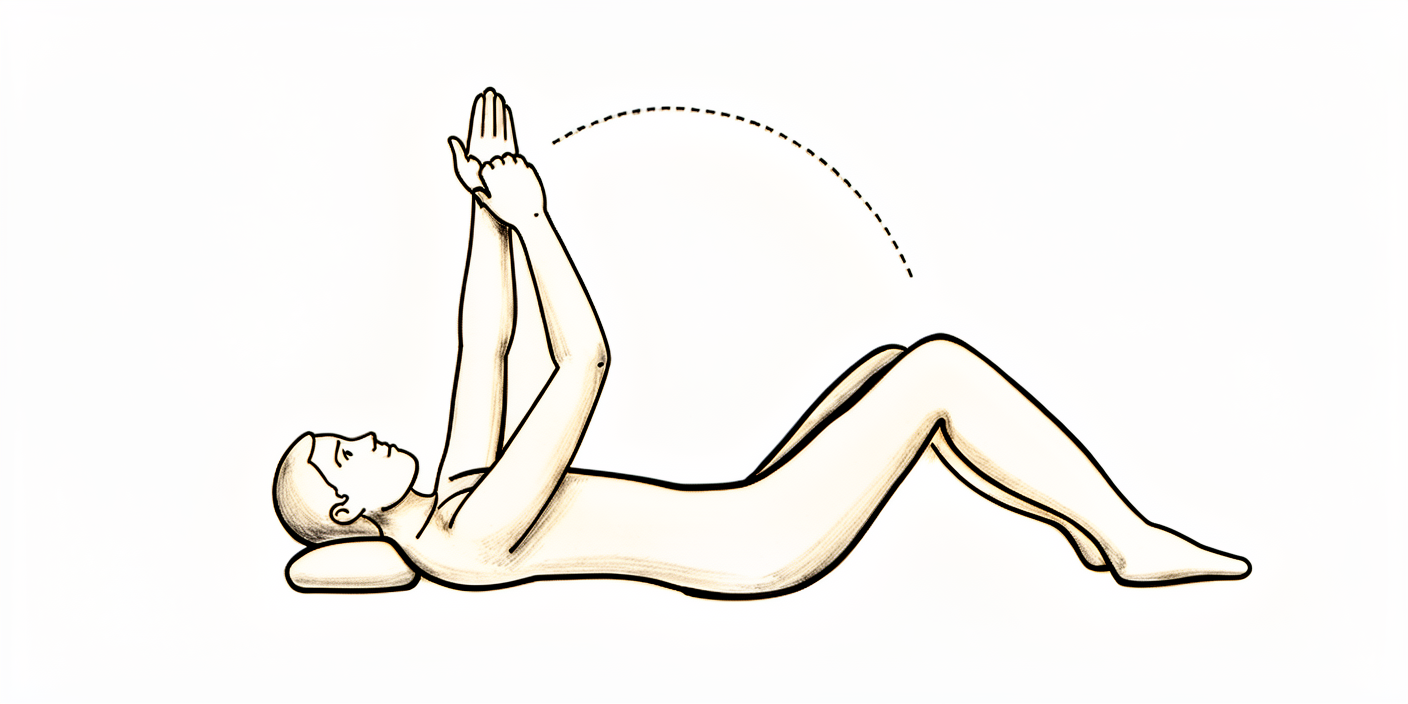
Assisted forward lift in lying
Lie on your back. Place your good hand under the elbow of your operated arm and use it to lift the operated arm towards the ceiling — your operated shoulder stays relaxed and does the work for you. Do NOT lift past shoulder height (about 90°) in this phase. Lower slowly back to the start.
10 times, 2–3 times a day
Kieran Hirpara 4.0
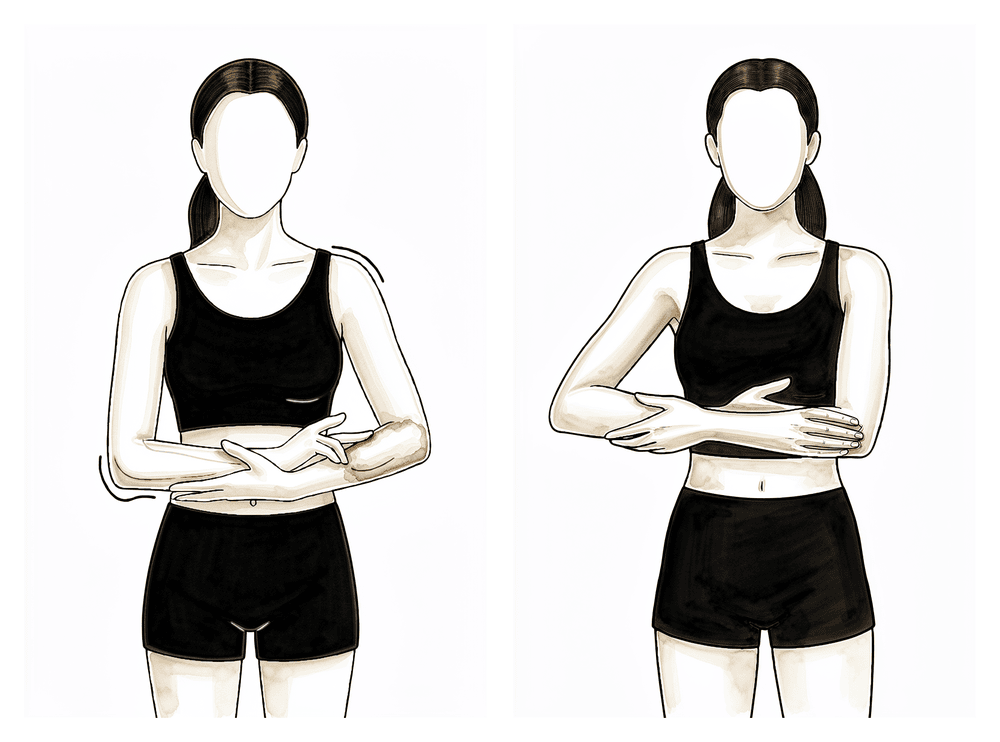
Cradled arm-out-to-the-side
Sitting and leaning forwards slightly, cradle your operated arm with your good arm and help it out to the side — like rocking a baby. Your operated shoulder stays relaxed; your good arm does the moving.
10 times, 2–3 times a day
Kieran Hirpara 4.0
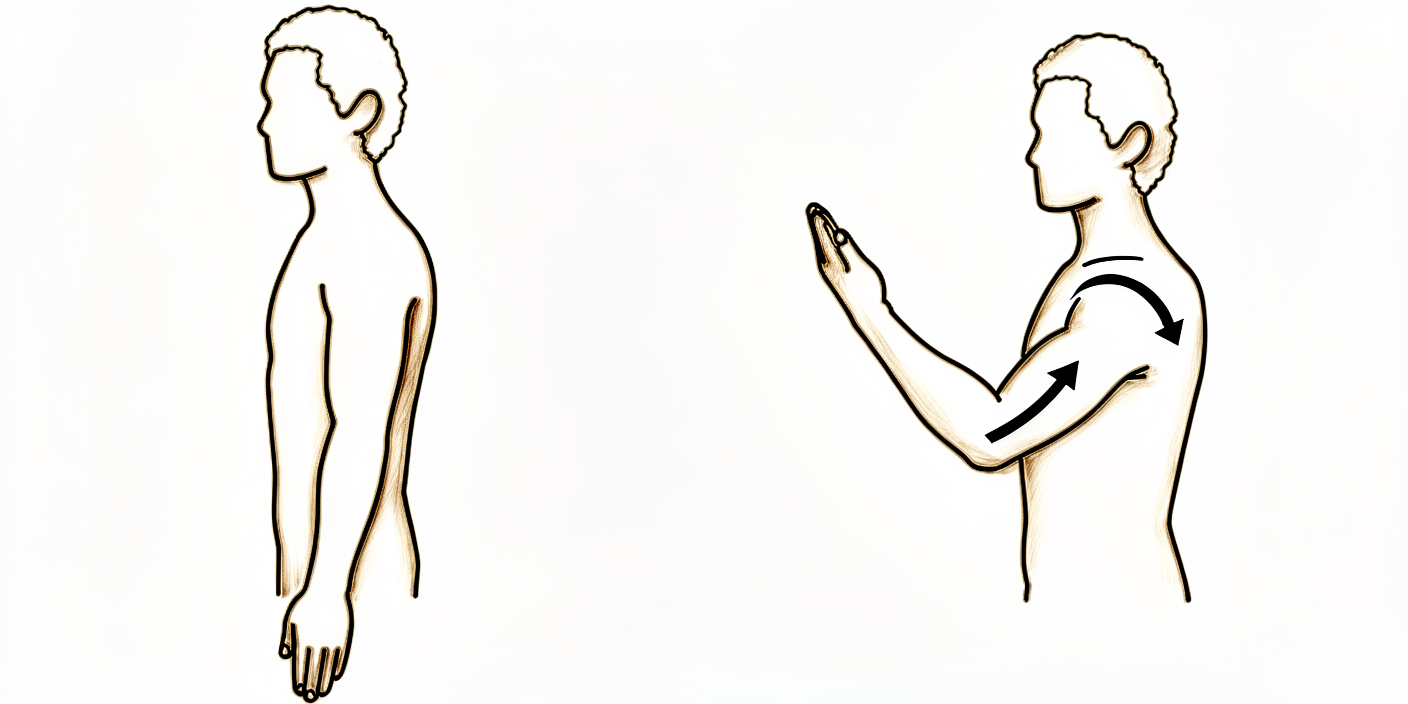
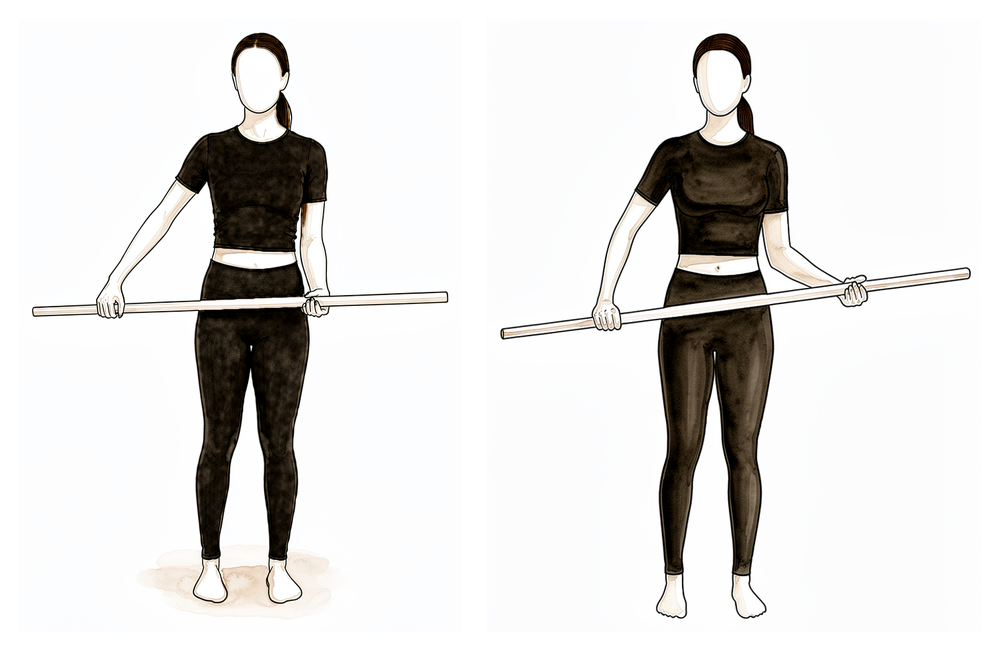
Assisted external rotation to neutral
Sitting or standing, keep your elbow tucked at your side and start with your hand resting on your stomach. Gently turn your forearm outwards only as far as the straight-ahead (neutral) position — no further. Do NOT rotate past neutral. Slowly return.
10 times, 2–3 times a day
Kieran Hirpara 4.0
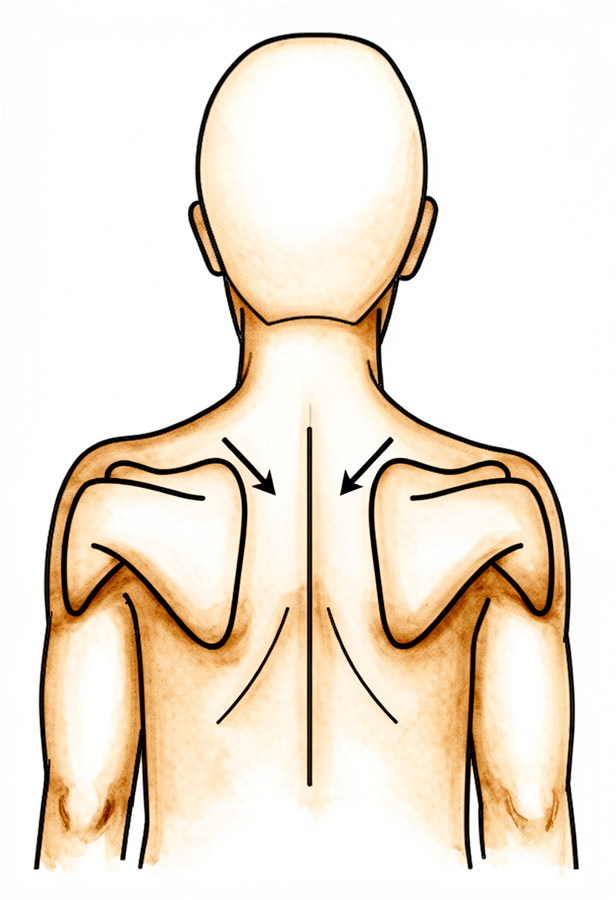
Shoulder-blade setting
Gently squeeze your shoulder blades downwards and together, hold, then relax. This is a light muscle-activation drill — your arm does not move.
Hold 5 seconds, 5 times, 2–3 times a day

Kieran Hirpara 4.0
Neck side-stretch
Use your good arm to gently bring your ear towards your good shoulder, away from the operated side, until you feel a comfortable stretch in your neck.
Hold 10 seconds, 3 times, 2–3 times a day

Kieran Hirpara 4.0
Neck stretch towards the armpit
Use your good arm to gently bring your nose down towards your armpit, away from the operated side, until you feel a comfortable stretch.
Hold 10 seconds, 3 times, 2–3 times a day
The first six weeks are about one thing: protecting the repair while the tendon starts to heal onto the bone. You stay in the simple sling for daytime support, sleep out of it, manage swelling with ice, and do gentle drills that keep your hand, wrist, elbow and neck moving without loading the repaired tendon. Your physiotherapist (or you, with help from your good arm) gently moves the shoulder for you; you stay completely relaxed.
- Sling: simple sling for daytime support; sleep OUT of the sling; off for exercises and hygiene.
- Movement allowed: assisted and passive movement only; nothing under your own shoulder power. Your good arm or a stick does the work. Build assisted forward elevation gradually towards about 90° (halfway up) early, and assisted outward rotation only as far as the straight-ahead (neutral) position.
- Exercises: pendulum swings; assisted forward lift in lying; cradled arm-out-to-the-side; assisted external rotation to neutral; gentle hand, wrist and elbow movement; shoulder-blade and neck drills.
Ready for the next phase when: your pain is settling and controlled with simple pain relief (about 3/10 or less); assisted forward elevation reaches about 90° comfortably; assisted outward rotation reaches the neutral position comfortably; your wound has healed with no signs of a problem; and there is no sign the repair has been over-stressed.
Small-medium tears — Phase II: Restoring movement (weeks 6–12)
Kieran Hirpara 4.0
Assisted forward lift in lying
Lying on your back, hold a stick in both hands and use your good arm to lift the operated arm forwards and up — the operated shoulder stays relaxed. Build towards about 120° (roughly two-thirds of the way up) over this phase, staying within the range your physiotherapist sets. Move smoothly, never force, and lower with control.
10 times, 2–3 times a day
Kieran Hirpara 4.0
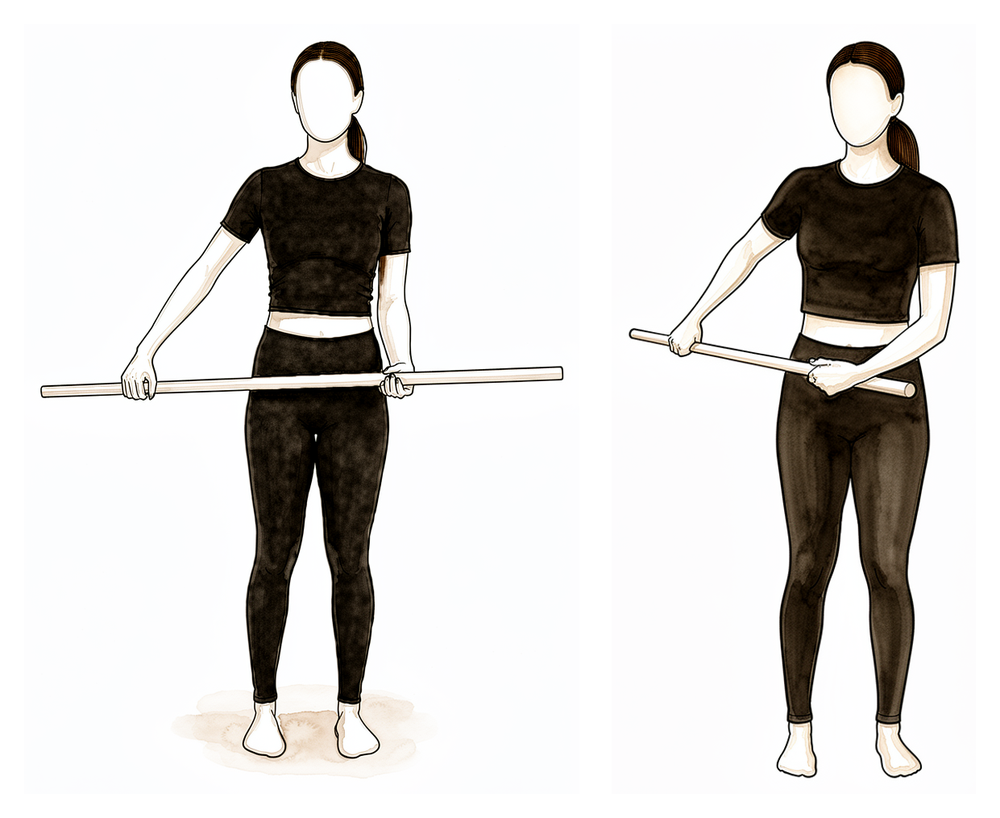
Assisted external rotation with a stick
Lying on your back, elbow tucked at your side and bent to 90°, hold a stick in both hands and use your good arm to push the operated hand gently outwards. Stay within the range your physiotherapist sets and never force it.
10 times, 2–3 times a day
Kieran Hirpara 4.0
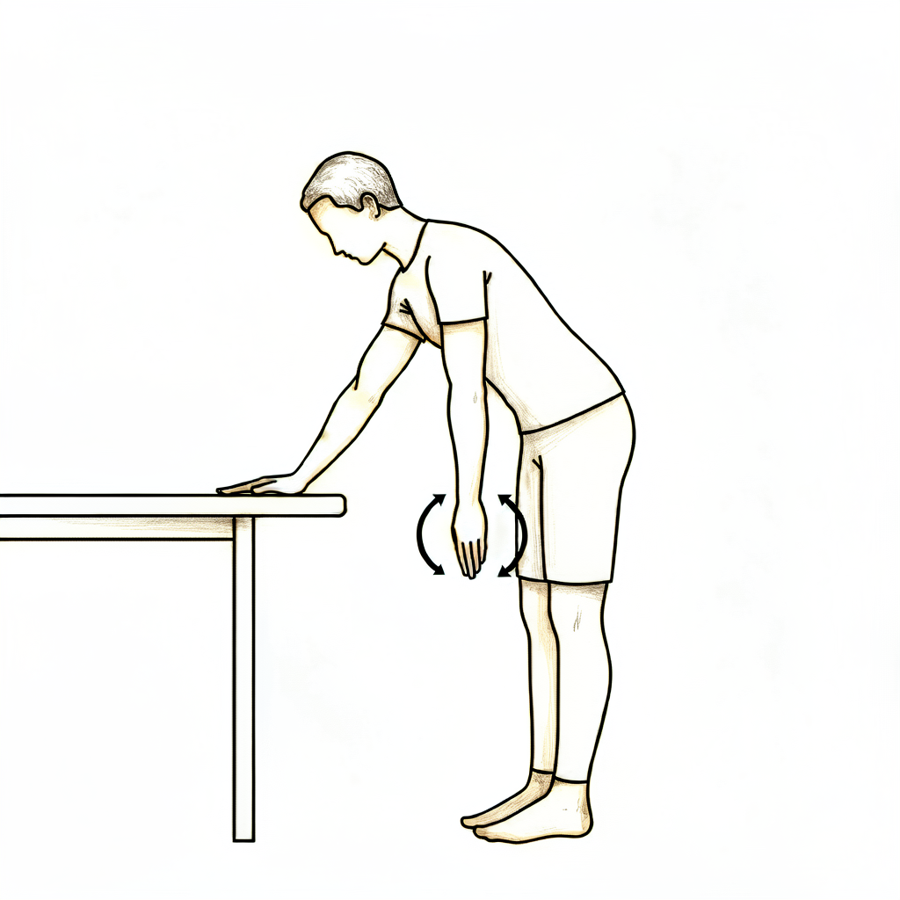
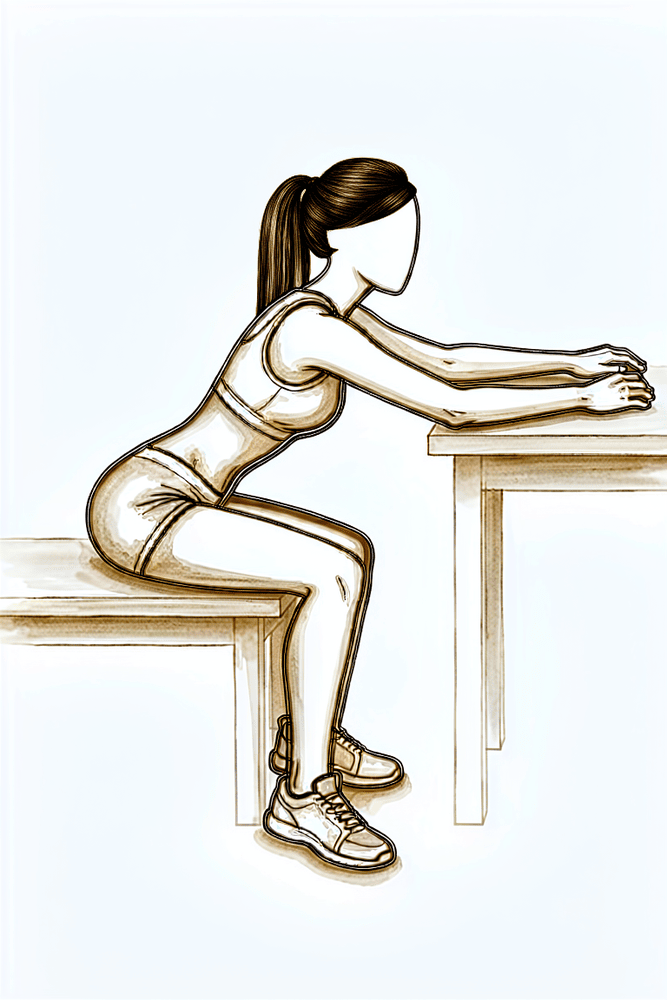
Seated table slide
From about week 6, sit at a table with your operated hand on a towel. Slide the hand forwards along the surface so the arm reaches forwards and up, letting the table take the weight, then slide back. The same drill can be done out to the side as your physiotherapist directs.
10 times, 2–3 times a day
Kieran Hirpara 4.0
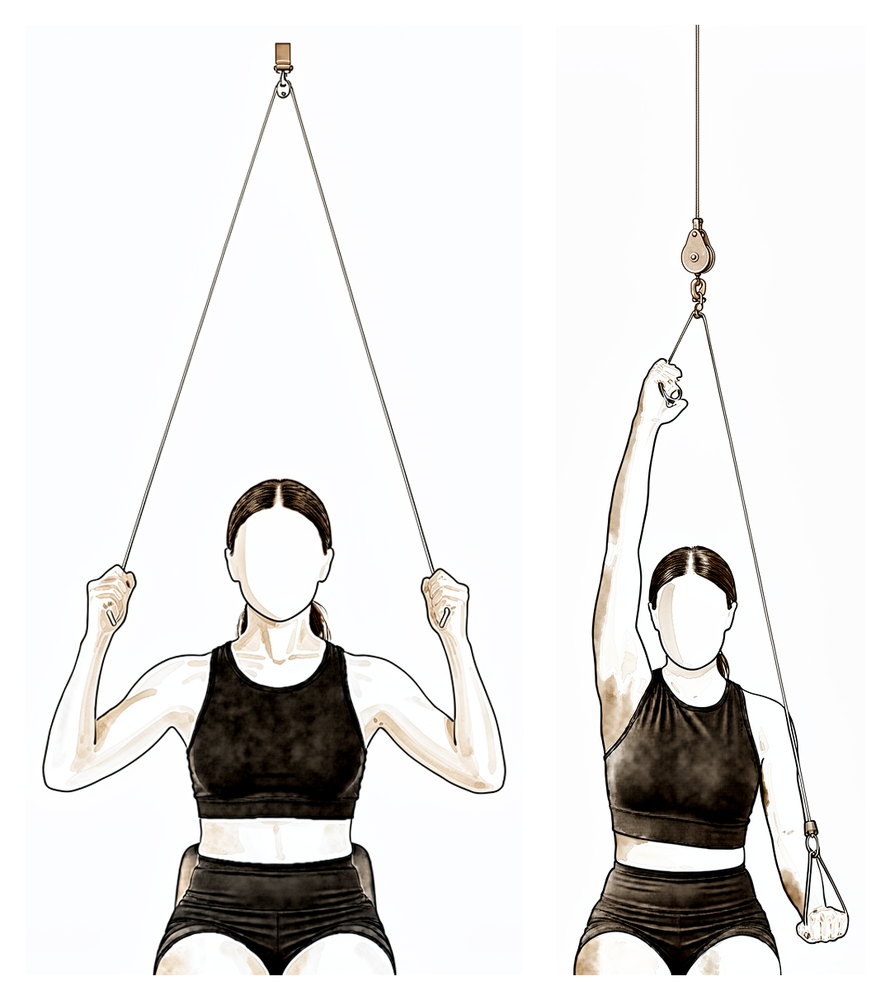
Over-door pulley
From about week 6, sit under an over-door pulley with a handle in each hand. Pull down with your good arm to raise the operated arm, keeping the operated arm relaxed, then lower it slowly.
As guided by your physiotherapist
Kieran Hirpara 4.0
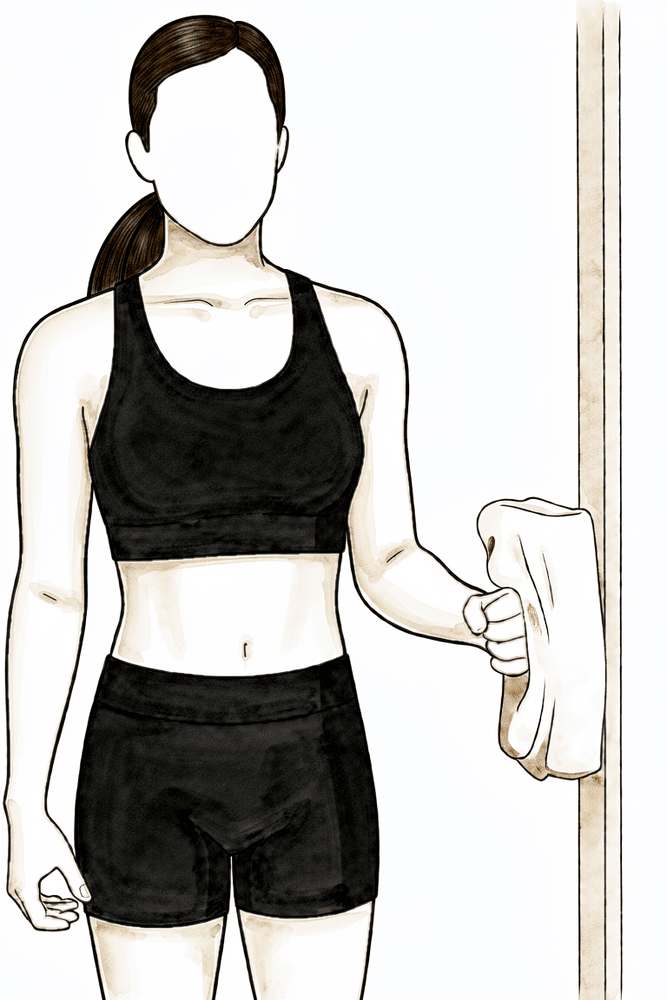
Isometric external rotation
From about week 8, if your physiotherapist agrees. Stand with your elbow tucked at your side and bent to 90°, the back of your hand near a wall or door frame. Press the back of your hand gently outwards into the surface WITHOUT letting the arm move — a gentle effort, about a quarter of your strength, with no pain. Hold, then relax.
Hold ~5 seconds, gentle (~25% effort), as guided by your physiotherapist
Kieran Hirpara 4.0
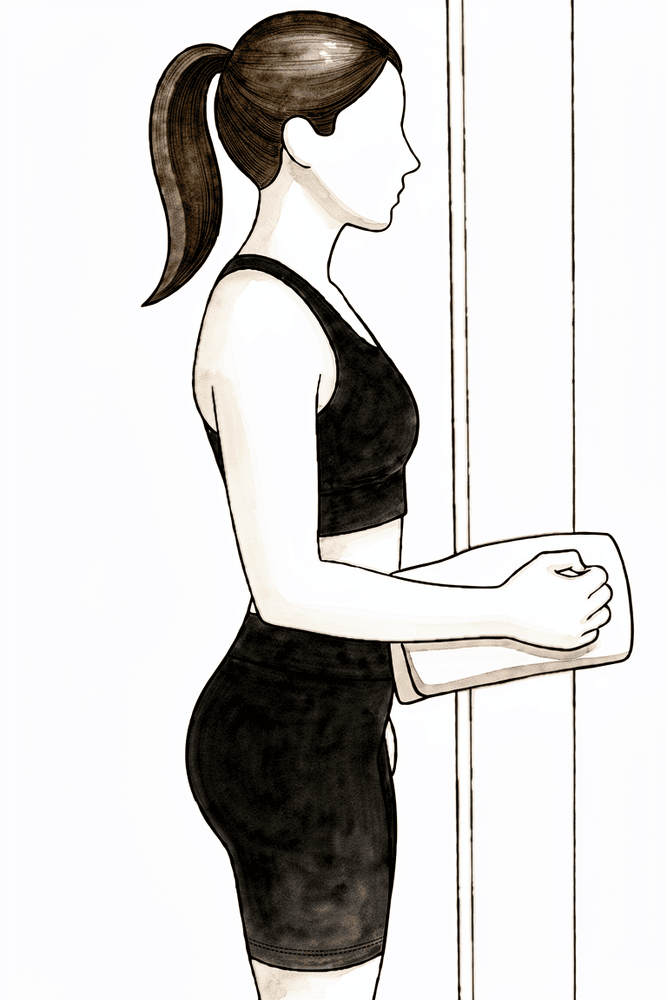
Isometric internal rotation
From about week 8, if your physiotherapist agrees — but NOT before week 12 if the front cuff tendon (subscapularis) was repaired. Stand with your elbow tucked at your side, palm against a wall. Press the palm gently inwards WITHOUT letting the arm move — about a quarter effort, with no pain. Hold, then relax.
Hold ~5 seconds, gentle (~25% effort), as guided by your physiotherapist
Kieran Hirpara 4.0
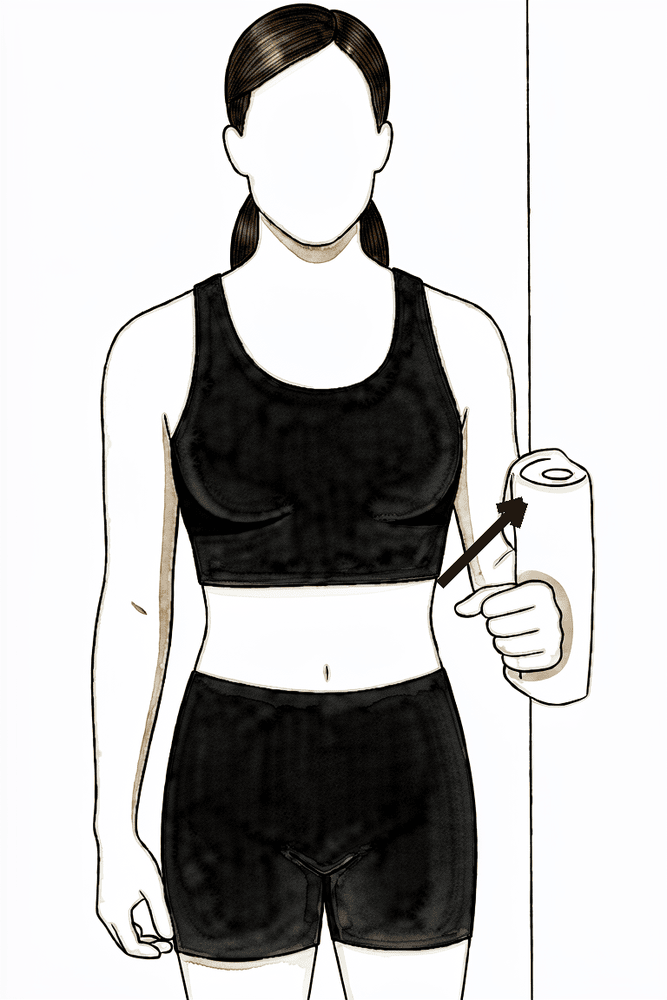
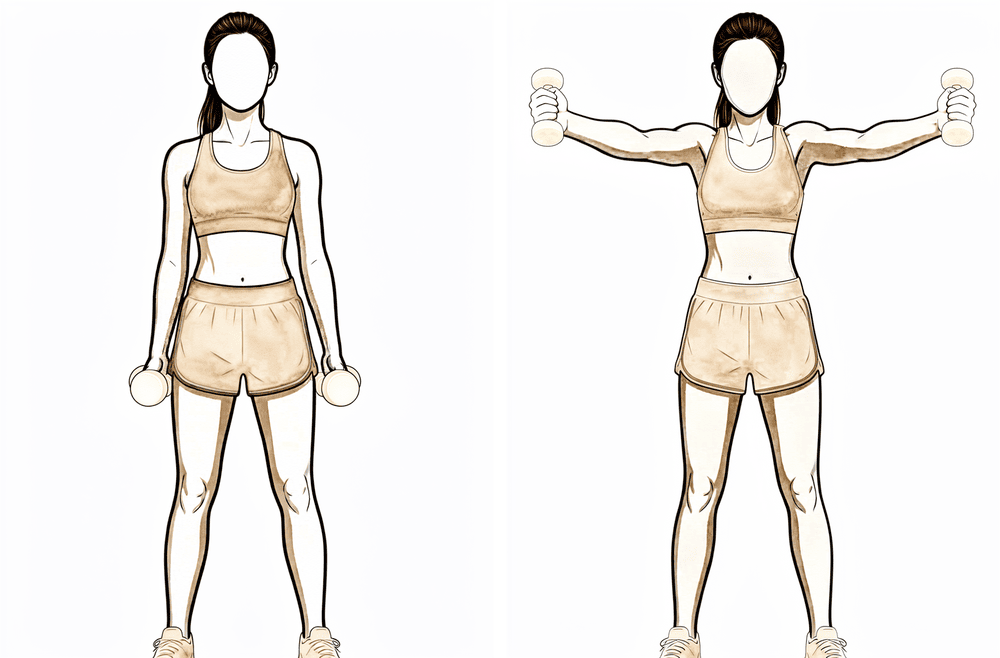
Isometric abduction
From about week 8, if your physiotherapist agrees. Stand side-on with the outside of your upper arm near a wall, elbow at your side. Press the arm gently outwards into the wall WITHOUT letting it move — about a quarter effort, no pain. Hold, then relax.
Hold ~5 seconds, gentle (~25% effort), as guided by your physiotherapist
Kieran Hirpara 4.0
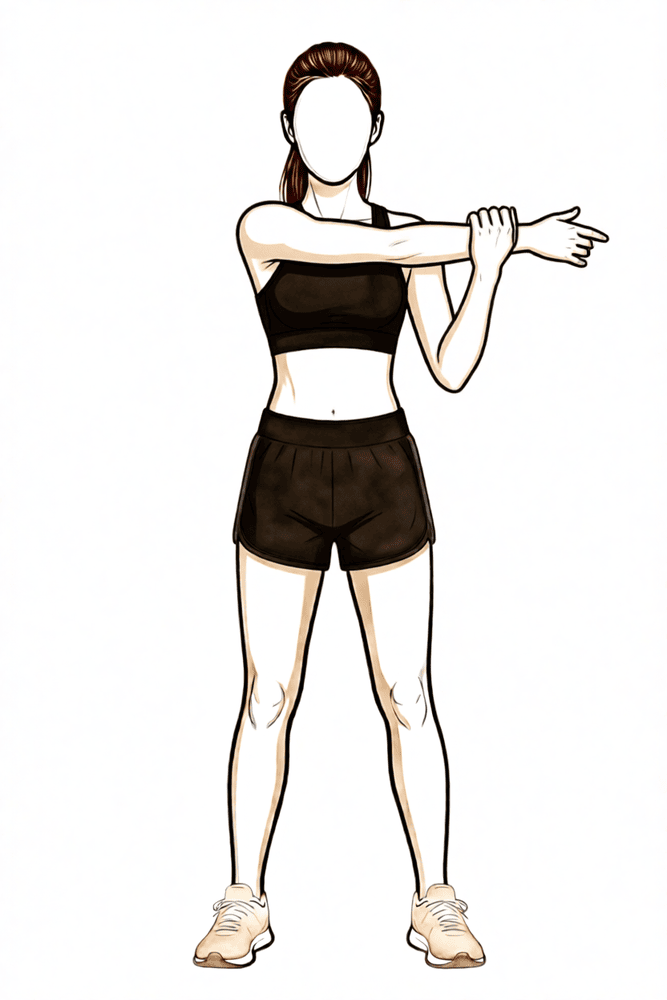
Cross-body stretch
Late in this phase only (after week 9). Use your good hand to draw the operated arm gently across your chest until you feel a comfortable stretch at the back of the shoulder. Keep it gentle — do not force.
Hold 10–20 seconds, a few times, as guided by your physiotherapist
The repair is healing but still weak, at only about 20–30% of normal strength at six weeks. So this phase restores movement, not strength. The sling is now off. You progress from assisted movement to moving the arm under your own power, starting in easy positions (lying down, or sliding along a table where gravity is taken out) and building towards upright. Light muscle-activation (isometric) drills are added late in the phase.
- Sling: weaned off (already mostly weaned by weeks 4–6).
- Movement allowed: full assisted movement, building to movement under your own power from about week 6. Build assisted/active forward elevation towards about 120° and beyond.
- Exercises: assisted forward lift in lying; assisted external rotation with a stick; seated table slide; over-door pulley; gentle isometric (press-and-hold) external rotation, internal rotation and abduction from about week 8; cross-body stretch late in the phase (after week 9).
Ready for the next phase when: you can lift the arm forwards under your own power to at least 115–120° with good control (no shrugging or hitching of the shoulder blade); your assisted/passive movement is full or nearly full and pain-free; gentle isometrics are tolerated without a pain flare-up afterwards; and pain is no more than about 2/10 before resisted work begins.
Small-medium tears — Phase III: Strengthening (weeks 12–16)
Kieran Hirpara 4.0
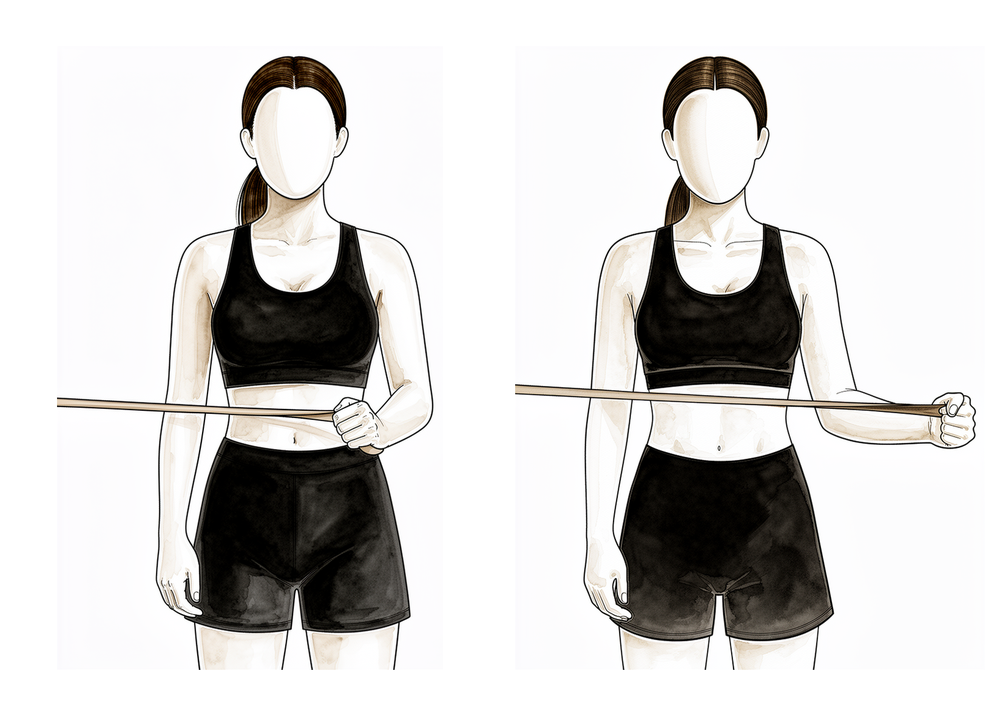
External rotation at shoulder height (band)
From about week 12, once overhead movement is comfortable. With your arm raised to shoulder height out to the side and the elbow bent to 90°, rotate the forearm upwards against a light band, then return with control. Use a light band and many repetitions, not heavy resistance.
As guided by your physiotherapist
Kieran Hirpara 4.0
Internal rotation with a stick
From about week 12 (later if the front cuff tendon was repaired). Hold a stick behind your back and use your good hand to draw the operated hand gently up your back, then lower with control. Keep it comfortable and within your physiotherapist's limits.
As guided by your physiotherapist
Kieran Hirpara 4.0
Full-can lift
From about week 12, once forward lifting is comfortable. Raise your arm forwards and slightly out to the side with your THUMB POINTING UP — the "full can" position — then lower with control. NEVER raise with the thumb pointing down ("empty can").
As guided by your physiotherapist

Kieran Hirpara 4.0
Low row (shoulder-blade setting)
From about week 12. With your hand on a fixed surface beside you, press down and back to draw the shoulder blade down and in, holding briefly. This steadies the shoulder blade (your physiotherapist may call it an "inferior glide").
As guided by your physiotherapist
Kieran Hirpara 4.0
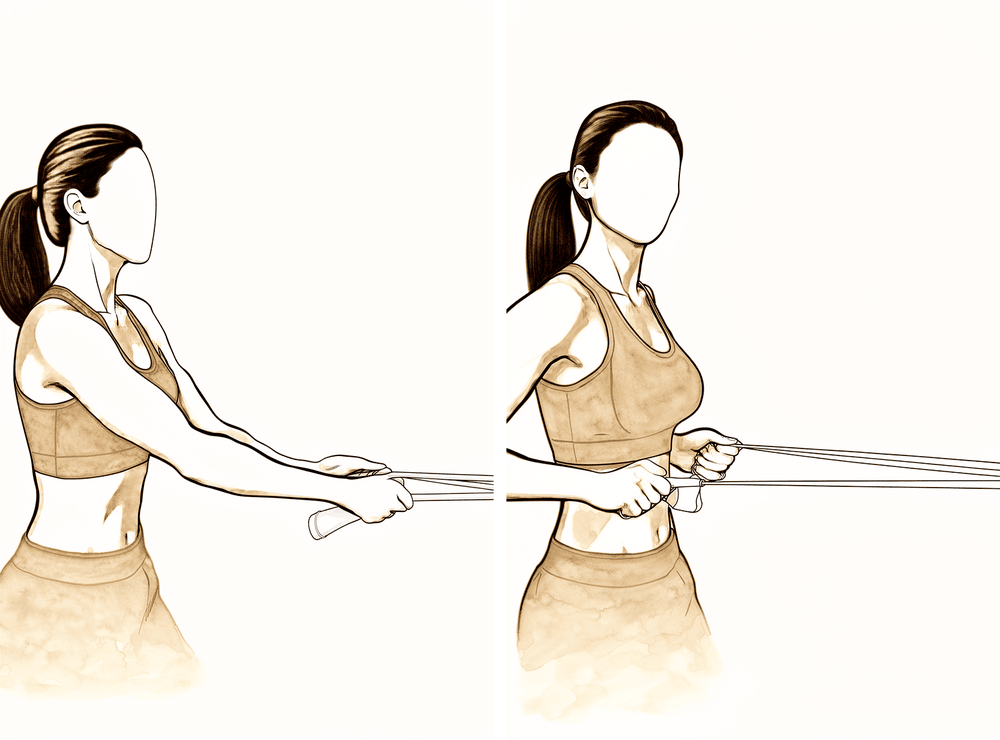
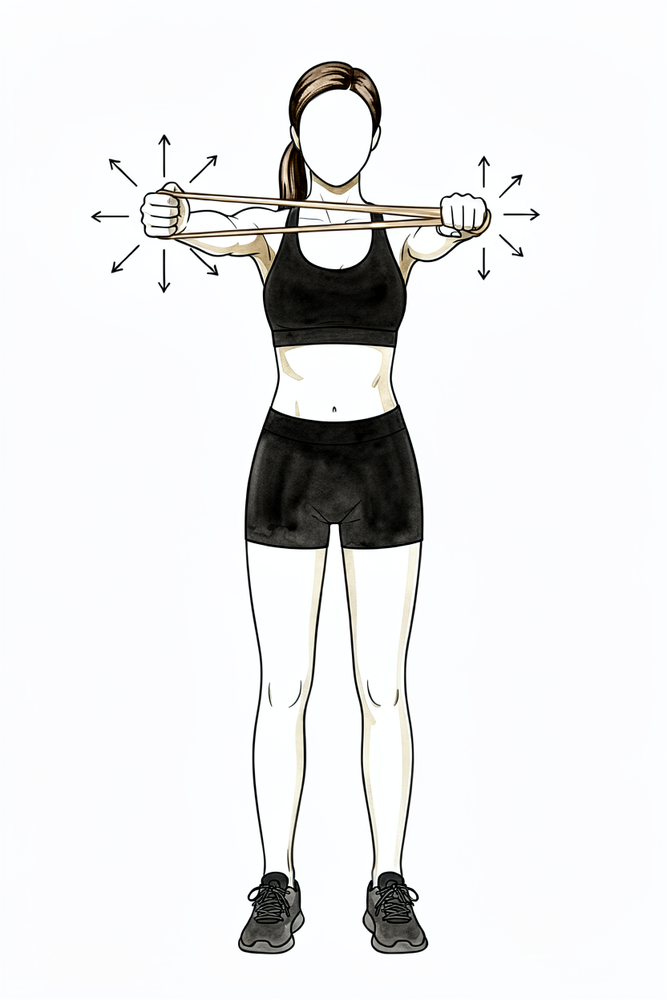
Resistance-band row
From about week 12. With a band anchored in front of you, pull the handles towards you, drawing your elbows back and squeezing your shoulder blades together, then return with control. Light band, high repetitions; stop if the shoulder becomes painful.
As guided by your physiotherapist

Kieran Hirpara 4.0
Sleeper stretch
From about week 12, if your physiotherapist directs it. Lie on your operated side with the arm forwards and elbow bent. Use your top hand to gently press the forearm down towards the bed until you feel a comfortable stretch at the back of the shoulder. Gentle only — do not force.
Hold 10–20 seconds, a few times, as guided by your physiotherapist
Kieran Hirpara 4.0
Rhythmic stabilisation
With your arm supported in front of you at about shoulder height, have your physiotherapist (or your good hand) apply small, gentle pushes from different directions while you hold the arm still and steady — do not let it move. This trains the shoulder's stabilising muscles to react. Keep all the efforts gentle.
As guided by your physiotherapist
This is where the repair matures fastest, and the focus shifts from regaining movement to rebuilding strength, endurance and control. Resistance work with light bands and light weights starts from about week 12: high repetitions, low loads. The golden rule is one plane at a time: you only strengthen in a direction once you have near-full, comfortable movement in that direction. Always lift with the thumb up, never thumb-down.
- Sling: none; full movement expected.
- Exercises: band external rotation at shoulder height; internal rotation with a stick; full-can lift; low row (shoulder-blade setting); resistance-band rows; sleeper stretch. Your physiotherapist may also add rhythmic stabilisation (gentle hold-steady drills where they push lightly on your arm and you resist) to retrain control; this is hands-on work with no diagram.
Ready for the next phase when: you have full, pain-free movement under your own power with even shoulder-blade control; no pain or swelling after strengthening sessions; comfortable resisted lifting in the shoulder-blade plane; and rotation strength building towards the other side (around 80% on gentle testing; full strength testing waits until much later).
Small-medium tears — Phase IV: Return to sport and work (weeks 16–24)
Kieran Hirpara 4.0
Full-can lift with a light weight
The full-can lift as before, now with a light weight, building the load gradually. Keep the THUMB UP. Stop if the shoulder is painful or swells afterwards.
As guided by your physiotherapist
This phase is the bridge back to a fully working shoulder, then a graduated return to sport and heavier work. You keep the range you have won and build the strength, power and endurance to use it confidently: reaching, carrying, working overhead. Returns are staged, not sudden; for sport, an interval programme that builds up volume and intensity step by step is the safest route back.
- Sling: none.
- Exercises: full-can lift with a light, gradually increasing weight; sport- and work-specific conditioning, progressive loading, and controlled higher-speed (plyometric) drills late in the phase as appropriate.
Ready to return when: your rotation strength is at least 85–90% of the other side; you have full, pain-free movement with no reactive swelling under heavier load; and you pass the task-specific tests for your sport or job. Return to sport or heavy work is usually around 4–6 months, based on meeting these criteria and on Dr Hirpara's and your physiotherapist's clearance, not the calendar alone.
Large / massive tears
This is the track for bigger tears (two or more tendons, or poorer tissue quality). The phases are the same, but each is held longer and progressed more cautiously to favour healing. Some surgeons deliberately delay formal therapy in this group; follow the specific instruction Dr Hirpara gives you. The sling is still a simple sling, with no abduction pillow, even for large or massive tears.
Large-massive tears — Phase I: Protection (weeks 0–6)
Kieran Hirpara 4.0
Pendulum swings
Lean forwards and let your operated arm hang down, completely relaxed. Make small circles by rocking your body, NOT by using your shoulder muscles. Your operated arm stays relaxed throughout.
10 in each direction, 2–3 times a day
Kieran Hirpara 4.0
Open and close hand
Make a tight fist, then open your hand fully. Keeps the hand moving and reduces swelling.
10 times per hour
Kieran Hirpara 4.0
Active wrist bends
Gently bend your wrist forwards, then back, as far as is comfortable.
10–15 times per hour
Kieran Hirpara 4.0
Active elbow bends
With your palm up, gently bend your elbow, then straighten it, keeping your upper arm tucked at your side.
10–15 times, 2–3 times a day
Kieran Hirpara 4.0
Shoulder-blade setting
Gently squeeze your shoulder blades downwards and together, hold, then relax. Your arm does not move.
Hold 5 seconds, 5 times, 2–3 times a day
As for the small/medium track, but movement is kept strictly protected and progressed more slowly. Your physiotherapist or good arm moves the shoulder for you; you stay relaxed. In this group, formal therapy is sometimes delayed to favour healing.
- Sling: simple sling for daytime support; sleep OUT of the sling; off for exercises and hygiene.
- Movement allowed: protected passive movement only, to the limit Dr Hirpara sets; generally less range than the small/medium track.
- Exercises: pendulum swings; gentle protected assisted movement as directed; hand, wrist and elbow movement; shoulder-blade setting.
Ready for the next phase when: your pain is controlled; there is no sign the repair has been over-stressed; and Dr Hirpara clears you to progress (this group is individualised; do not advance on the calendar alone).
Large-massive tears — Phase II: Restoring movement (weeks 6–12)
The sling comes off around week 6, but active movement under your own power is reintroduced later and more individually than in the small/medium track, to protect the repair longer. Resisted cuff work is deliberately held back.
- Sling: weaned around week 6.
- Movement allowed: assisted movement progressing towards movement under your own power later than the small/medium track; the exact timing is set by your physiotherapist based on how you are healing.
- Exercises: the same drills as the small/medium Phase II (assisted forward lift, assisted external rotation with a stick, table slide, over-door pulley), but progressed more slowly; resisted cuff work is deferred.
Ready for the next phase when: your movement under your own power is steadily improving; assisted/passive movement is full; you have good shoulder-blade control; and your team is satisfied the repair is healing well enough to begin loading.
Large-massive tears — Phase III: Strengthening (from about week 16)
Kieran Hirpara 4.0
Rhythmic stabilisation
With your arm supported in front of you at about shoulder height, have your physiotherapist (or your good hand) apply small, gentle pushes from different directions while you hold the arm still and steady — do not let it move. This trains the shoulder's stabilising muscles to react. Keep all the efforts gentle.
As guided by your physiotherapist
Strengthening is delayed to around week 16 rather than week 12, because the larger repair needs longer to mature. From there, the progression is the same as the small/medium strengthening phase: light bands and weights, high repetitions, low loads, one plane at a time, always thumb-up.
- Sling: none; full movement expected.
- Exercises: as for the small/medium strengthening phase (band external rotation, internal rotation with a stick, full-can lift, low row, band rows, sleeper stretch), started later and built up gradually. Rhythmic stabilisation (hands-on hold-steady drills) may be added as control improves.
Ready for the next phase when: you have full, pain-free movement under your own power; no pain or swelling after strengthening; and your strength is building evenly compared with the other side.
Large-massive tears — Phase IV: Return to sport and work (6 months onward)
The return to sport and heavy work sits later for large and massive tears, usually six months or more, and often longer, with a slower, lower-rate return. The build-up is the same staged, criteria-based approach as the small/medium track.
- Sling: none.
- Exercises: progressive loading and sport- or work-specific conditioning, built up gradually.
Ready to return when: both Dr Hirpara and your physiotherapist clear you; your rotation strength is at least 85% of the other side; and you have full, pain-free movement and endurance with no reactive swelling under load. Expect six months or more (often longer) and base the decision on meeting these criteria, not the calendar.
Returning to sport and work
For every repair, the return is criteria-based (pain-free, with adequate range, strength and endurance) and signed off by both Dr Hirpara and your physiotherapist, not decided by the calendar alone.
- Small / medium tears: sedentary work within a few weeks; heavier strengthening from 12–16 weeks; return to sport or heavy work from around 4–6 months.
- Large / massive tears: 6 months or more, frequently longer, with a slower and more cautious build-up.
For overhead and throwing sports, complete a graded interval programme before unrestricted play. Full (maximal) strength testing is deferred until 9–12 months after surgery.
Your early exercises
These are the gentle exercises for the early (protection) phase, starting on the ward and continuing at home, done with your operated arm out of the sling and your shoulder muscles relaxed. Start them as guided by your physiotherapist, and stop anything that causes sharp shoulder pain. They appear under each track's Phase I above.
After your protocol
This protocol works alongside the practice's general recovery advice; see managing post-operative pain and wound care. For the operation itself, see rotator cuff repair.
Evidence & references
Rotator Cuff Repair — Best-Evidence Rehabilitation Protocol
Scope: arthroscopic (and mini-open) rotator cuff repair (RCR). Two evidence sources combined: (1) local RAG corpus of 180,000+ Orthopaedic articles (citations below carry the journal/year), and (2) authoritative published institutional rehabilitation protocols (URLs below).
Each claim is flagged [STRONG] (RCT / meta-analysis / systematic review) or [CONSENSUS] (institutional protocol, narrative review, expert opinion) where relevant.
1. Consensus phased timeline (small/medium, "standard" 1–2 tendon repair)
Synthesised primarily from the Brigham & Women's Hospital (BWH) Arthroscopic RCR protocol and the BWH Standard of Care, cross-checked against the published institutional consensus. [CONSENSUS] for the exact week windows; [STRONG] that no specific week-by-week schedule is proven superior across all sizes (see controversies — Baumgarten 2009 Level I/II review; Chan 2014 meta-analysis).
| Phase | Weeks | Sling | ROM allowed | Active ROM | Strengthening | Precautions |
|---|---|---|---|---|---|---|
| I — Passive motion / protective ("healing") | 0–6 | Sling + small abduction cushion worn at all times, including sleep; remove only for exercise/icing/hygiene. Weaned wks 4–6. | PROM/AAROM only. Pendulums. Supine passive forward elevation to ~90–100°; passive ER (arm near side) to ~30°. Progress toward 120–140° FE / 30–60° ER by end of phase. | None. No active shoulder motion (tendon ~20% of normal strength at 4 wks). Active elbow/wrist/hand OK (curls only if biceps not involved). | Submaximal scapular + cuff setting; manual scapular work only. No resisted shoulder. | No active abduction/elevation; no pushing off with the arm for 6 wks. |
| II — Active-assisted -> active ROM | 6–12 | Discontinued (weaned wks 4–6). | Full PROM/AAROM to tolerance; supine->seated AAROM with cane/towel. | AAROM starts ~6 wks; AROM starts ~6–8 wks (gravity-eliminated -> upright). Goal >115° active FE before Phase III. | Begin light isotonic for deltoid, non-repaired cuff, scapula at ~10–12 wks (small tears); delayed to 16 wks for large/massive. | Avoid empty-can raises ever; no straight-arm lateral raises; light waist-level use only early. |
| III — Strengthening | 12–16 | None. | Should have full ROM with good stability. | Full active use for ADLs; return to full work + modified recreation. | Progressive cuff/scapular/deltoid strengthening; endurance/power. | <=5 lb lifting; no sudden jerk/push; thumb-up (full-can) raises only. |
| IV — Return to sport/work prep | 16–24 | None. | Maintain full ROM. | Sport/work-specific conditioning, plyometrics, progressive weight program. | Advanced/sport-specific strengthening. | <=10 lb until cleared; no painful progressions. |
| Return to sport / heavy work | >=4–6 months (often 6 mo; up to 12 mo for full recovery) | — | — | — | — | Surgeon + therapist clearance; pain-free, adequate ROM + endurance. |
Tendon-healing biology underpinning the schedule (BWH protocol): repair strength ~20% of normal at 4 wks, ~40% at 8 wks, ~60% at 12 wks, ~70% at 16 wks, ~80% at 32 wks — the rationale for no active motion before 6 wks and no strengthening before 12 wks. [CONSENSUS] (institutional, biologically grounded).
2. Small/medium vs large/massive tears (the key size distinction)
[STRONG] Tear size is the dominant modifier of healing/retear risk: weighted mean retear ~26.6% overall (Chamberlain/Namdari/Keener, What's New in Shoulder & Elbow Surgery, JBJS 2015), rising to ">90% in massive tears" (Hsu, Horneff, Gee, Immobilization After Rotator Cuff Repair, Orthop Clin North Am 2016). Retear correlates with larger tear size, advanced age, fatty infiltration.
| Variable | Small / medium (<3 cm, 1–2 tendons, good tissue) | Large / massive (>3–5 cm, >=2 tendons, poor tissue) |
|---|---|---|
| Sling/immobilizer duration | 4–6 wks | 6 wks (commonly), abduction pillow; some delay PT to 6 wks to protect healing |
| PT start | within first 6 wks | may be delayed up to 6 wks to promote healing (BWH hybrid protocol) |
| Active ROM start | ~6–8 wks | later, individualised; protect repair longer |
| Strengthening start | ~10–12 wks | delayed to ~16 wks |
| Return to sport/heavy work | 4–6 months | >=6 months, frequently longer; lower/slower return |
[STRONG] Review of online RCR protocols (Coda et al., Arthrosc Sports Med Rehabil 2020): for large/massive tears, sling/immobilizer use ranged 4–10 wks, with the plurality (~55%) at 6 wks. [STRONG] Substantial between-protocol variability exists (Galetta et al., J Shoulder Elbow Surg 2021, ACGME-program protocol survey; Coda 2020) — i.e., no single validated schedule; size-stratification is consensus-driven.
Return-to-work pooled data: [STRONG] Haunschild et al. (Am J Sports Med 2021) systematic review/meta-analysis quantifies return-to-work after primary RCR (timeline varies with job demand; heavy-labor return slower).
3. KEY CONTROVERSY — Early vs Delayed (immobilization) passive motion after arthroscopic RCR
This is the central evidence debate. Two competing concerns: early PROM reduces post-op stiffness; delayed/immobilization may protect tendon-to-bone healing (reduce retear), especially in larger tears.
Evidence FOR early passive motion (less stiffness, no proven healing penalty in small/medium)
- [STRONG] Keener et al. RCT — early vs delayed passive motion after arthroscopic repair of full-thickness tears, 114 patients, small-to-medium tears (cited in Braman/Neviaser/Parsons, What's New in Shoulder and Elbow Surgery, JBJS 2014): the landmark RCT in this debate; early motion improved early ROM without a clear healing penalty in this size class.
- [STRONG] Mazzocca et al. RCT (Arthroscopy 2017): no difference between delayed and early motion in WORC scores, clinical outcomes, or structural failure at 6 months; both protocols equivalent on patient-reported outcomes.
- [STRONG] Saltzman et al. (J Shoulder Elbow Surg 2017) — systematic review of overlapping meta-analyses: early-motion protocols may give superior early ROM; differences trend toward equivalence by ~1 year.
- [STRONG] Li et al. meta-analysis (Medicine 2018): early passive motion (EPM) gives superior ROM recovery, with the caveat below.
Evidence FOR delayed motion / immobilization (protect healing, lower retear in larger tears)
- [STRONG] Chan et al. meta-analysis (J Shoulder Elbow Surg 2014): documents the shift toward delaying motion over healing concerns; early motion improves ROM but raises healing-integrity questions.
- [STRONG] Li et al. meta-analysis (Medicine 2018): EPM "may adversely affect shoulder function" and "might result in lower rates of tendon healing in large-sized tears" — i.e., the early-motion benefit is size-dependent and may cost healing in big tears.
- [STRONG] Gallagher et al. systematic review (Phys Sportsmed 2015): early aggressive rehab may compromise repair integrity; conclusions size/quality dependent.
- [STRONG] Stillson et al. (J Am Acad Orthop Surg 2022, large Medicare cohort): strong association between starting PT within 1 week post-op and increased revision/revision-surgery rates — the largest study to date on rehab timing; cautions against very early aggressive therapy.
- Supporting basic-science: delayed early passive motion was harmless to cuff healing in animal models (rabbit model cited in Thigpen/Shaffer/Kissenberth, Clin Sports Med 2015, "Knowing the Speed Limit").
Current consensus
[STRONG/CONSENSUS] The meta-analytic bottom line (Mazzocca 2017 RCT; Saltzman 2017; Chan 2014): for small-to-medium tears, early and delayed PROM converge by ~6–12 months — timing is largely surgeon preference and does not change final outcome, so either is defensible. For large/massive tears (and poor tissue), the balance tips toward a delayed / protected approach to favor healing and lower retear (Li 2018; Hsu 2016), and very early (<1 wk) aggressive PT should be avoided (Stillson 2022). This is exactly the size-stratified pattern the BWH protocol encodes (delay PT/strengthening for large/massive). Note Cochrane-level certainty remains low — no protocol is proven superior on patient-important outcomes (Baumgarten 2009 Level I/II review found insufficient evidence for a single optimal protocol).
4. Practice shift to flag
- Historical default = early passive motion (minimize stiffness). Over the last decade the field moved toward delaying/protecting motion in larger tears on healing grounds (Chan 2014; Li 2018), then partially back toward equipoise for small/medium tears as RCTs/meta-analyses showed equivalent final outcomes (Mazzocca 2017; Saltzman 2017).
- Newest signal: avoid ultra-early (<1 week) PT regardless — associated with higher revision rates (Stillson 2022, Medicare cohort). Net current practice = size-stratified: standard 6-wk sling + passive-only phase, active ROM ~6–8 wks, strengthening ~12 wks for small/medium and ~16 wks for large/massive, RTS 4–6+ months.
CITATIONS
RAG corpus articles (title / journal / year)
- Keener et al. — early vs delayed passive motion after arthroscopic full-thickness RCR (small–medium, n=114). Cited in Braman J, Neviaser A, Parsons B. What's New in Shoulder and Elbow Surgery. J Bone Joint Surg. 2014;96(20). [STRONG — RCT]
- Mazzocca AD, Arciero RA, Shea KP, et al. The Effect of Early Range of Motion on Quality of Life, Clinical Outcome, and Repair Integrity After Arthroscopic Rotator Cuff Repair. Arthroscopy. 2017;33(6). [STRONG — RCT]
- Chan K, MacDermid JC, Hoppe DJ, et al. Delayed versus early motion after arthroscopic rotator cuff repair: a meta-analysis. J Shoulder Elbow Surg. 2014. [STRONG — meta-analysis]
- Saltzman BM, Zuke WA, Go B, et al. Does early motion lead to a higher failure rate or better outcomes after arthroscopic rotator cuff repair? A systematic review of overlapping meta-analyses. J Shoulder Elbow Surg. 2017;26(9):1681-1691. [STRONG]
- Li S, Sun H, Luo X, et al. The clinical effect of rehabilitation following arthroscopic rotator cuff repair (meta-analysis). Medicine. 2018. [STRONG — meta-analysis]
- Gallagher BP, Bishop ME, Tjoumakaris FP, et al. Early versus delayed rehabilitation following arthroscopic rotator cuff repair: A systematic review. Phys Sportsmed. 2015. [STRONG]
- Stillson QA, Sun JQ, Maninang M, et al. Effect of Physical Therapy and Rehabilitation Timing on Rotator Cuff Repair Revisions and Capsulitis. J Am Acad Orthop Surg. 2022 (large Medicare cohort). [STRONG]
- Baumgarten KM, Vidal AF, Wright RW. Rotator Cuff Repair Rehabilitation: A Level I and II Systematic Review. Sports Health. 2009 (insufficient evidence for a single optimal protocol). [STRONG]
- Parsons BO, Gruson KI, Chen DD, et al. Does slower rehabilitation after arthroscopic rotator cuff repair lead to long-term stiffness? J Shoulder Elbow Surg. 2010;19(7):1034-1039. [moderate]
- Thigpen CA, Shaffer MA, Kissenberth MJ. Knowing the Speed Limit. Clin Sports Med. 2015. [CONSENSUS/review]
- Chamberlain AM, Namdari S, Keener JD. What's New in Shoulder and Elbow Surgery? J Bone Joint Surg. 2015;97(20) (retear ~26.6%; predictors). [STRONG — pooled]
- Hsu JE, Horneff JG, Gee AO. Immobilization After Rotator Cuff Repair. Orthop Clin North Am. 2016 (retear up to >90% massive). [CONSENSUS/review]
- Coda RG, Cheema SG, Hermanns CA, et al. A Review of Online Rehabilitation Protocols Designated for Rotator Cuff Repairs. Arthrosc Sports Med Rehabil. 2020;2(3) (sling 4–10 wks; ~55% at 6 wks for large/massive). [STRONG — protocol systematic review]
- Galetta MD, Keller RE, Sabbag OD, et al. Rehabilitation variability after rotator cuff repair. J Shoulder Elbow Surg. 2021;30(6) (ACGME program protocol variability). [STRONG]
- Haunschild ED, Gilat R, Lavoie-Gagne O, et al. Return to Work After Primary Rotator Cuff Repair: A Systematic Review and Meta-analysis. Am J Sports Med. 2021. [STRONG]
Published institutional protocols (URLs)
- Brigham & Women's Hospital — Arthroscopic Rotator Cuff Repair Protocol (hybrid patient/therapist; full phased timeline, tear-size stratification): https://www.brighamandwomens.org/assets/BWH/patients-and-families/rehabilitation-services/pdfs/shoulder-arthroscopic-rct-repair-protocol-hybrid-patient-therapist.pdf
- Brigham & Women's Hospital — Standard of Care: Arthroscopic repair of a rotator cuff tear (small/medium/large-massive protocol families; literature review): https://www.brighamandwomens.org/assets/BWH/patients-and-families/rehabilitation-services/pdfs/shoulder-rotator-cuff-repair-arthroscopic.pdf
Overall evidence grade: the biology-based phase structure is [CONSENSUS] (well-aligned across institutions). The early-vs-delayed motion question is supported by multiple [STRONG] RCTs and meta-analyses, which converge on equivalence for small/medium tears and a protect-healing tilt for large/massive — but Cochrane-level certainty for any single optimal schedule remains LOW.