Patients › Rehabilitation
Total Shoulder Arthroplasty
Phase-by-phase rehabilitation protocol after total shoulder replacement, with criteria to progress and the early exercise program.
This protocol guides your recovery after total shoulder arthroplasty (total shoulder replacement) with Dr Kieran Hirpara at Mater Private Hospital Rockhampton. Each phase below opens with a plain-English explanation of what is happening and what matters most, followed by the structured protocol written for your physiotherapist; bring this page or its PDF to your first physiotherapy visit so your rehabilitation stays coordinated. Your physiotherapist may adjust the plan depending on how your recovery progresses.
If you have any concerns about your wound after surgery, get in touch with the rooms. It is often helpful to take a photo of the wound and email it for review.
What to expect
You will have a numb arm when you wake up, and the feeling usually returns within 6 to 12 hours. Rarely, some numbness or weakness can continue for 2 to 3 days.
When you wake up from your operation, you will be in a sling, with a big pad over your shoulder. This pad will be removed before discharge. Underneath is a waterproof dressing covering a surgical glue strip, which can be left alone for 2 weeks. Your stitches are dissolvable and do not need removing, but there may be some tails of stitch at each end of the wound that can be cut flush with the skin after 2 weeks. You will be booked to see our nurse for a wound check 1–2 weeks after your surgery. If you are unable to attend the dressing check, you can remove your dressing yourself after 2 weeks.
The journey at a glance:
- Protection: weeks 0–3
- Intermediate: weeks 4–6
- Intermediate, continued: weeks 7–8
- Transitional: weeks 9–11
- Advanced strengthening: weeks 12–16
Approximate timeframes for return to activities:
- Driving: 6 weeks
- Swimming: breaststroke 8 weeks; freestyle 12 weeks
- Golf: 4–6 months
- Lifting: light lifting can begin at 6 weeks; avoid lifting heavy items for 6 months
- Work: sedentary job 6 weeks; manual job guided by your surgeon
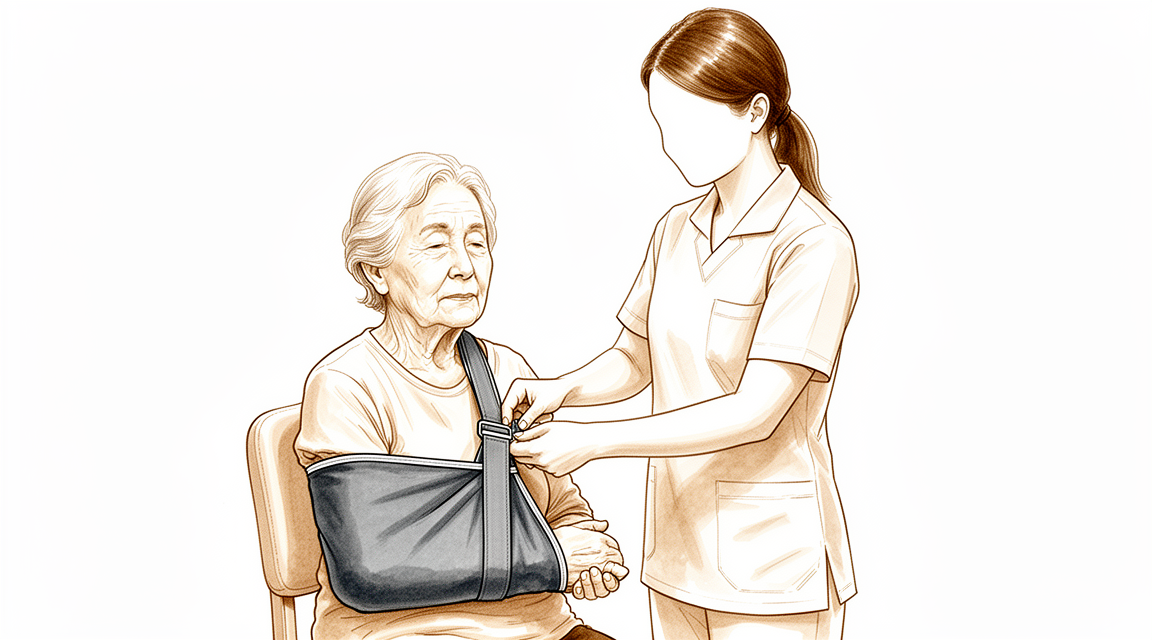
Wearing your sling
Your sling (shoulder immobiliser) supports the shoulder while it heals. The rules are simple:
- Wear it for 6 weeks, including while sleeping.
- Take it off only for showers and for your exercises, once you have been shown how, and whenever the sling is off, keep your arm by your side.
- Resting at home, it can come off if you are sensible about it: arm supported on a pillow while sitting.
- Use ice if the shoulder is swollen or sore, especially after exercise.
Fitting it correctly matters, and a loose sling does not support the shoulder properly:
- Position your elbow right into the corner of the sling, well supported.
- The end of the sling should rest at the knuckle of your little finger. If your hand extends further out, the sling is not supporting you properly.
- The sling has two Velcro straps: one for your neck, one for your waist.
- With your elbow and forearm positioned, use your non-operated arm to swing the upper strap around your neck and attach it through the upper loop.
- Attach the lower strap around your waist through the lower loop the same way.
While you are in the sling, watch your posture. Keep your ears, shoulders and hips in line and avoid letting your shoulders slump; good posture protects your back and helps prevent your shoulder stiffening. A rolled-up towel in the small of your back when sitting is a useful reminder.
Before you go home, the ward physiotherapist will fit your sling, teach you to manage it independently, and start you on the gentle exercises below. Three terms come up often in shoulder rehabilitation, and it helps to know the difference: active range of motion (AROM) means moving the arm yourself, without aid or help; active-assisted range of motion (AAROM) means using the other arm or an object to help the arm move; and passive range of motion (PROM) means the arm stays completely relaxed while the other arm or an outside force does 100% of the work. Your physiotherapist will tell you which kind of movement each exercise uses.
The early rehabilitation rules while you are in hospital and in the first weeks at home:
- You need to sleep in the sling.
- Use ice for pain relief if needed.
- When wearing your sling, relax your shoulder and let the sling take the weight of your arm.
- Take your painkillers before you do your exercises, and before your physiotherapy appointments.
- You are allowed to take your arm out of the sling for your exercises and showering.
- You need to wear your sling for 6 weeks, especially when out of the house.
- Unless you have chosen to arrange your own physiotherapy, an appointment has been made for you and is detailed in your discharge pack.
- If you have any problems, contact the office or let your physiotherapist know.
These are your early exercises, started in hospital and continued at home as guided by your physiotherapist:
Your first days in hospital
Kieran Hirpara 4.0
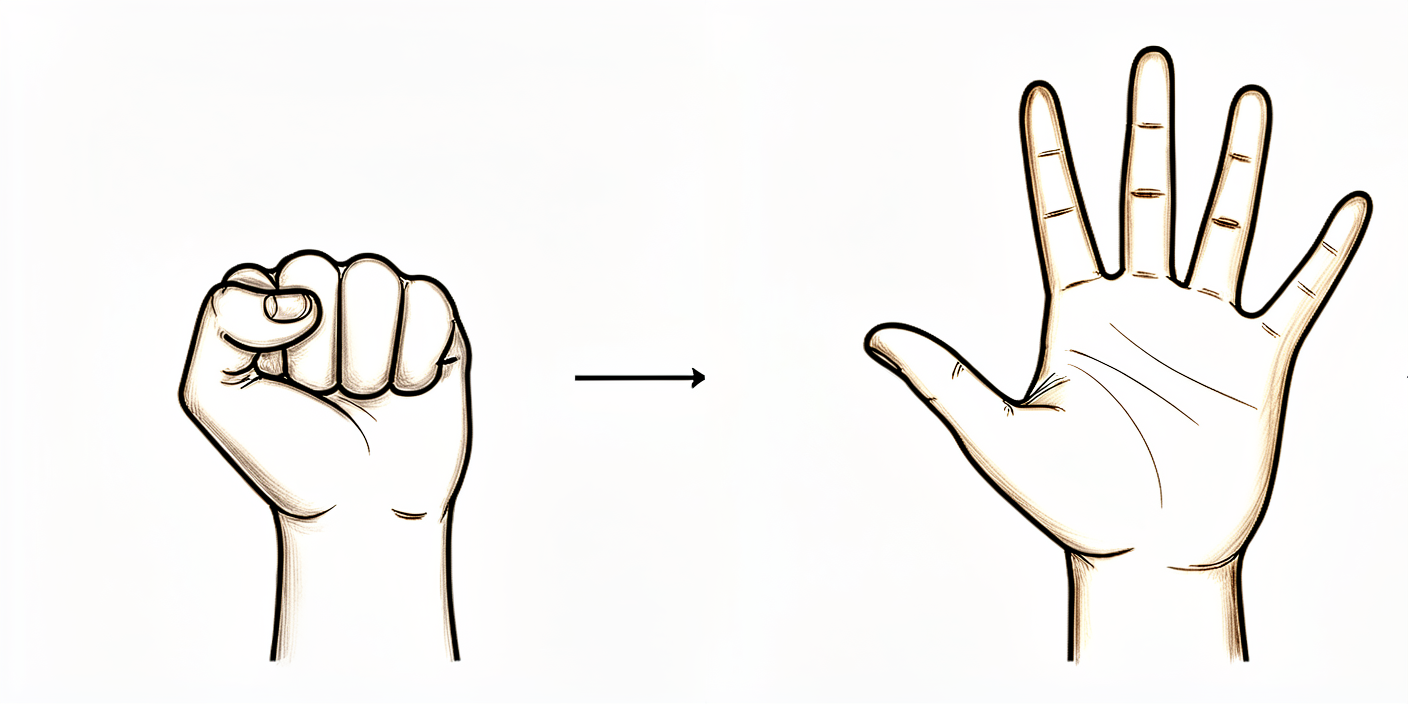
Open and close hand
Keep your hand and fingers moving by opening and closing them, or by squeezing a soft ball.
10 times, 3 times per day
Kieran Hirpara 4.0
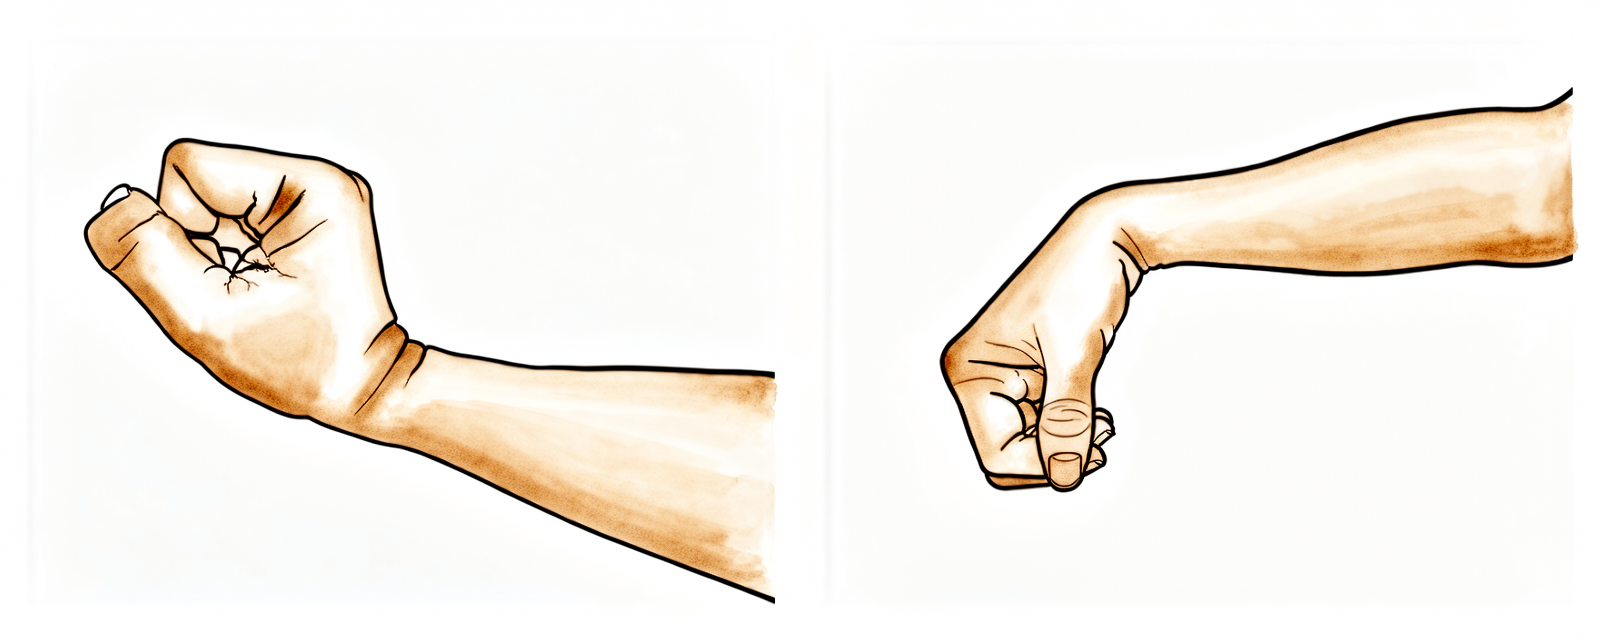
Wrist movement
Keep your wrist moving by bending it forwards, backwards and side to side.
10 times, 3 times per day
Kieran Hirpara 4.0
Elbow
Bend and straighten your elbow.
10 times, 3 times per day
Kieran Hirpara 4.0
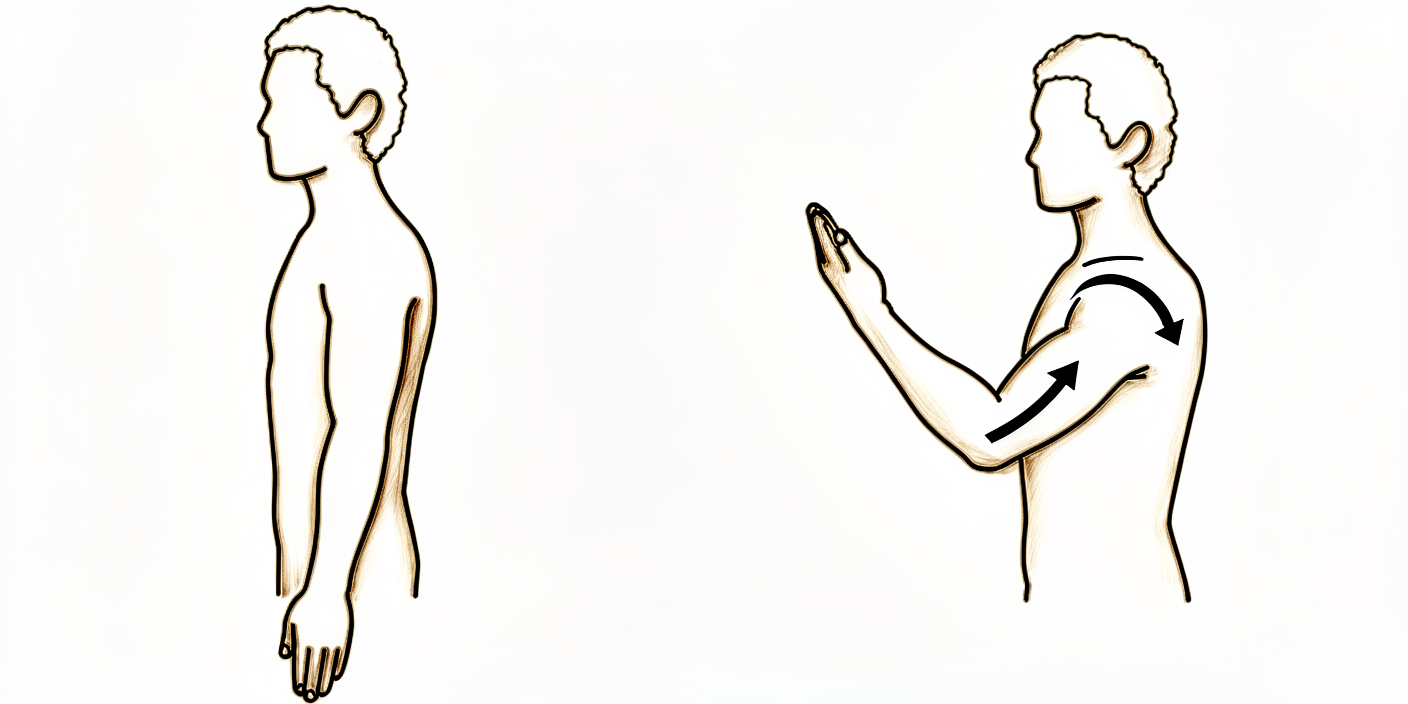
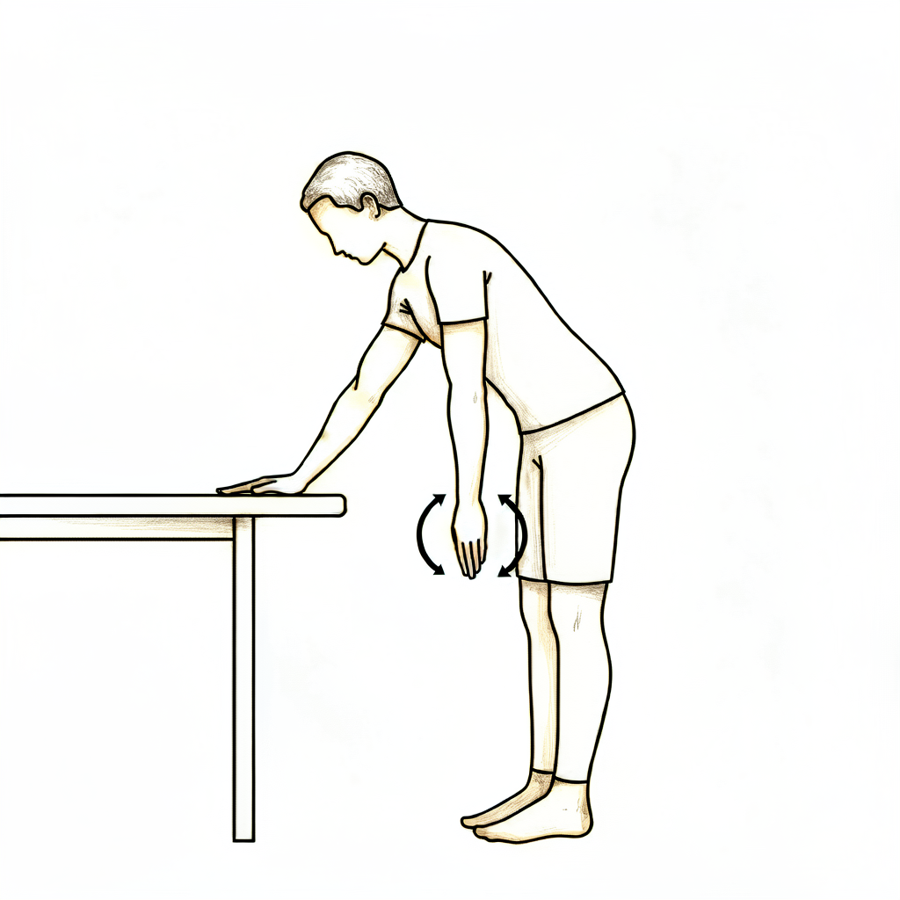
Pendulums
This is a passive exercise. Lean forward and let your arm relax down. Use your body to move the arm gently either clockwise or anti-clockwise, along with forwards, backwards and side to side.
Approximately 30 seconds each way, 3 times per day
Kieran Hirpara 4.0
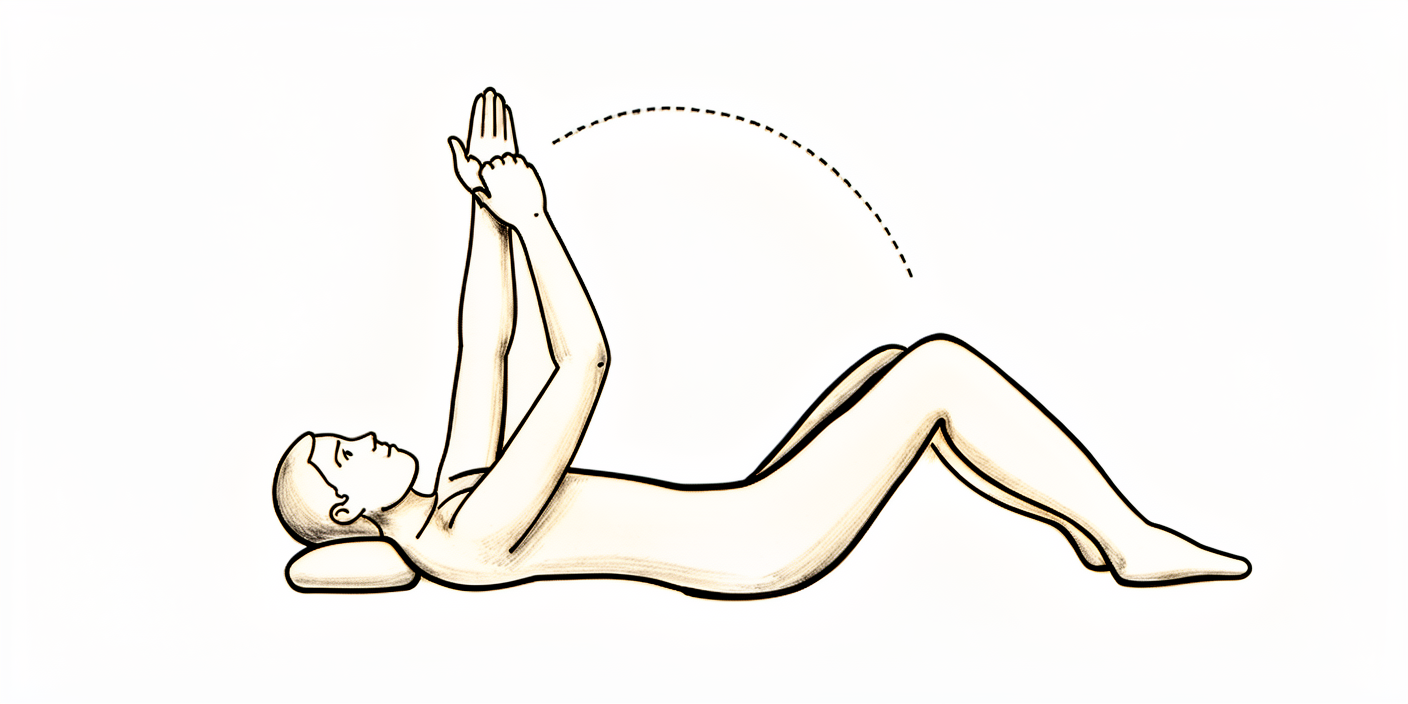
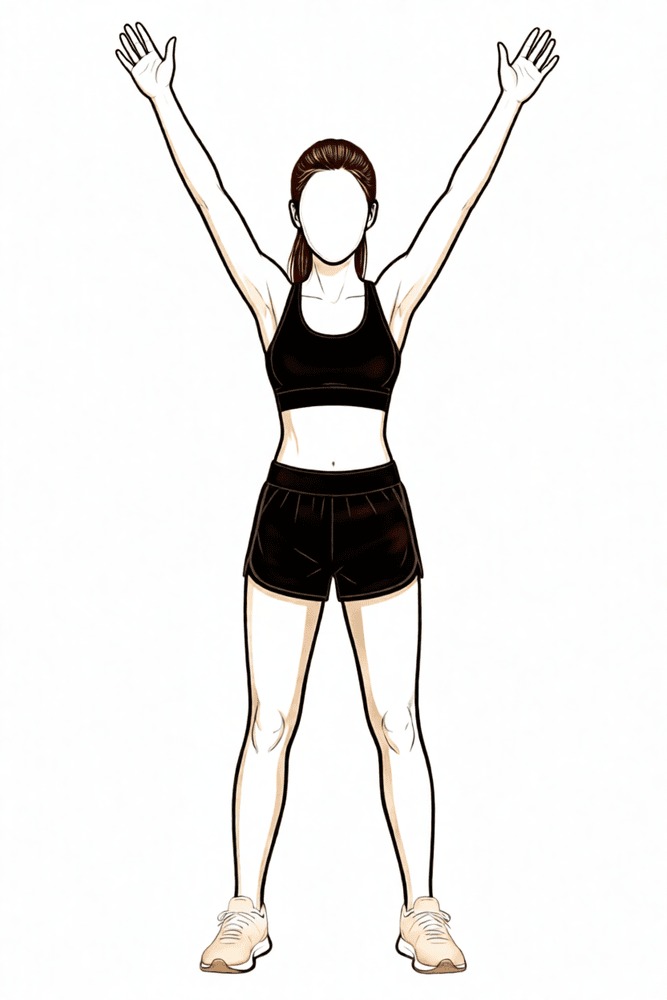
Forward flexion (assisted)
Sitting on a chair and leaning forward, cradle your operated arm with the other arm and gently move your arm upwards in front of you. Lower it back down with the assistance of your non-operated arm. You could also try lying on your back in bed and helping the arm upwards if you would prefer.
10 times, 3 times per day
Kieran Hirpara 4.0
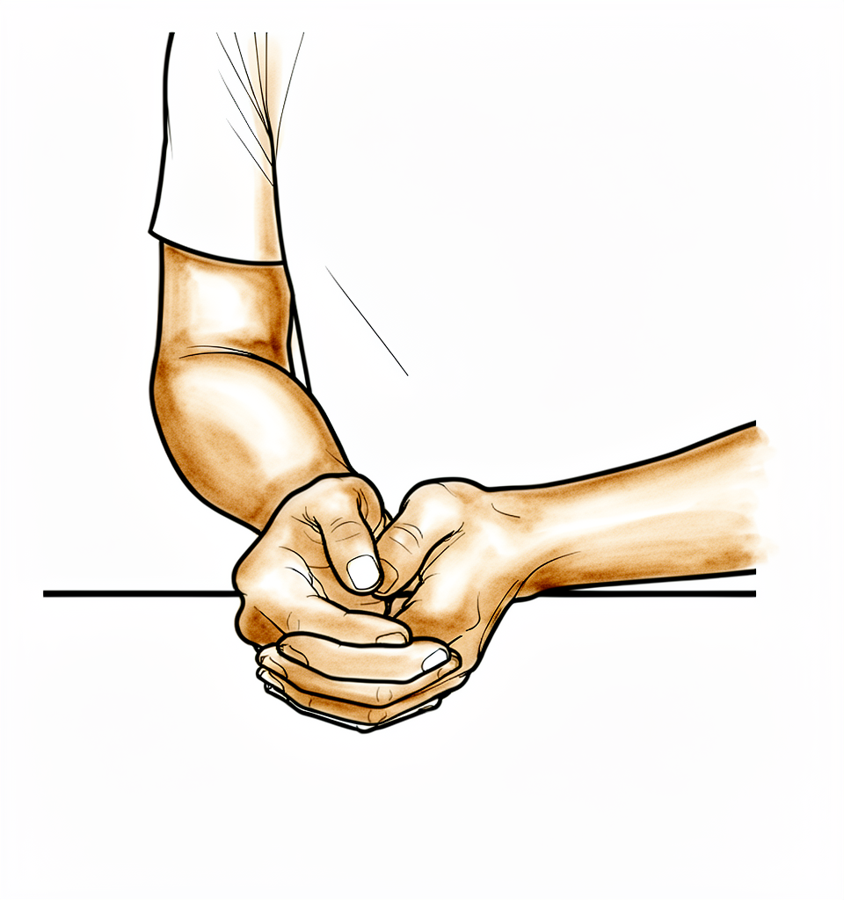
Abduction (assisted)
Sitting on a chair and leaning forward, cradle the arm again and help it out to the side (like rocking a baby).
10 times, 3 times per day
Kieran Hirpara 4.0
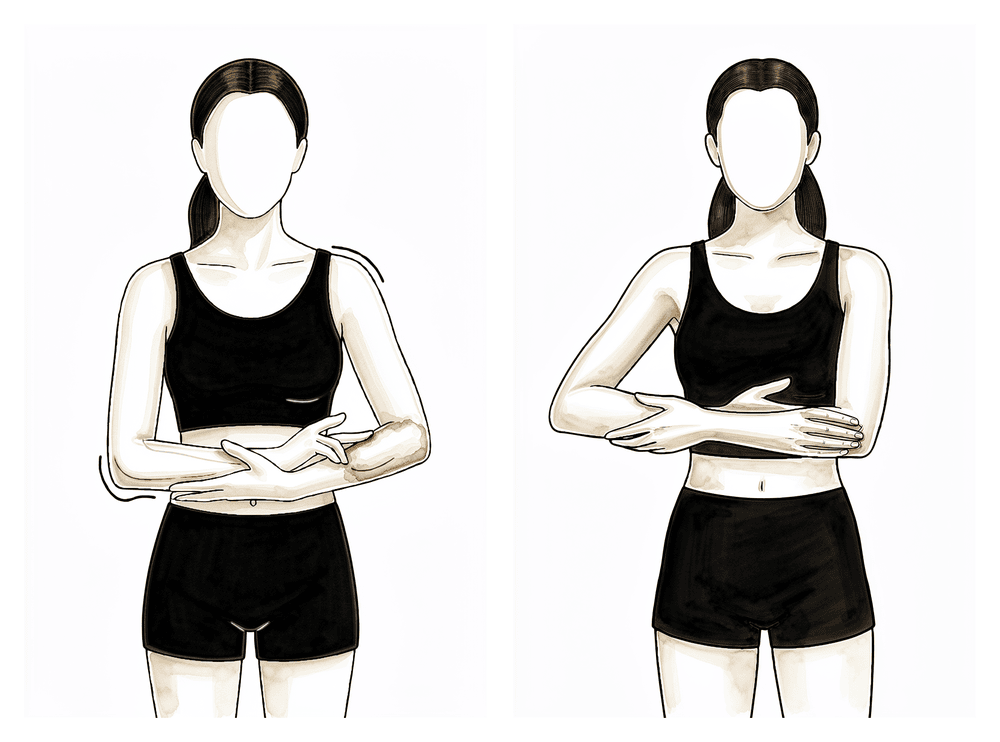
External rotation
Sitting on a chair, only move your arm from where it would be in the sling to pointing straight in front of you. Don't go further outwards.
Gently, 10 times, 3 times per day
Kieran Hirpara 4.0
Lower trapezius setting
Squeeze your shoulder blades downwards and together.
Hold 5 seconds, 5 times; repeat 3 times daily

Kieran Hirpara 4.0
Upper trapezius stretch
Use your non-operated arm to bring your ear towards your shoulder, away from the operated side.
Hold 10 seconds, 3 times; repeat 3 times per day

Kieran Hirpara 4.0
Levator scapulae stretch
Use your non-operated arm to bring your nose towards your nipple or armpit area.
Hold 10 seconds, 3 times; repeat 3 times per day
Phase I — Protection (Weeks 0–3)
Kieran Hirpara 4.0
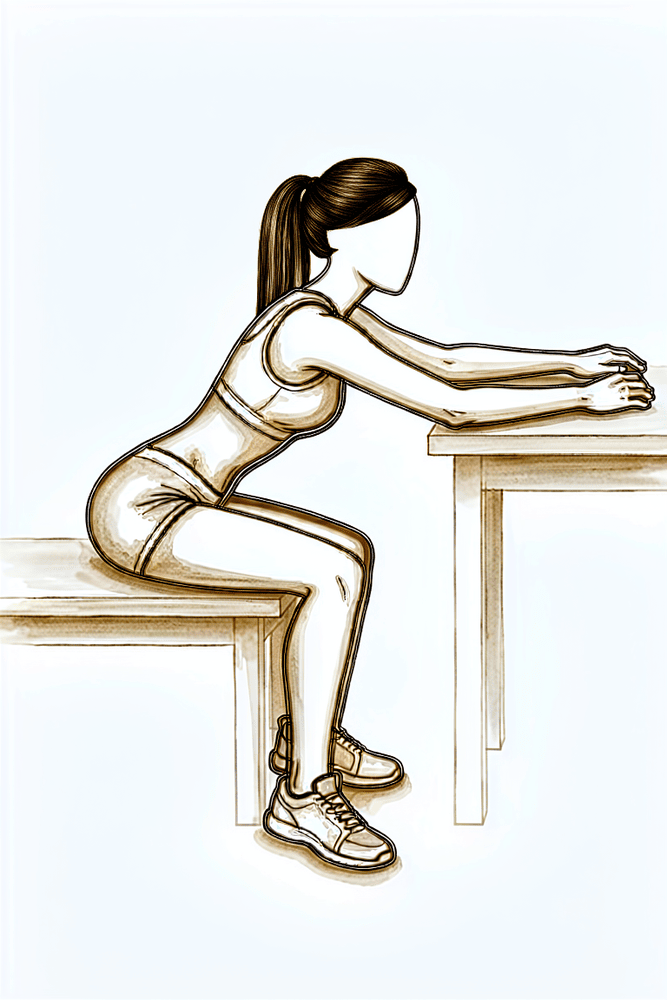
Seated table slide
Sit at a table with your forearm resting on the surface. Let your hand slide forwards along the table as you lean gently in, letting the shoulder fold forwards without using the shoulder muscles, then slide back. Keep the movement relaxed and comfortable.
As guided by your physiotherapist
The first three weeks are about protecting your new shoulder while it settles. You will be in the sling (held in a neutral position and worn at night), using ice and compression for swelling, while your physiotherapist gently moves the shoulder for you within set limits and you keep your hand, wrist and elbow moving yourself. From week 2, gentle shoulder-blade exercises and ball squeezes begin. The rules that matter most: no active shoulder movement, no reaching behind your back, no lifting, and no pushing up through your hands.
For your physiotherapist:
Goals
- Protect surgical repair
- Reduce swelling, minimise pain
- Maintain upper extremity (UE) range of motion in elbow, hand and wrist
- Gradually increase shoulder passive range of motion (PROM)
- Minimise muscle inhibition
- Patient education
Management
- Sling: neutral rotation; use at night while sleeping
- Swelling management: ice, compression
- Range of motion / mobility:
- PROM: external rotation (ER) ≤ 30 degrees in the scapular plane; internal rotation (IR) to belt line in the scapular plane
- Flexion/scaption to tolerance; abduction (ABD) ≤ 90 degrees; pendulums; seated glenohumeral (GH) flexion table slide; seated horizontal table slide
- Active-assisted range of motion (AAROM): active-assisted shoulder flexion
- Active range of motion (AROM): elbow, hand, wrist
- Strengthening (week 2):
- Periscapular: scapular retraction, prone scapular retraction, standing scapular setting, supported scapular setting, inferior glide, low row
- Ball squeeze
Precautions
- No shoulder AROM
- No reaching behind back, especially into internal rotation
- No excessive shoulder external rotation or abduction
- No lifting of objects
- No supporting of body weight with hands
- Place small pillow/towel roll under elbow while lying on back to avoid shoulder hyperextension
Criteria to progress
- ≥ 50% shoulder PROM flexion and scaption compared with the contralateral side
- ≤ 90 degrees of shoulder ABD PROM
- ≤ 30 degrees of shoulder ER PROM in the scapular plane
- ≥ 70 degrees of IR PROM in the scapular plane
- Palpable muscle contraction felt in scapular musculature
- Pain < 4/10
- No complications with Phase I
Phase II — Intermediate (Weeks 4–6)
Kieran Hirpara 4.0
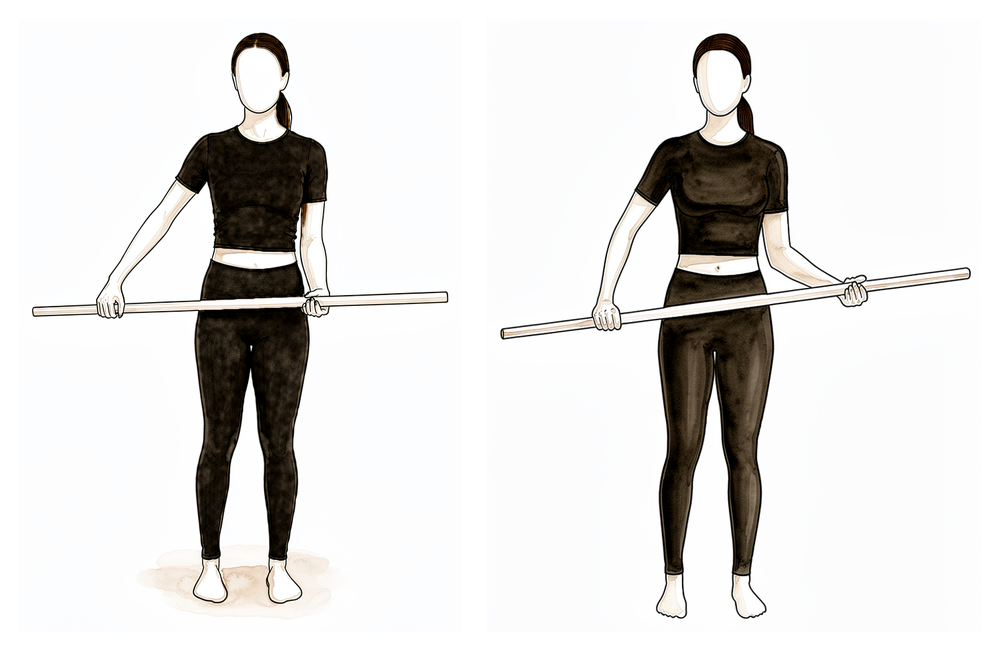
Cane external rotation stretch
Lie on your back with your elbow by your side and bent to 90 degrees. Hold a cane or stick in both hands and use the non-operated arm to push the hand of the operated arm gently outwards. Stay within the limit your physiotherapist sets for this phase, and never force the movement.
As guided by your physiotherapist
The shoulder is still being protected, but movement now builds steadily. The sling stays on at night, and during the day it is gradually weaned off over these two weeks. Your physiotherapist progresses the passive movement towards full range (still within set external rotation and abduction limits), adds assisted and then active movements, and starts gentle activation work for the rotator cuff and shoulder-blade muscles. Lift nothing heavier than a coffee cup, and keep avoiding extremes of rotation and reaching.
For your physiotherapist:
Goals
- Continue to protect surgical repair
- Reduce swelling, minimise pain
- Gradually increase shoulder PROM
- Minimise substitution patterns with AROM and AAROM
- Improve periscapular muscle activation/strength
- Initiate rotator cuff (RTC) activation (external rotators)
- Patient education
Management
- Sling: use at night while sleeping; gradually start weaning the sling over the next two weeks during the day
- Continue with Phase I interventions
- Range of motion / mobility:
- PROM: full, with the exception of ER ≤ 30 degrees in the scapular plane and ABD ≤ 90 degrees
- AAROM: shoulder flexion with cane, cane external rotation stretch, washcloth press, seated shoulder elevation with cane
- AROM: supine flexion, salutes, supine punch
- Strengthening:
- Rotator cuff: external rotation isometrics
- Periscapular: row on physioball, serratus punches
- Elbow: biceps curl, resistance band biceps curls and triceps
- Motor control:
- ER in scaption and flexion 90–125 (rhythmic stabilisation)
- Stretching:
- Side-lying horizontal adduction
Precautions
- No excessive shoulder external rotation or abduction
- No lifting of objects heavier than a coffee cup
- No supporting of body weight with hands
- Place small pillow/towel roll under elbow while lying on back to avoid shoulder hyperextension
Criteria to progress
- ≥ 75% shoulder PROM flexion and scaption compared with the contralateral side
- ≥ 75% shoulder PROM IR in the scapular plane compared with the contralateral side
- 30 degrees of shoulder PROM ER in the scapular plane
- 90 degrees of shoulder PROM ABD
- Minimal substitution patterns with AAROM
- AROM shoulder elevation to 100 degrees with minimal substitution patterns
- Pain < 4/10
- No complications with Phase II
Phase III — Intermediate, continued (Weeks 7–8)
Kieran Hirpara 4.0
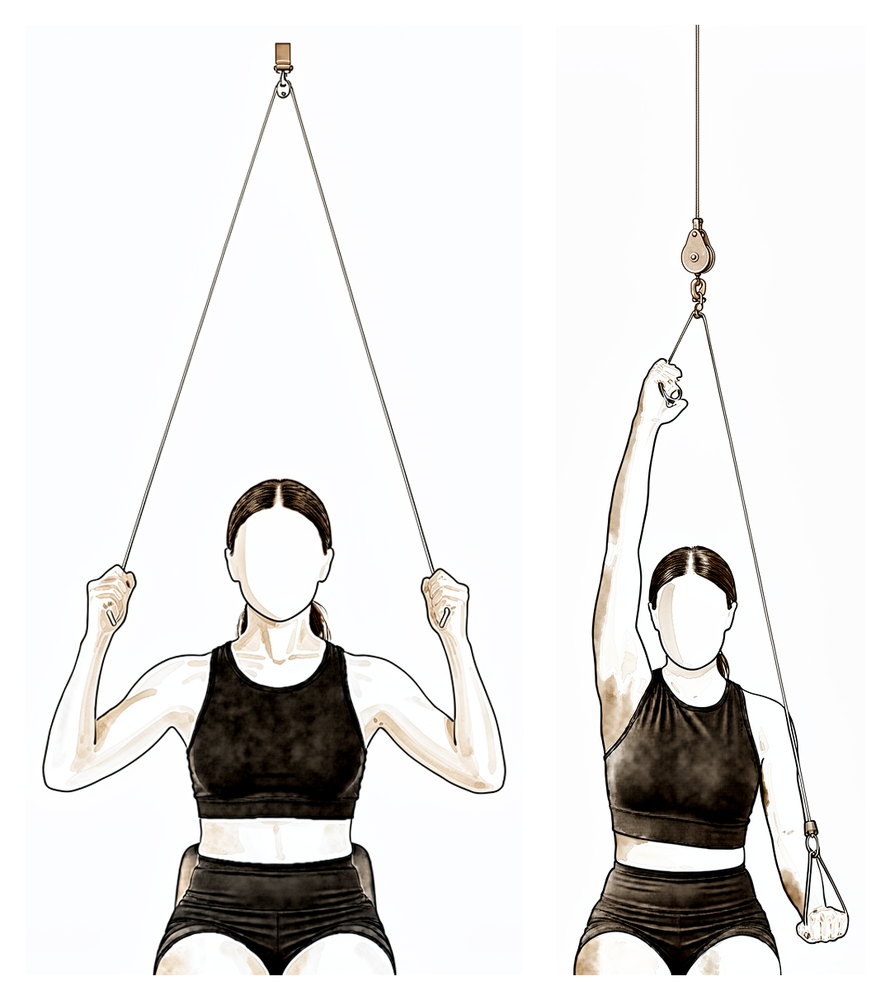
Over-door pulley
Sit under an over-door pulley with a handle in each hand. Pull down with the non-operated arm to raise the operated arm, keeping the operated arm relaxed, then lower it slowly and smoothly.
As guided by your physiotherapist

Kieran Hirpara 4.0
Sleeper stretch
Lie on your operated side with the arm out in front at shoulder height and the elbow bent to 90 degrees. Use the other hand to press the forearm gently down towards the bed until you feel a comfortable stretch at the back of the shoulder. Do not force the stretch.
As guided by your physiotherapist
Kieran Hirpara 4.0
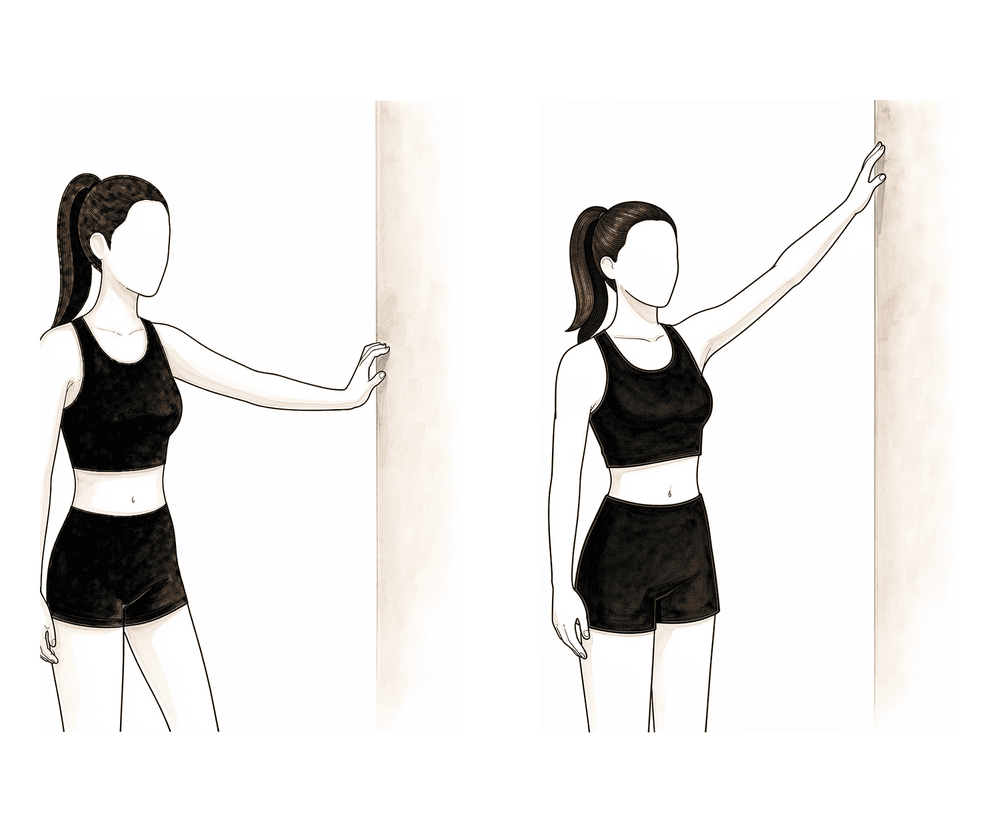
Wall walk out to the side
Stand side-on to a wall with your fingertips resting on it. Walk your fingers up the wall out to the side, raising the arm as far as is comfortable, then walk them back down with control. The wall supports the arm as you regain movement out to the side.
As guided by your physiotherapist
The sling is now finished with, and the aim is full movement in every direction, assisted where needed and increasingly under your own power. Strengthening steps up, with resistance-band work for the rotator cuff and shoulder-blade muscles, and you can return to full everyday activities. Two limits remain: nothing heavier than 5 kg, and nothing that overstresses the healing tissue at the front of the shoulder.
For your physiotherapist:
Goals
- Do not overstress healing tissue (especially the anterior capsule)
- Minimise pain
- Maintain PROM
- Improve AROM
- Progress periscapular and RTC strength
- Return to full functional activities
- Patient education
Management
- Sling: discontinue
- Continue with Phase I and II interventions
- Range of motion / mobility:
- Full range of motion in all planes
- AAROM: incline table slides, ball roll on wall, wall climbs, pulleys
- AROM: seated scaption, seated flexion, supine forward elevation with elastic resistance to 90 degrees
- Strengthening:
- Rotator cuff: internal rotation isometrics, side-lying external rotation, standing external rotation with resistance band, standing internal rotation with resistance band, internal rotation, external rotation
- Periscapular: resistance band shoulder extension, resistance band seated rows, rowing, lawn mowers, robbery
- Motor control:
- IR/ER and flexion 90–125 (rhythmic stabilisation)
- Quadruped alternating isometrics and ball stabilisation on wall
- Proprioceptive neuromuscular facilitation (PNF): D1 diagonal lifts, PNF D2 diagonal lifts
- Stretching:
- Internal rotation behind back with towel, side-lying horizontal adduction, sleeper stretch, triceps and lats
Precautions
- No lifting of heavy objects (> 5 kg)
Criteria to progress
- Minimal to no substitution patterns with shoulder AROM
- Pain < 4/10
Phase IV — Transitional (Weeks 9–11)
Kieran Hirpara 4.0
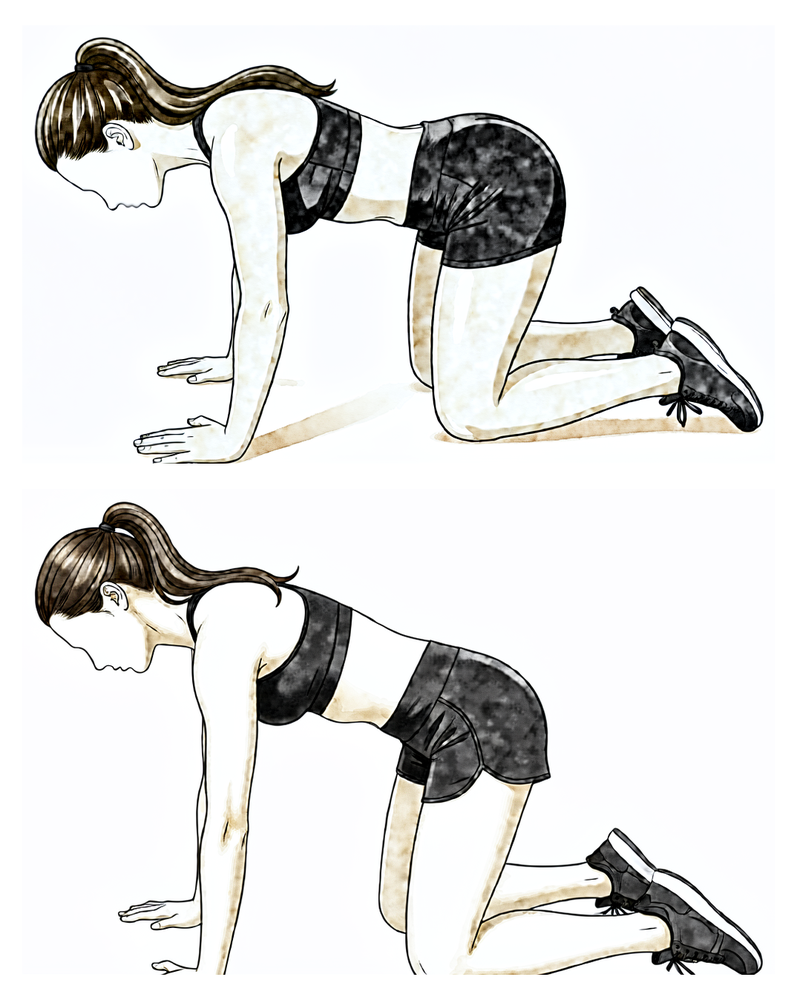
Push-up plus on knees
From a push-up position on your knees with hands under the shoulders, keep the elbows straight and push the upper back towards the ceiling, letting the shoulder blades slide apart, then lower with control.
As guided by your physiotherapist
Movement should now be full and comfortable; this phase is about making it strong and steady. Resistance increases on the rotator cuff exercises, the shoulder-blade program broadens, and control work challenges the shoulder in diagonal, functional patterns. The 5 kg lifting limit still applies, and positions that strain the front of the joint (rotating the arm outwards while it is lifted above 80 degrees out to the side) are still avoided.
For your physiotherapist:
Goals
- Do not overstress healing tissue (especially the anterior capsule)
- Maintain pain-free PROM
- Continue improving AROM
- Improve dynamic shoulder stability
- Gradually restore shoulder strength and endurance
Management
- Continue with Phase II–III interventions
- Range of motion / mobility:
- Full range of motion in all planes
- Strengthening:
- Rotator cuff: increase resistance of rotator cuff exercises
- Periscapular: push-up plus on knees, "W" exercise, resistance band Ws, dynamic hug, resistance band dynamic hug, prone shoulder extension Is, resistance band forward punch, forward punch, tripod, pointer
- Motor control:
- Resistance band PNF pattern; PNF D1 diagonal lifts with resistance; diagonal-up, diagonal-down wall slides with resistance band
Precautions
- No lifting of heavy objects (> 5 kg)
- Avoid exercises that put stress on the anterior shoulder capsule (i.e. shoulder ER above 80 degrees of ABD)
Criteria to progress
- Supine AROM flexion ≥ 140 degrees
- Supine AROM ABD ≥ 120 degrees
- Supine AROM ER in the scapular plane ≥ 60 degrees
- Supine AROM IR in the scapular plane ≥ 70 degrees
- AROM shoulder elevation to 120 degrees with minimal substitution patterns
- Performs all exercises demonstrating symmetric scapular mechanics
- Pain < 2/10
Phase V — Advanced strengthening (Weeks 12–16)
Kieran Hirpara 4.0
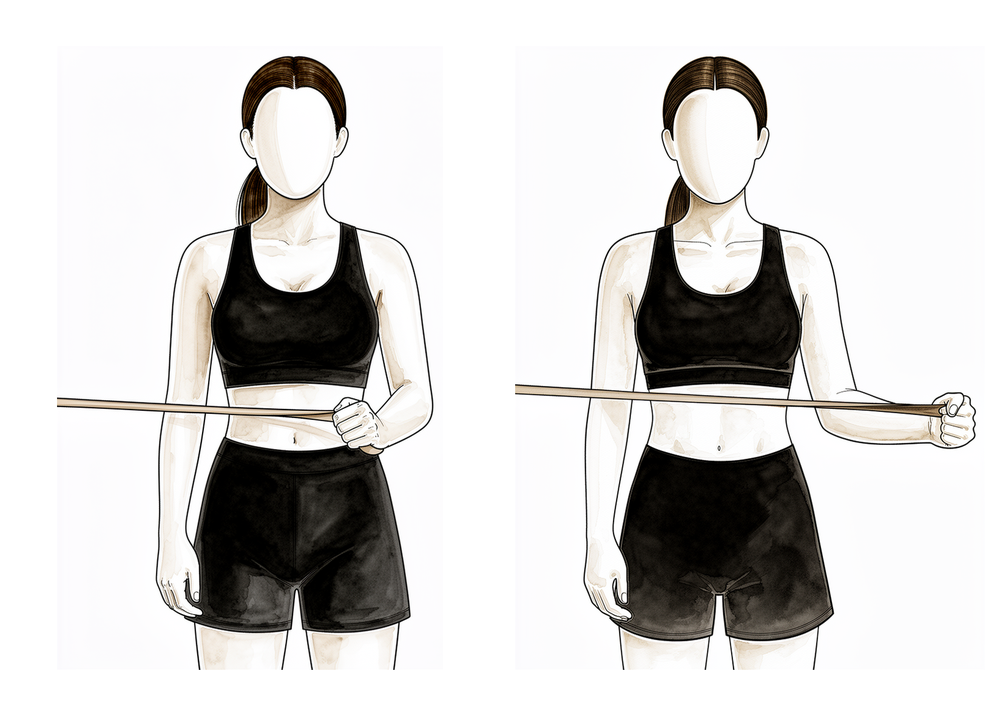
Standing external rotation at 90 degrees (band)
Standing, raise your arm to shoulder height out to the side with the elbow bent to 90 degrees. Rotate the forearm upwards against a light resistance band, then return with control.
As guided by your physiotherapist
Kieran Hirpara 4.0
Rhythmic stabilisation
With your arm supported in front of you at about shoulder height, have your physiotherapist (or your good hand) apply small, gentle pushes from different directions while you hold the arm still and steady — do not let it move. This trains the shoulder's stabilising muscles to react. Keep all the efforts gentle.
As guided by your physiotherapist
The final phase conditions the shoulder for everything you want to use it for: building strength and endurance at higher positions, including rotation work with the arm raised to 90 degrees, and progressing stability work overhead. Moving beyond the protocol (including any return to sport) happens with your surgeon's clearance once all the milestones have been met, and for athletes the decision is individualised rather than calendar-driven.
For your physiotherapist:
Goals
- Maintain pain-free range of motion
- Improve shoulder strength and endurance
- Enhance functional use of the upper extremity
Management
- Continue with Phase II–IV interventions
- Strengthening:
- Rotator cuff: external rotation at 90 degrees, internal rotation at 90 degrees, resistance band standing external rotation at 90 degrees, resistance band standing internal rotation at 90 degrees
- Periscapular: T and Y, "T" exercise, push-up plus with knees extended, wall push-up
- Motor control:
- Progress ball stabilisation on wall to overhead alternating isometrics / rhythmic stabilisation
Criteria to progress
- Clearance from the doctor, and ALL milestone criteria have been met
- Maintains pain-free PROM and AROM
- Performs all exercises demonstrating symmetric scapular mechanics
- QuickDASH and ASES outcome scores
Return to sport
- For the recreational or competitive athlete, return-to-sport decision making should be individualised and based upon factors including the level of demand on the upper extremity, contact vs non-contact sport, frequency of participation, etc. Close discussion with the referring surgeon is encouraged prior to advancing to a return-to-sport rehabilitation program.
After your protocol
This protocol works alongside the practice's general recovery advice; see managing post-operative pain and wound care. For the operation itself, see total shoulder replacement. The evidence behind this protocol, and why the early phase protects the subscapularis repair, is summarised in the evidence section, available as a PDF from the top of this page.
Evidence & references
Anatomic Total Shoulder Arthroplasty — Post-operative Rehabilitation
Topic scope: Post-operative rehabilitation after anatomic total shoulder arthroplasty (aTSA) for glenohumeral arthritis. (Reverse total shoulder arthroplasty has a different rehab logic — see the reverse-shoulder-arthroplasty protocol; the early in-hospital phase of either is covered by the inpatient-shoulder-replacement protocol.)
Defining principle of this rehab — PROTECT THE SUBSCAPULARIS: to reach the joint in an anatomic TSA the surgeon usually takes down and then repairs the subscapularis (by tenotomy, peel, or a lesser-tuberosity osteotomy). That repair is the structure rehabilitation must protect. So the early plan is the mirror image of a frozen-shoulder release: external rotation is limited, and active/resisted internal rotation is delayed, to avoid pulling the subscapularis repair apart — while early passive forward elevation is encouraged so the shoulder does not stiffen. This subscapularis-protection logic is the key difference from reverse arthroplasty (which usually has no subscapularis repair to guard) and the reason aTSA rehab is more measured.
A. THE PROCEDURE (what is being protected)
Anatomic TSA resurfaces the arthritic joint with a metal humeral head and a plastic glenoid, restoring the normal ball-and-socket mechanics — which depends on an intact, balanced rotator cuff (the indication that distinguishes it from reverse arthroplasty). The subscapularis management is the rehab-defining variable:
- Subscapularis tenotomy / peel with tendon-to-tendon or transosseous repair, or
- Lesser-tuberosity osteotomy (LTO) — repaired bone-to-bone.
Either way, the repair governs the early external-rotation limit and the delay before active and resisted internal rotation. The specific ER ceiling and the IR-loading timeline are surgeon-set (they depend on repair quality and tissue) — the patient protocol follows the surgeon's chosen limits, and the phase table below reflects them.
B. POST-OPERATIVE PHASED TIMELINE (subscapularis-protective)
Consistent with the protocol's phases (Protection → Intermediate → Transitional → Advanced). Sling supports the arm; passive elevation early; ER capped and active/resisted IR withheld until the subscapularis has healed.
| Phase | Window | Sling | ROM | Strengthening | Notes |
|---|---|---|---|---|---|
| I — Protection | Week 0–3 | Full-time (off for hygiene + exercises) | Passive elevation + gentle ER to the surgeon's limit only; pendulums; hand/elbow free | None | Protect subscapularis repair; no active shoulder motion; no behind-the-back / forced ER |
| II — Intermediate | Week 4–6 | Weaning | Progress passive → active-assisted elevation; ER advanced within limit | Scapular setting / isometrics as allowed | Subscapularis still protected — no resisted internal rotation |
| III — Intermediate continued | Week 7–8 | Off | Active ROM all planes progressing toward full | Begin gentle cuff (incl. graded IR) + scapular work | Subscapularis repair healing — IR loading introduced cautiously |
| IV — Transitional | Week 9–11 | Off | Full active ROM goal | Progressive resistance, low load → higher | — |
| V — Advanced strengthening | Week 12–16 | Off | Full, incl. rotation at 90° abduction | Advanced strength/endurance; overhead stability | Return to sport/heavy use on surgeon clearance, individualised |
C. KEY CONTROVERSIES / EVIDENCE QUALITY
- Subscapularis management — tenotomy vs peel vs lesser-tuberosity osteotomy. Healing and functional-IR recovery drive the ER-restriction and IR-loading timeline; biomechanical and clinical data inform but do not settle the choice. Moderate (biomechanical + cohort).
- Early vs delayed / immobilisation — a single-blind RCT comparing early rehabilitation versus immobilisation after shoulder arthroplasty found broadly comparable outcomes, supporting a measured but not ultra-conservative early plan; subscapularis protection remains the governing constraint. Moderate (RCT).
- The phase timeline itself is consensus/expert (institutional protocols — MGH, BWH — and surgeon practice), not a defining rehab RCT. Phase weeks are typical, surgeon-adjustable. Weak/consensus.
D. EVIDENCE STRENGTH FLAGS (summary)
- MODERATE (RCT / biomechanical / cohort): early-rehab-vs-immobilisation after shoulder arthroplasty (RCT); subscapularis repair-technique biomechanics; durability/outcome of aTSA.
- WEAK / CONSENSUS: the specific subscapularis-protective phase structure and ER/IR restriction timings (institutional protocols + surgeon preference; no defining rehab RCT).
- CONTEXT: the protocol's measured early phase is appropriately keyed to subscapularis healing rather than the calendar.
CITATIONS
RAG corpus (180,000+ Orthopaedic articles)
- A randomized single-blinded trial of early rehabilitation versus immobilization after shoulder arthroplasty. J Shoulder Elbow Surg. 2020. DOI: 10.1016/j.jse.2019.10.005
- A biomechanical evaluation of three surgical techniques for subscapularis repair. J Shoulder Elbow Surg. 2007. DOI: 10.1016/j.jse.2007.04.016
- Deltoid fatigue part 2: a longitudinal assessment of anatomic total shoulder arthroplasty. J Shoulder Elbow Surg. 2021. DOI: 10.1016/j.jse.2021.07.019
Published rehab protocols (basis for the phase structure)
- Massachusetts General Brigham Sports Medicine. Rehabilitation Protocol for Total Shoulder Arthroplasty and Hemiarthroplasty (rev. Dec 2018). https://www.massgeneral.org/assets/MGH/pdf/orthopaedics/sports-medicine/physical-therapy/rehabilitation-protocol-for-total-shoulder-arthroplasty-and-hemi.pdf
- Brigham and Women's Hospital. Total Shoulder Arthroplasty / Hemiarthroplasty Protocol. https://www.brighamandwomens.org/assets/bwh/patients-and-families/pdfs/shoulder---total-shoulder-arthroplasty-protocol.pdf
Note on the rehab evidence: there is no single defining RCT for the anatomic-TSA rehab protocol. The phase structure is the originating-institution / surgeon consensus, and the external-rotation ceiling and internal-rotation loading timeline are deliberately keyed to subscapularis repair healing — a surgeon-set, tissue-dependent decision. Treat phase weeks as typical, surgeon-adjustable defaults.