Patients › Rehabilitation
Distal Clavicle Excision
Rehabilitation after isolated arthroscopic distal clavicle excision; combined cases follow the rotator cuff repair protocol.
This protocol guides your recovery after arthroscopic distal clavicle excision (also called AC joint excision, or the Mumford procedure) with Dr Kieran Hirpara at Mater Private Hospital Rockhampton. Each phase below opens with a plain-English explanation of what matters most, followed by the structured protocol written for your physiotherapist; bring this page or its PDF to your first physiotherapy visit so your rehabilitation stays coordinated. Your physiotherapist will progress you through the phases based on how your shoulder is recovering, not on the calendar.
This protocol is for an isolated distal clavicle excision. If your operation also included a rotator cuff repair, follow the rotator cuff repair protocol instead, as the repaired tendon sets a slower pace. (Distal clavicle excision is also commonly combined with a subacromial decompression; the protocol below applies equally in that case.)
If you have any concerns about your wound after surgery, get in touch with the rooms. It is often helpful to take a photo of the wound and email it for review.
What to expect
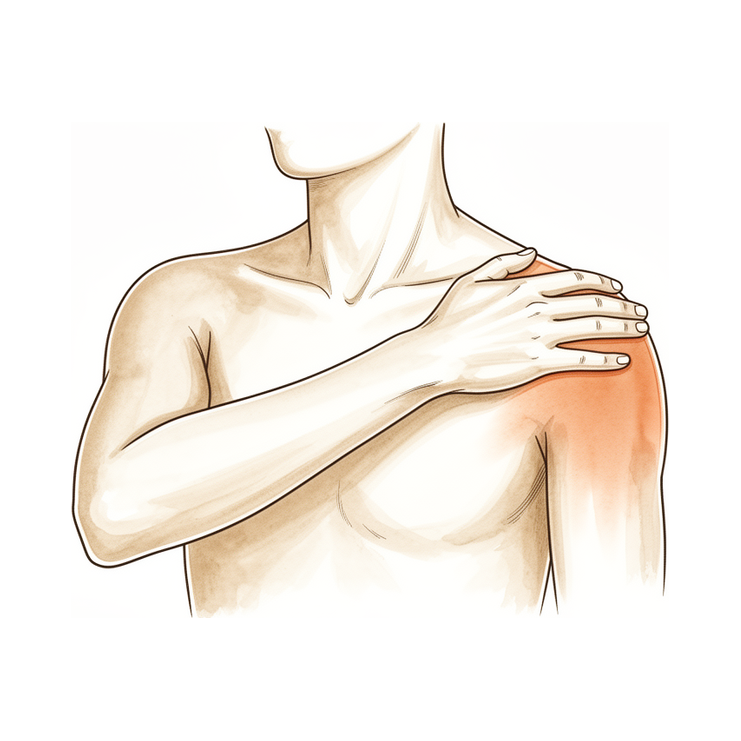
Distal clavicle excision removes a few millimetres of bone from the end of the collarbone, so the worn surfaces of the AC joint (the small joint on top of your shoulder) no longer grind against each other. Nothing is repaired that needs protecting while it heals, so rehabilitation moves quickly: the sling is for comfort only and most people are out of it within the first week or two, movement starts straight away, and the published protocols for this operation all push towards early motion rather than rest.
Two things are specific to this operation and shape the protocol:
- Reaching across your body is the slow mover. Cross-body (horizontal adduction) movements compress the area where the bone was removed, so they are often the last movements to feel comfortable. Early on they are deliberately avoided, then reintroduced gradually.
- Heavy pressing comes last. Exercises that load the AC joint hard (bench press, dips and push-ups) are the final things to return, typically over three to four months. Most other activities come back well before that.
The journey at a glance:
- Phase I — Early recovery and movement — week 0–2
- Phase II — Restoring your range — week 2–6
- Phase III — Strengthening and return to activity — week 6–12
- Phase IV — Return to full activity — week 12 onwards
Most people are using the arm for light everyday tasks within the first couple of weeks, back to most normal activities by four to six weeks, and back to sport and heavier work somewhere between eight and twelve weeks. Athletes in repetitive overhead sports (throwing, swimming, tennis) typically take a little longer, in the range of two to four months.
Phase I — Early recovery and movement (Week 0–2)
Kieran Hirpara 4.0
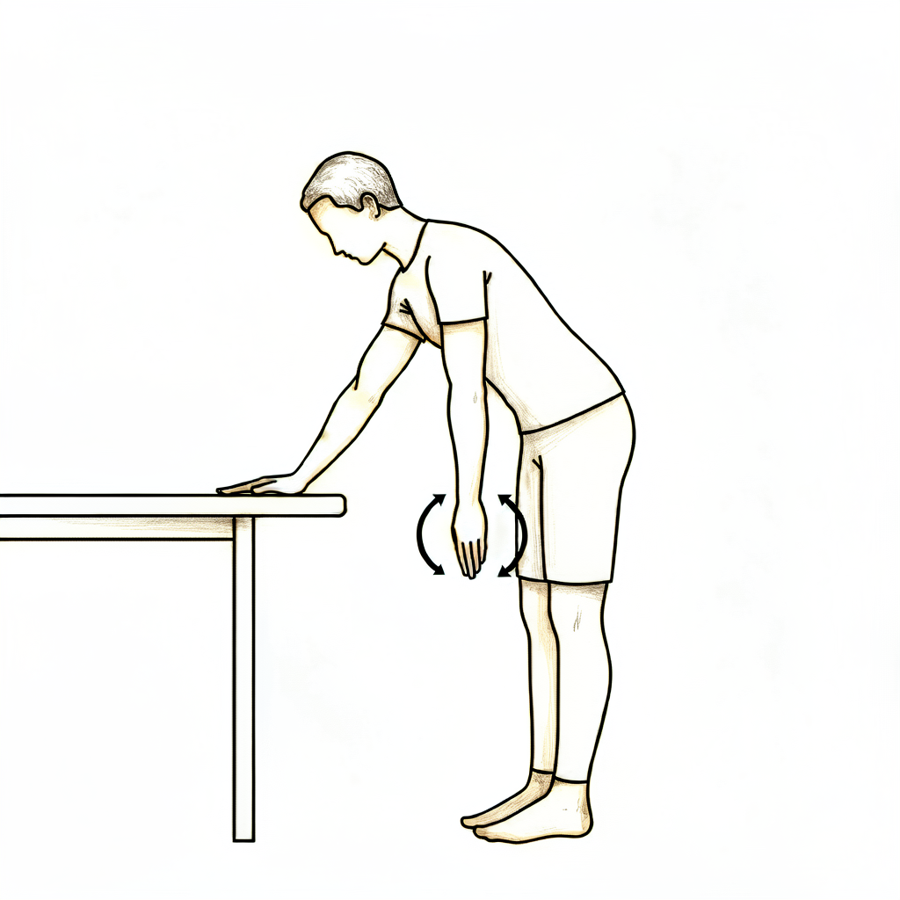
Pendulum exercise
Bend forward at the waist and let the operated arm hang gently away from the body. Let the arm swing in small, relaxed circles — the movement comes from your body, not the shoulder muscles. Start from day one and stay within comfort.
Home program 3–5 times daily
Kieran Hirpara 4.0
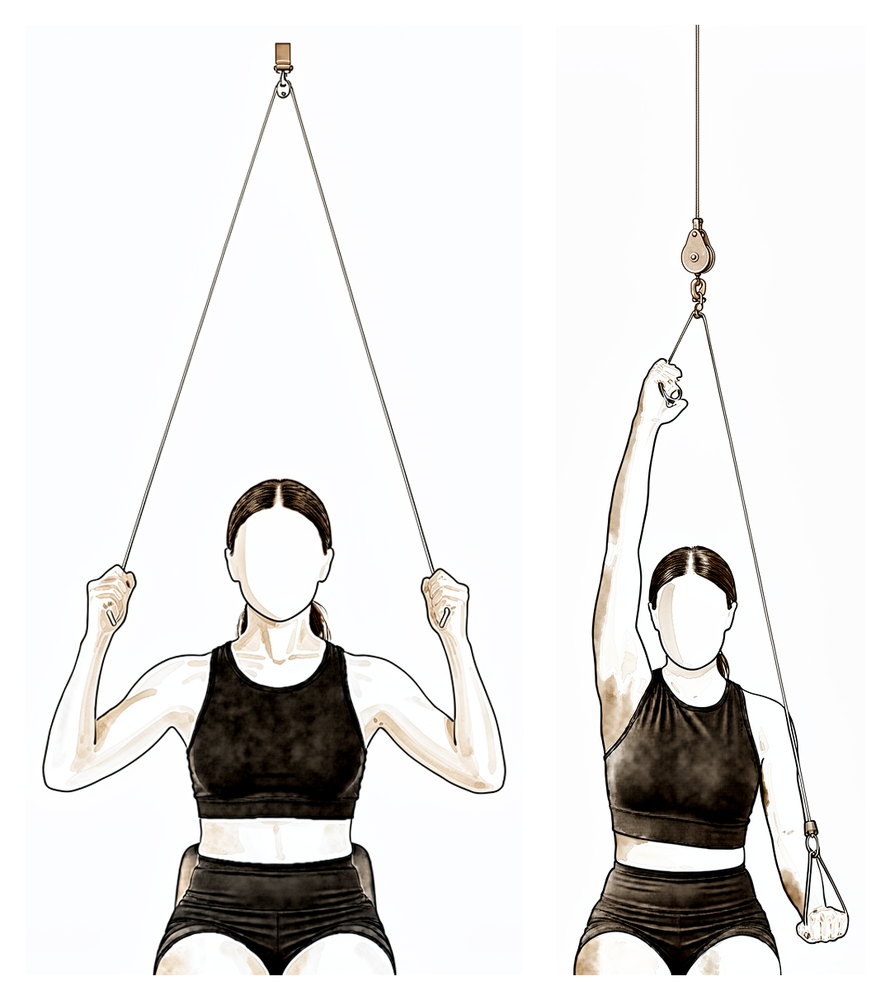
Pulley-assisted elevation
Sit beneath an over-door pulley holding a handle in each hand. Pull down with the good arm to raise the operated arm upwards, letting it stay relaxed, then lower it back with control. Work within comfort and progress the height as tolerated.
Home program 3–5 times daily
Kieran Hirpara 4.0
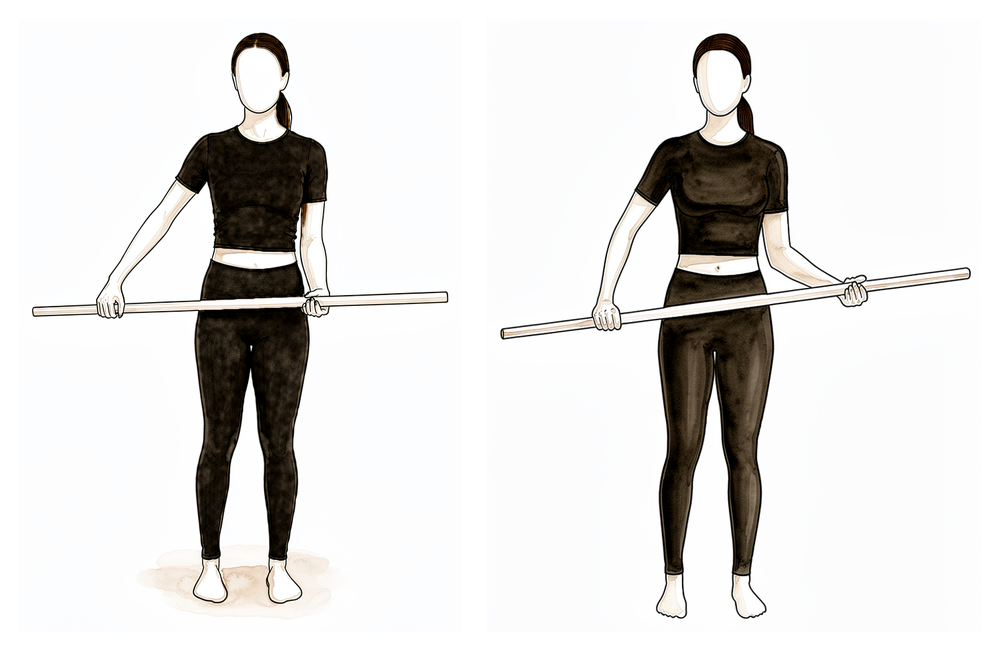
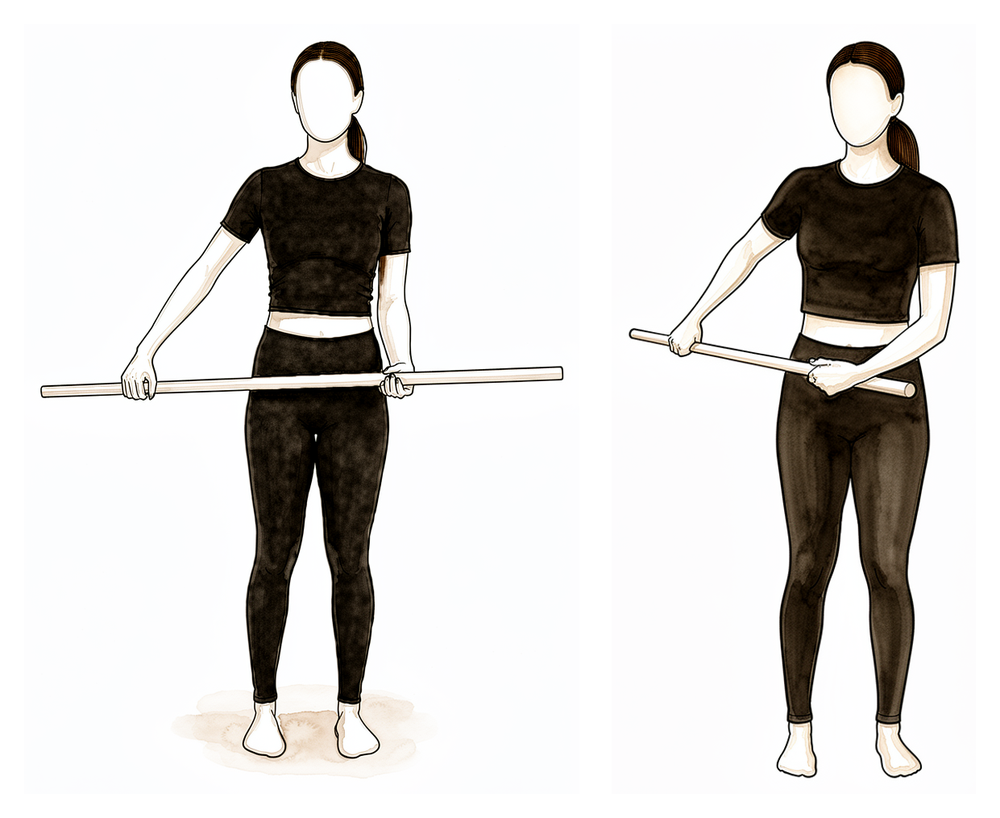
Wand-assisted external rotation
Lie on your back holding a stick or cane in both hands with the elbows bent to right angles and tucked at your sides. Use the good arm to push the operated forearm gently outward, away from the body, then return. The operated arm stays relaxed and lets the stick do the work.
Home program 3–5 times daily
Kieran Hirpara 4.0
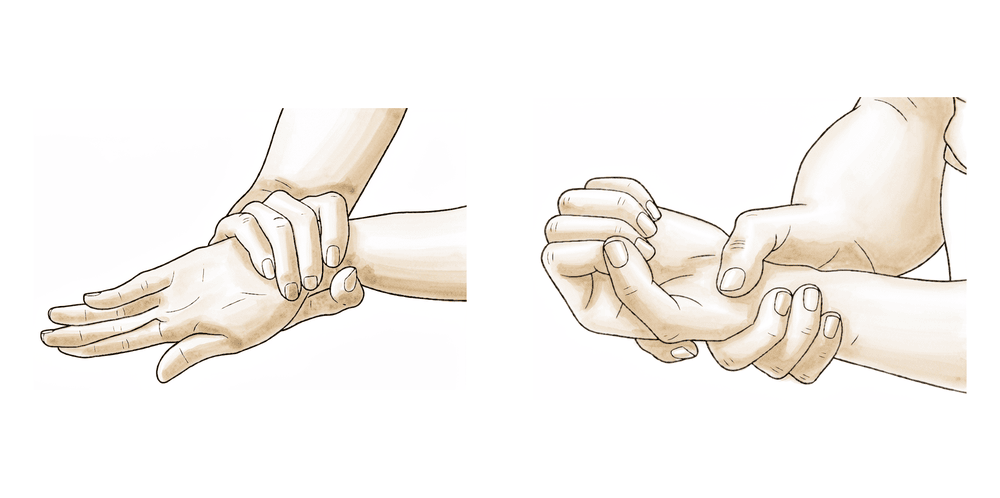
Behind-the-back internal rotation
Hold a stick or cane behind your back, with the operated hand low and the good hand above. Use the good arm to draw the operated hand gently up the back, then lower. Move within comfort — this direction returns gradually.
Home program 3–5 times daily
Kieran Hirpara 4.0
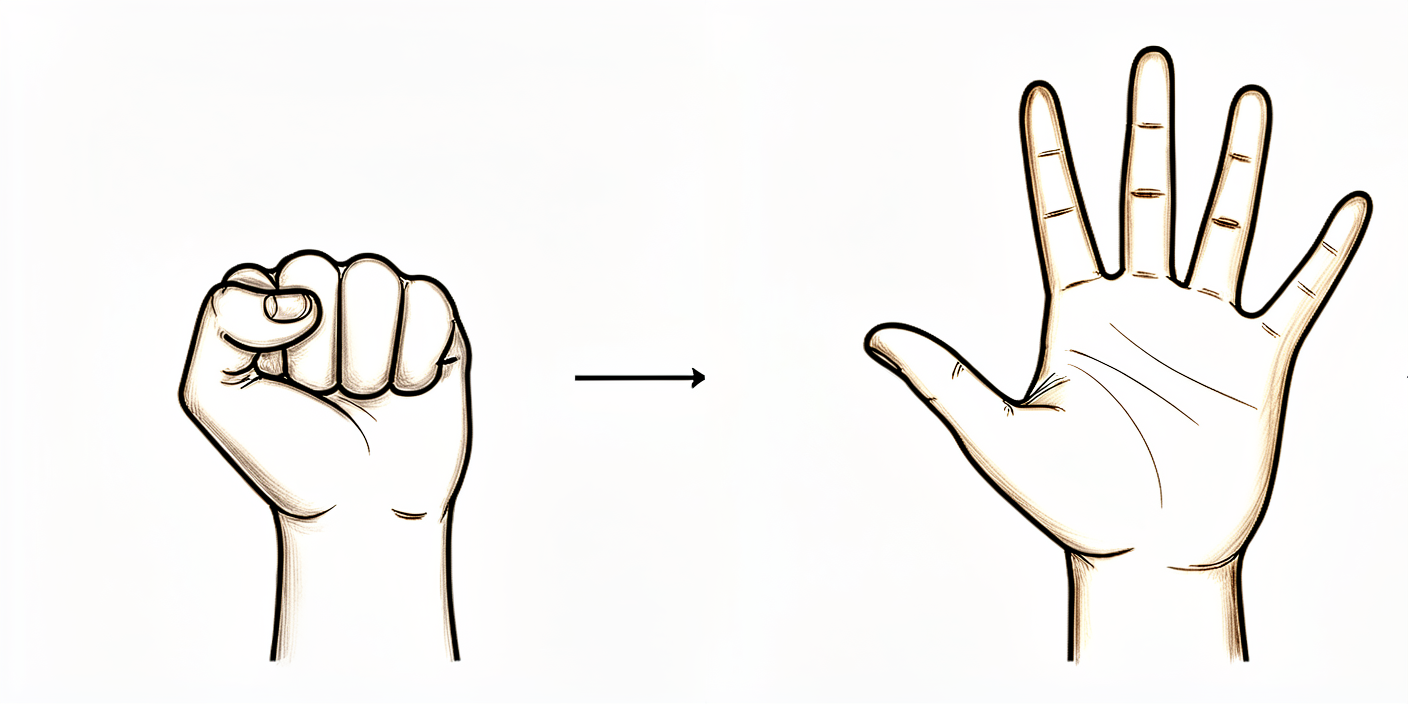
Grip strengthening
Make a full fist, then open the fingers out straight. A soft ball or rolled-up sock can be squeezed for grip work. Keep the elbow, wrist and hand moving from day one.
As guided by your physiotherapist
Kieran Hirpara 4.0
Elbow bends
With the upper arm resting by your side, bend the elbow as far as it comfortably goes, then straighten it fully. Only the elbow moves — keep the shoulder relaxed. Keep the elbow, forearm, wrist and hand moving from day one.
As guided by your physiotherapist
Kieran Hirpara 4.0
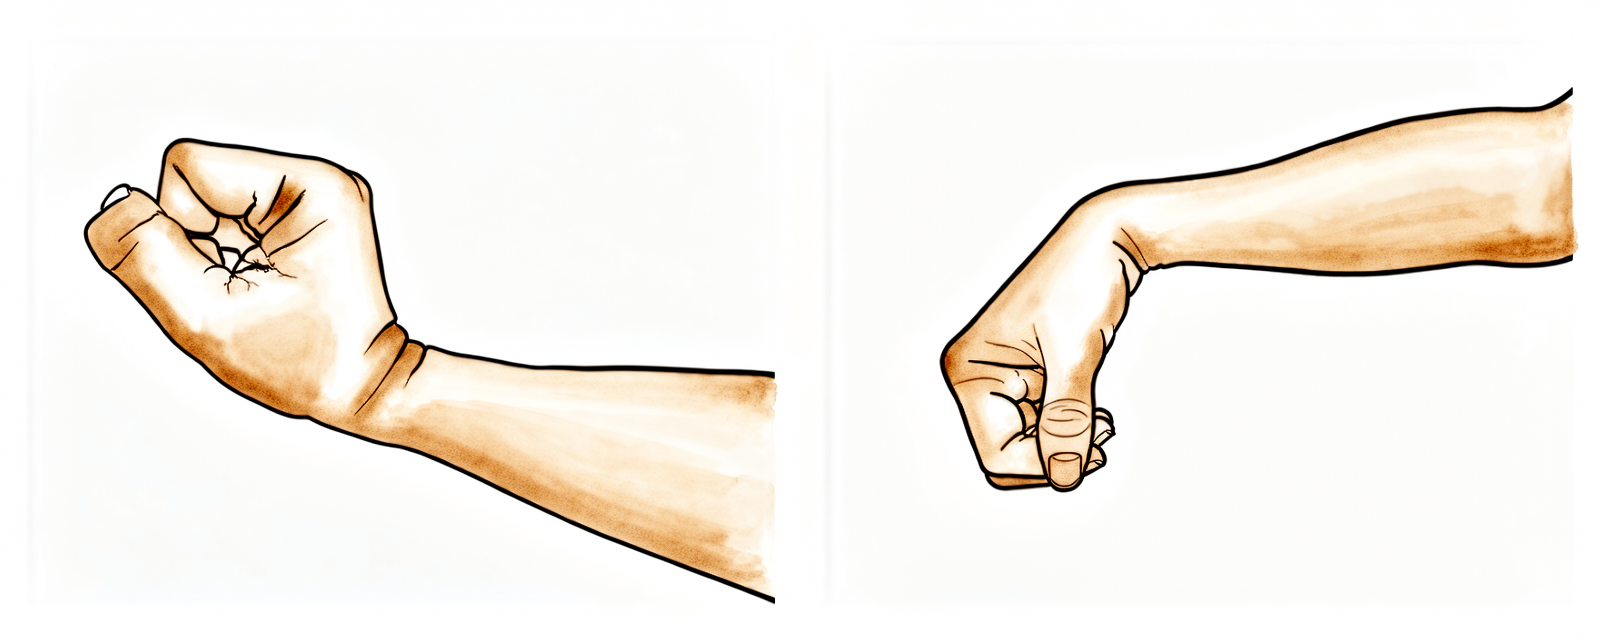
Wrist movement
Keep your wrist moving by bending it forwards, backwards and side to side, with the arm out of the sling. Keeping the whole arm working from day one helps the shoulder settle.
As guided by your physiotherapist
Kieran Hirpara 4.0
Forearm rotation
With the elbow tucked at your side and bent to a right angle, turn the palm up towards the ceiling and then down towards the floor. Keep the forearm moving from day one while the shoulder rests.
As guided by your physiotherapist
Kieran Hirpara 4.0
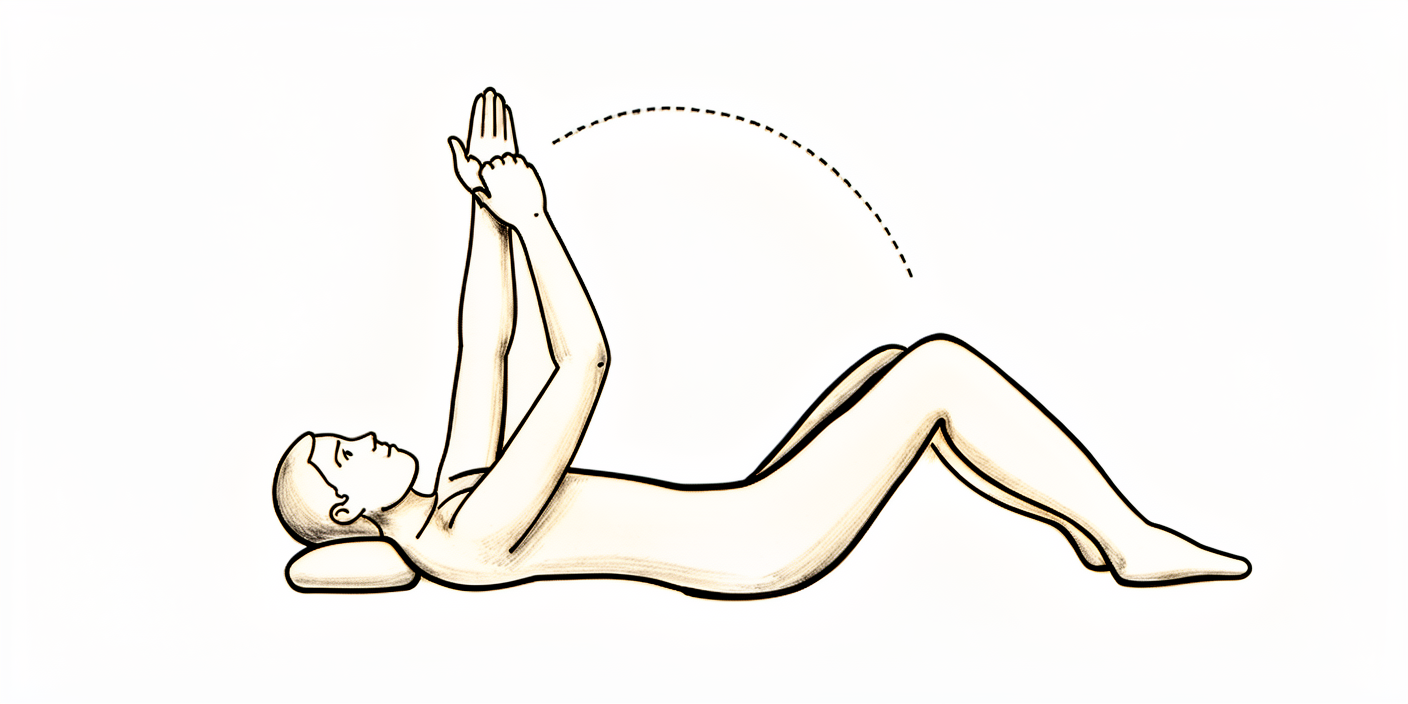
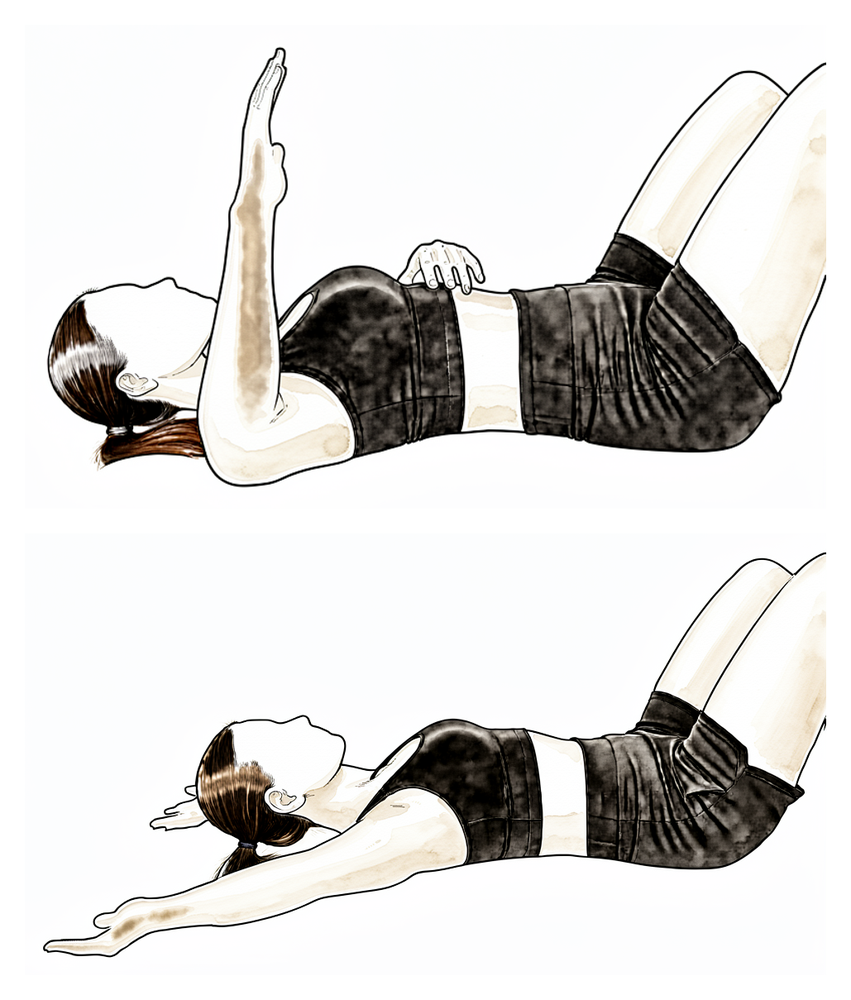
Assisted forward elevation (lying)
Lie on your back and use your good arm to help lift the operated arm up overhead as a gentle stretch, then lower it back down with the good arm still helping. Lying down lets gravity assist and the shoulder muscles stay relaxed. Work within comfort.
Home program 3–5 times daily
Kieran Hirpara 4.0
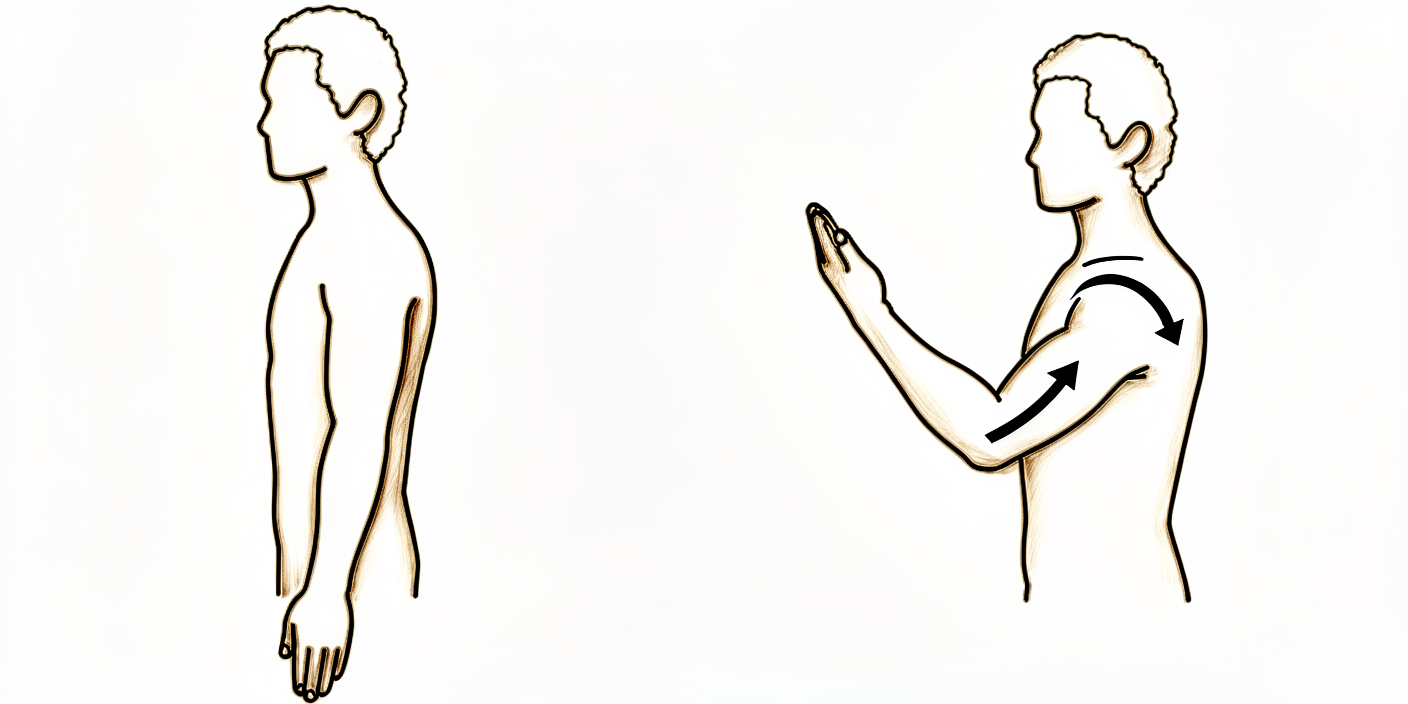
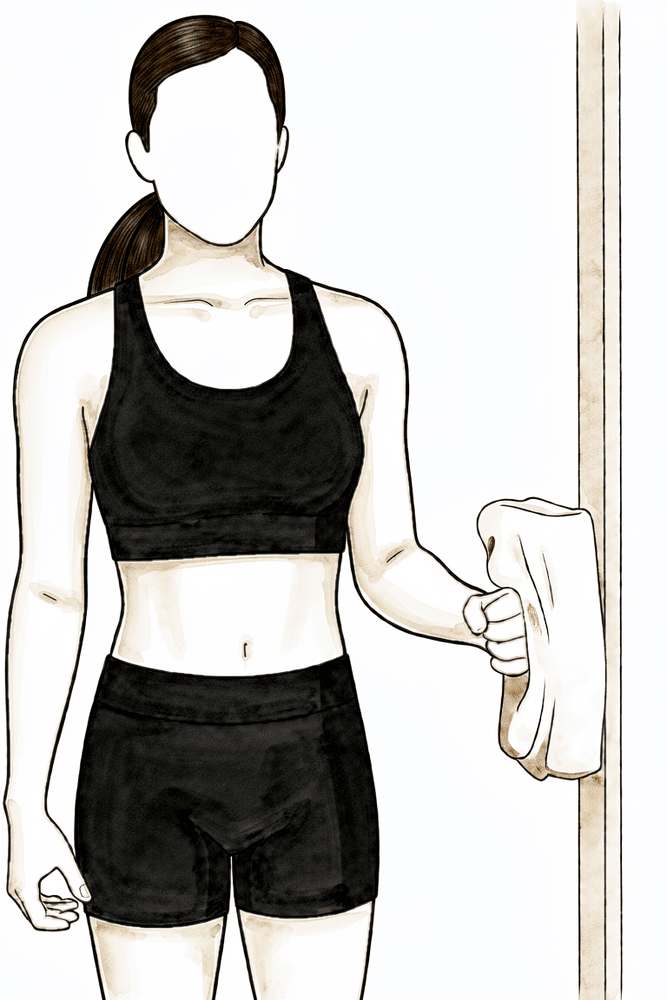
Isometric external rotation
Stand with your elbow tucked at your side and bent to a right angle, the back of your hand against a wall or doorframe. Gently press outwards into it without letting the arm move, hold a few seconds, then relax. This is a gentle isometric only — there should be no movement and no strain. Stay within comfort.
As guided by your physiotherapist
Kieran Hirpara 4.0
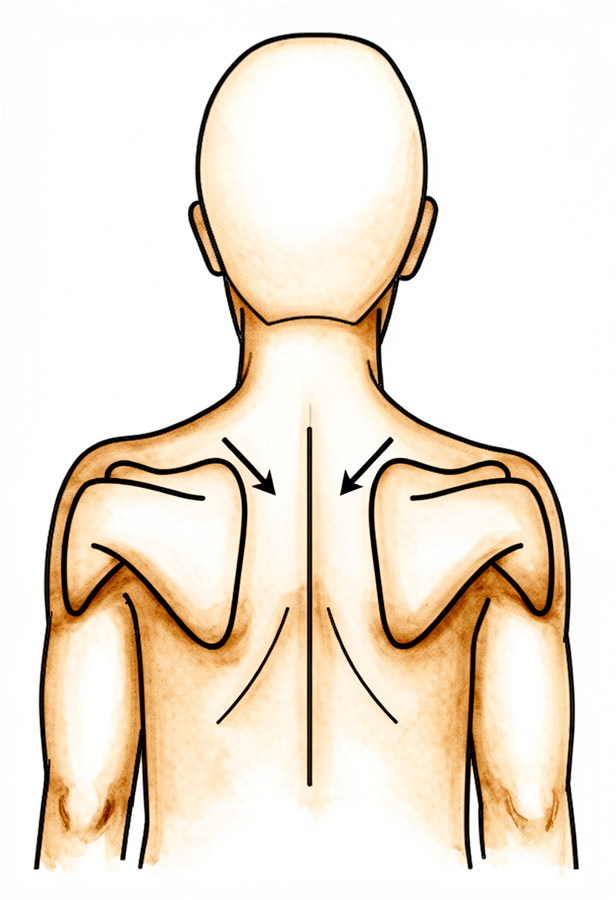
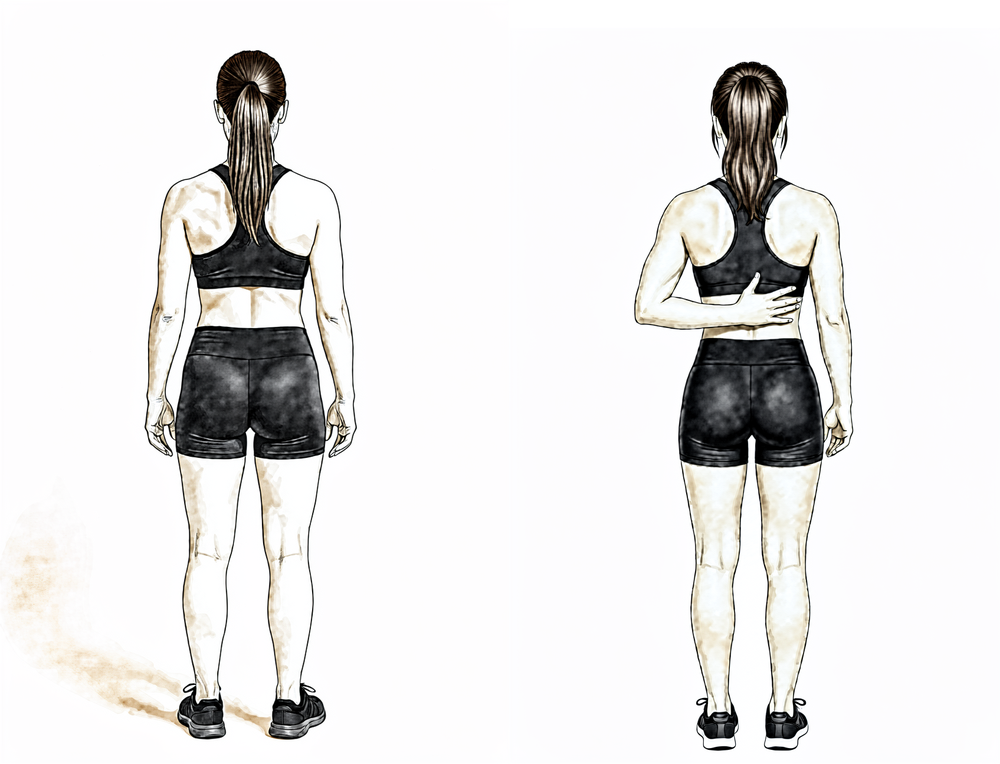
Scapular setting
Sitting or standing tall, gently draw your shoulder blades back together and down, away from your ears. Hold for a few seconds, then relax. Good shoulder-blade rhythm from the start makes the rest of the program work better.
As guided by your physiotherapist
The first two weeks are about settling pain and swelling while getting the shoulder moving. Use ice regularly: three to four times a day is typical in the first week or two. The sling is for comfort only: wear it as much or as little as it helps, take the arm out often, and stop using it as soon as you are comfortable without it. Many people find it most useful when out of the house, to stop people bumping the arm. Do not drive for at least six weeks after any shoulder operation, even once the sling is gone; your surgeon will clear you to drive, typically at the six-week review.
Start moving straight away: your elbow, wrist and hand should be moving from day one, along with gentle pendulum exercises and assisted shoulder movements (using your other arm, a stick or a pulley to help the operated arm upwards and outwards). Take your painkillers before your exercises and before physiotherapy appointments. The one movement to leave alone for now is reaching across your body towards the opposite shoulder.
For your physiotherapist:
Goals
- Settle pain and swelling
- Early range of motion: approximately 140° of forward flexion and 40° of external rotation at the side by the end of the phase
- Independence with the home exercise program
Management
- Sling for comfort only: wean and discontinue within the first 1–2 weeks, as comfort allows
- Cryotherapy 3–4 times daily, especially after exercise
- Immediate active range of motion of the neck, elbow, forearm, wrist and hand
- Pendulum exercises from day one
- Passive and active-assisted shoulder range of motion as tolerated: forward elevation, external rotation and behind-the-back internal rotation, using pulleys, a wand or cane, and supine gravity-assisted positions
- Scapular setting and periscapular range of motion; attention to scapulohumeral rhythm from the start
- Grip strengthening; gentle shoulder isometrics as pain allows
- Analgesia before exercises and physiotherapy sessions
- Home program performed 3–5 times daily
Precautions
- Avoid cross-body (horizontal) adduction
- No resisted shoulder exercise beyond gentle isometrics
- No lifting beyond light everyday items; no weight-bearing through the arm (pushing up from a chair or bed)
- No driving for six weeks (this applies to any shoulder operation)
Criteria to progress
- Sling discarded and pain settling
- Comfortable assisted elevation to approximately 140° and external rotation to approximately 40°
Phase II — Restoring your range (Week 2–6)
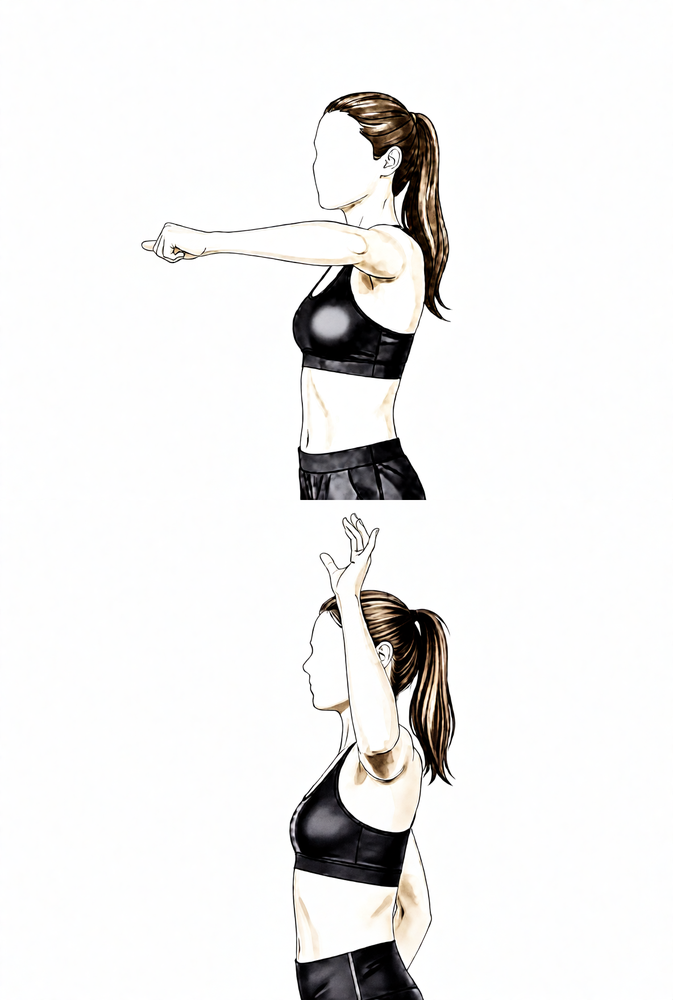
Kieran Hirpara 4.0
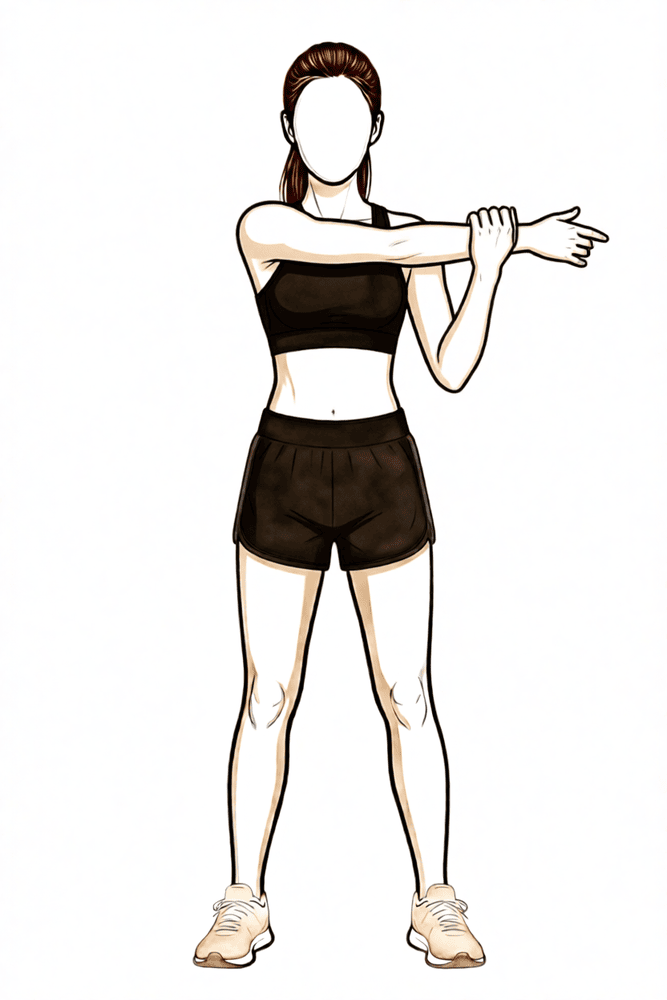
Cross-body stretch
Bring the operated arm across your chest and use the other hand, placed above the elbow, to draw it gently further across. Reintroduce this gradually, guided by symptoms — some pinching awareness at the end of the movement is common after this operation and settles with time.
As guided by your physiotherapist

Kieran Hirpara 4.0
Sleeper stretch
Lie on your operated side with that arm out in front and the elbow bent to a right angle. Use your good hand to gently press the forearm down towards the bed, until you feel a stretch at the back of the shoulder, then ease off. This gentle posterior stretch helps restore reaching behind the back. Stretch to firm discomfort, not sharp pain.
As guided by your physiotherapist
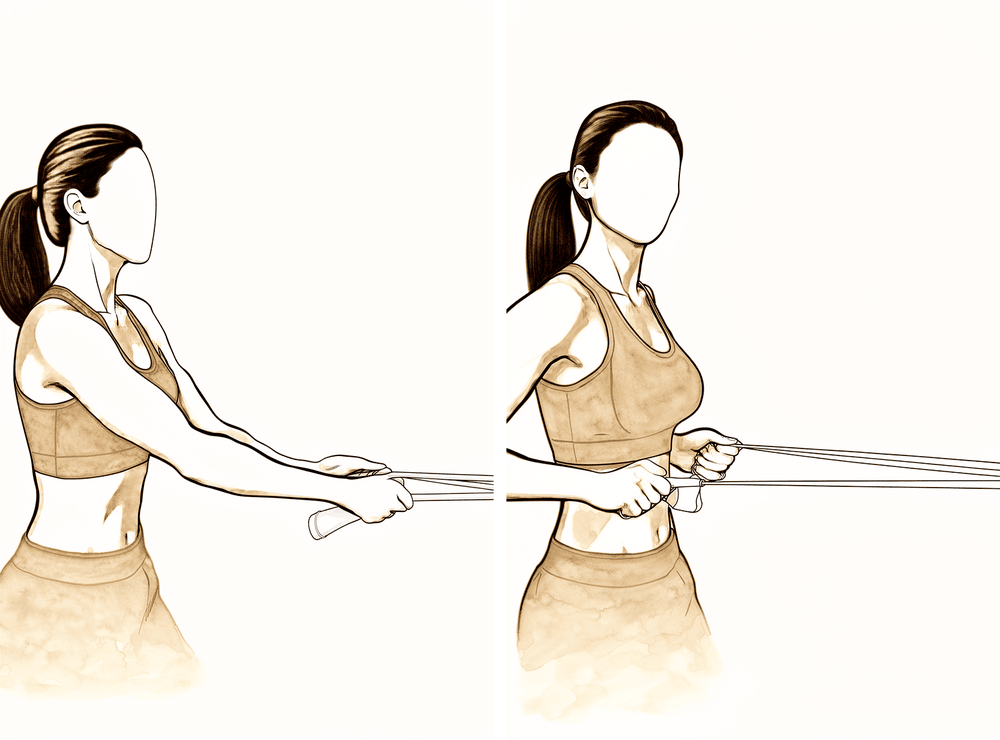
Kieran Hirpara 4.0
Band external rotation
Stand with your elbow tucked into your side and bent to a right angle, holding an elastic band anchored to one side. Keeping the elbow at your side, rotate the forearm outwards against the band, then return slowly. Begin once your movement is close to full — work high repetitions with light resistance.
High repetitions, low load; as guided by your physiotherapist

Kieran Hirpara 4.0
Low row
Hold a band anchored in front of you at about waist height. Keeping the arm fairly straight, pull it back and down towards your hip, squeezing the shoulder blade down and back, then return slowly. This builds the shoulder-blade muscles that steady the shoulder as your strength returns.
High repetitions, low load; as guided by your physiotherapist
Kieran Hirpara 4.0
External rotation at 90/90 (lying)
Lie on your back with the arm out to the side at shoulder height and the elbow bent to a right angle, supported on a pillow. Slowly rotate the forearm back towards the head as far as is comfortable, then return with control. This restores rotation in the raised position.
10 times, as guided by your physiotherapist
Kieran Hirpara 4.0
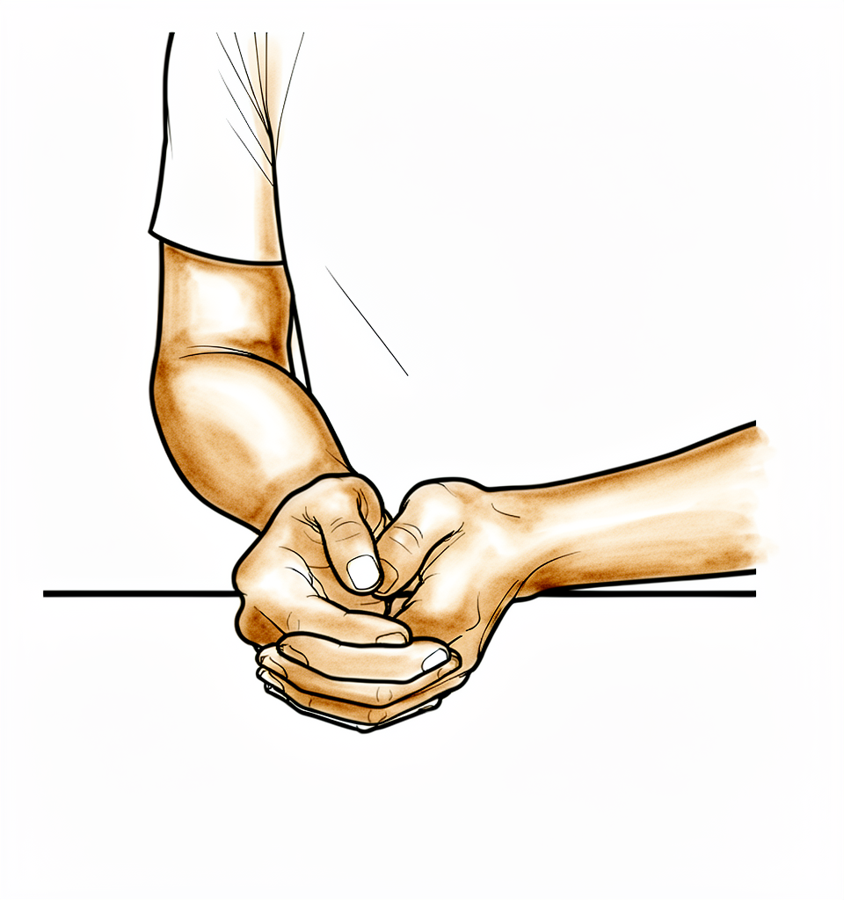
Hand-behind-back reach
Standing, place the back of your operated hand against your lower back and gently slide it up your spine as far as is comfortable using your own muscles, then lower. Move only within a comfortable range and never force it.
As guided by your physiotherapist
With the sling gone, this phase works the shoulder towards full movement in all directions: assisted movements first, then under the arm's own power. Once your movement is close to full, gentle strengthening of the rotator cuff and shoulder blade muscles begins with elastic bands and light weights. Use the arm normally for daily activities, but keep lifting modest (no more than about 5 kg) and hold off on anything that presses or loads the arm hard. Reaching across your body is reintroduced gradually during this phase as comfort allows; some pinching awareness at the end of that movement is common and settles with time. Many people find heat before stretching and ice afterwards helpful, and lighter lower-body exercise such as walking, an exercise bike or jogging typically resumes from about week four.
For your physiotherapist:
Goals
- Full, or near-full, active range of motion in all planes by the end of the phase
- Normalised scapulohumeral kinematics
- Commence rotator cuff and periscapular strengthening once active range is near full
Management
- Progress passive and active-assisted range of motion to active range in all planes: flexion and scapular-plane elevation towards full, external rotation at the side and at 90° of abduction as tolerated, internal rotation behind the back with gentle posterior capsular stretching
- Reintroduce cross-body adduction range gradually, guided by symptoms
- Manual therapy and glenohumeral mobilisation as indicated
- Progress from isometrics to elastic-band rotator cuff and scapular stabiliser strengthening once active range of motion is near full: high repetitions, low load
- Heat before and ice after sessions as preferred; analgesia before exercises
- Graduated return to normal daily activities; light lower-body conditioning (walking, stationary bike, jogging) from approximately week 4
Precautions
- Keep lifting light: approximately 5 kg or less on the operated side
- Avoid loaded end-range horizontal adduction and positions of impingement
- No pressing exercises: bench press, dips, push-ups
- Defer combined abduction–rotation (90/90) stretching if the shoulder is irritable
Criteria to progress
- Full or near-full active range of motion without significant discomfort
- Band strengthening tolerated without flare-up of pain
Phase III — Strengthening and return to activity (Week 6–12)
Kieran Hirpara 4.0
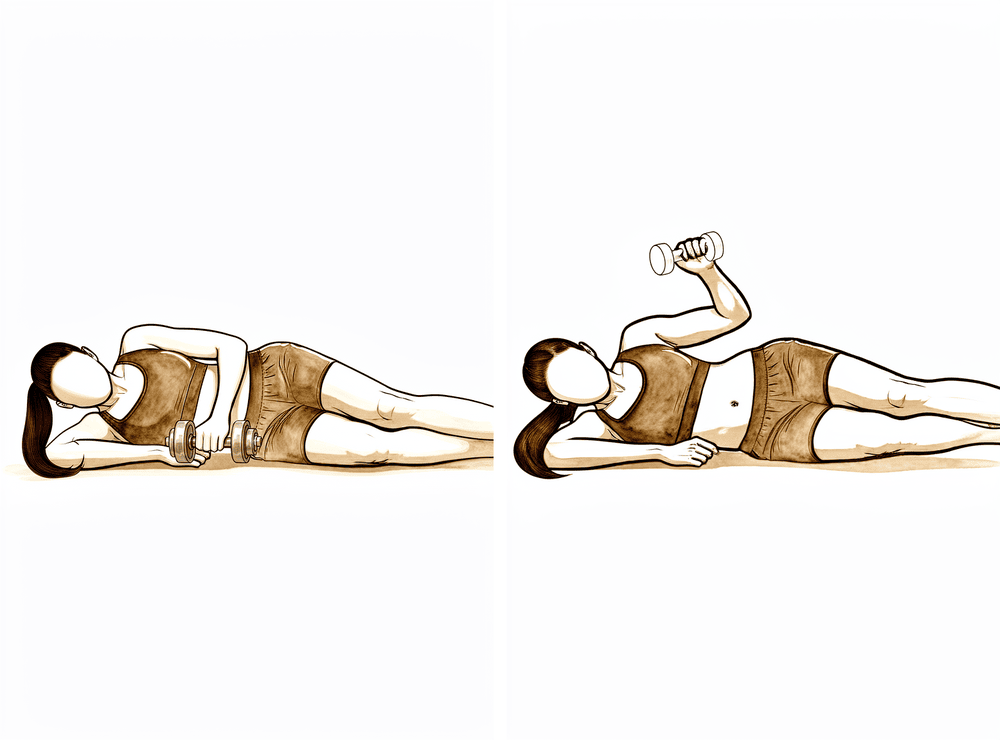
Side-lying external rotation with weight
Lie on your non-operated side with the top elbow bent to a right angle and tucked against your body. Holding a light weight, rotate the forearm up towards the ceiling, then lower slowly. This progresses your rotator cuff strengthening from bands to dumbbells.
2–3 sets of 8–15 repetitions, low load
Kieran Hirpara 4.0
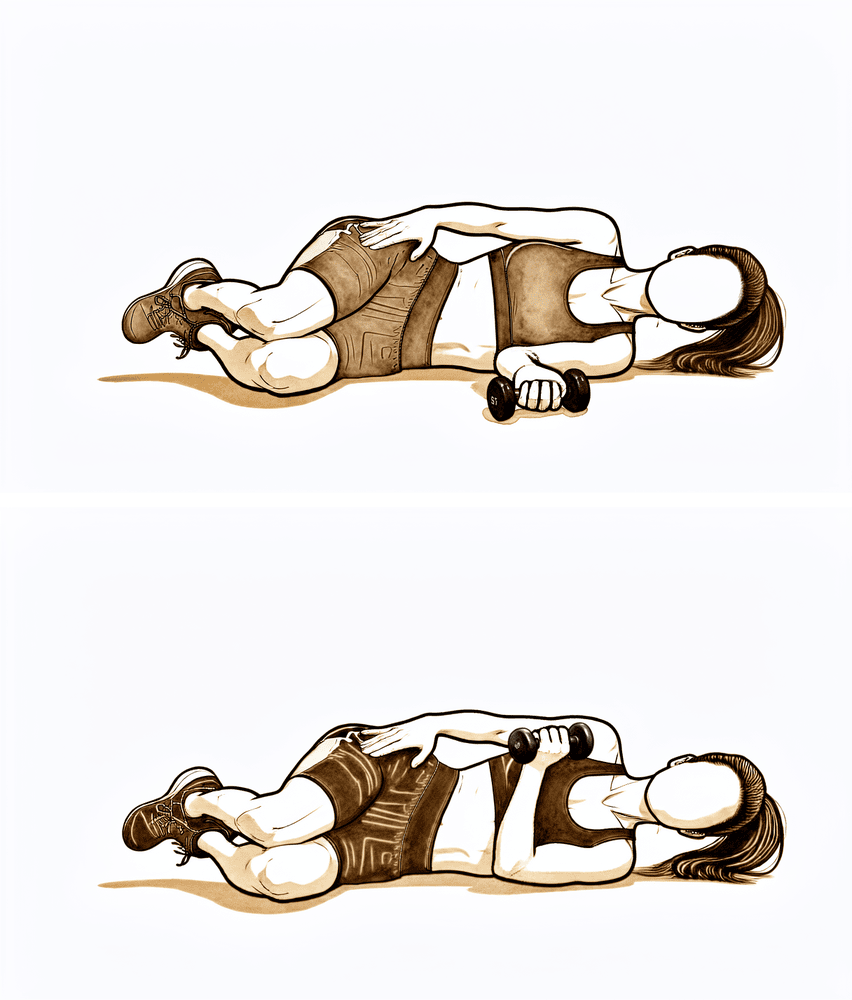
Side-lying internal rotation with weight
Lie on your operated side with that elbow bent to a right angle and tucked against your body. Holding a light weight, lift the forearm up towards your body, then lower slowly. This balances the rotator cuff strengthening with the outward-rotation work.
2–3 sets of 8–15 repetitions, low load
Kieran Hirpara 4.0
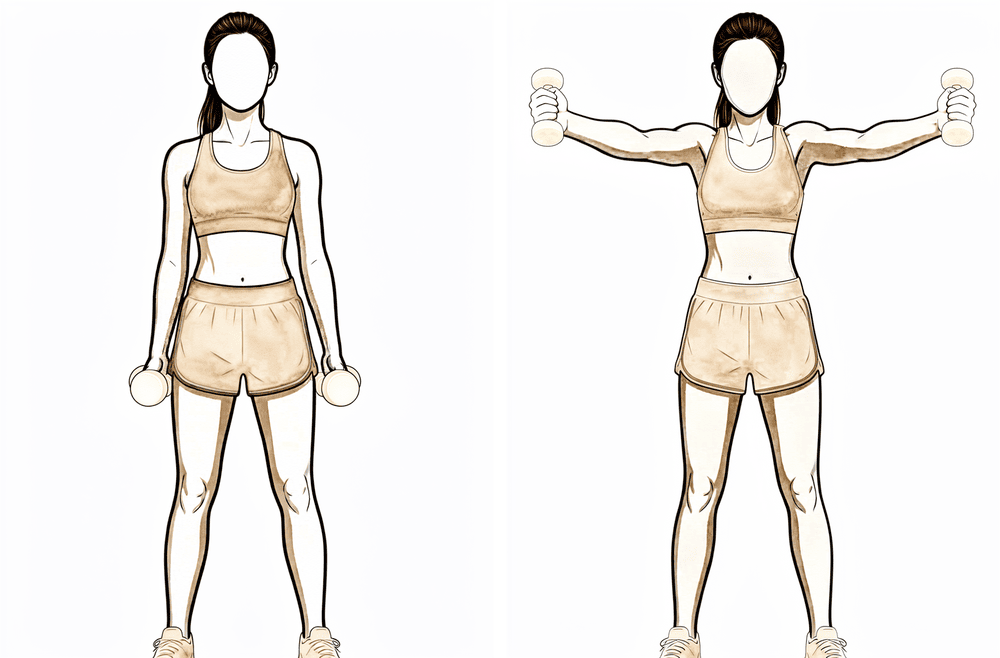
Full-can scaption
Stand holding a light weight in each hand, arms slightly out in front of you at about a 30-degree angle with the thumbs pointing up. Raise the arms to shoulder height, then lower slowly. This strengthens the deltoid and rotator cuff together through a comfortable mid-range.
2–3 sets of 8–15 repetitions, low load
Kieran Hirpara 4.0
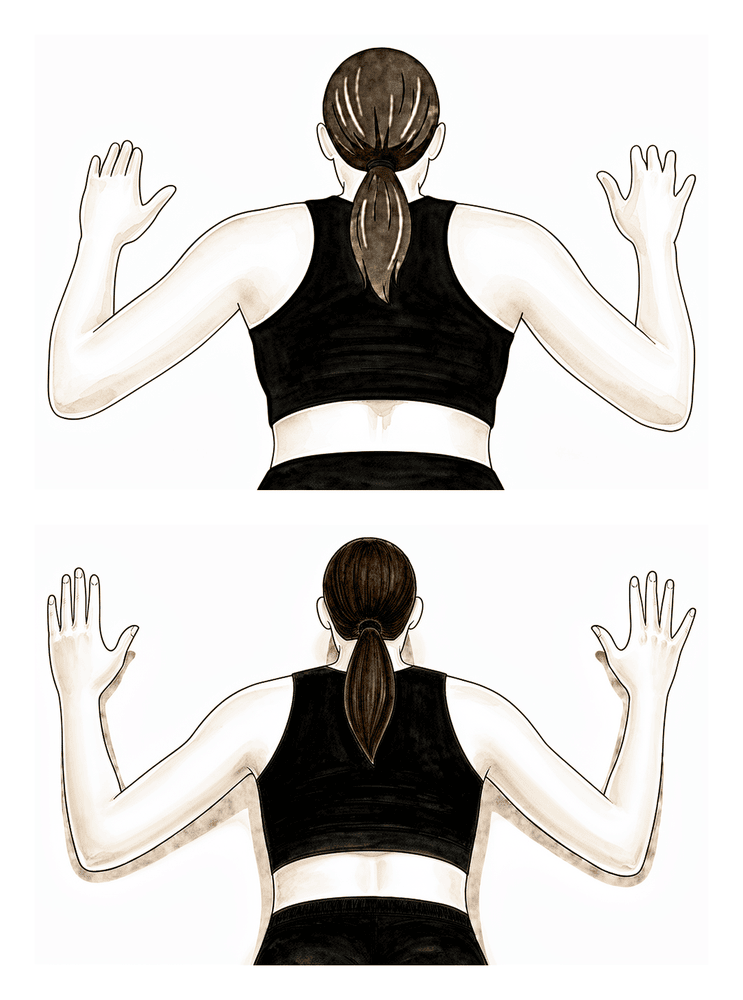
Prone W
Lie face down with your arms by your sides. Draw your elbows back and down towards your hips, making a W shape, while squeezing your shoulder blades together, then lower slowly. This strengthens the lower shoulder-blade muscles that support good shoulder mechanics.
2–3 sets of 8–15 repetitions
Kieran Hirpara 4.0
Standing row
Hold a band or light weight in front of you and pull it back towards your body, drawing the elbow behind you and squeezing the shoulder blade in, then return slowly. This builds the mid-back and shoulder-blade strength that supports your shoulder as you return to activity.
2–3 sets of 8–15 repetitions
Kieran Hirpara 4.0
External rotation with the arm raised
With your arm out to the side at shoulder height and your elbow bent to 90°, rotate your forearm upwards and back, then return with control. Keep the movement smooth and within a comfortable range. This trains outward rotation in the raised position.
As guided by your physiotherapist — light and controlled
With full movement back, attention turns to rebuilding strength and getting you back to what you do. Resistance work progresses from bands to dumbbells for the rotator cuff, deltoid and shoulder blade muscles, and exercise becomes more functional: gym work, swimming, a graduated throwing program for throwers, and a staged return to work duties and sport. Most people return to sport and heavier work during this phase, between roughly eight and twelve weeks, guided by comfort and strength rather than the calendar. The pressing exercises that load the AC joint most (bench press, dips and push-ups) are the last to be reintroduced, starting light and shallow.
For your physiotherapist:
Goals
- Restore strength, endurance and neuromuscular control of the shoulder girdle
- Graduated return to work duties, recreational activity and sport-specific training
Management
- Progressive resistance for the rotator cuff, deltoid and scapular stabilisers: bands to light dumbbells, typically 2–3 sets of 8–15 repetitions
- Add eccentric work, closed-chain exercise and, late in the phase, plyometric drills where relevant to the patient's sport
- Functional and sport-specific training: swimming, interval throwing program for throwers, sport drills under controlled conditions
- Graduated return to full work duties and sport, criteria-based
Precautions
- Reintroduce AC-loading presses (bench press, dips, push-ups) last: begin light, with reduced range, and avoid the elbows dropping below or behind the line of the body
- Progression remains symptom-guided: an irritable AC joint settles with a short step back in load, not by pushing through
Criteria to progress
- Full, pain-free functional range of motion
- No pain or tenderness over the operated area with loading
- Strength approaching the other side on testing
Phase IV — Return to full activity (Week 12 onwards)
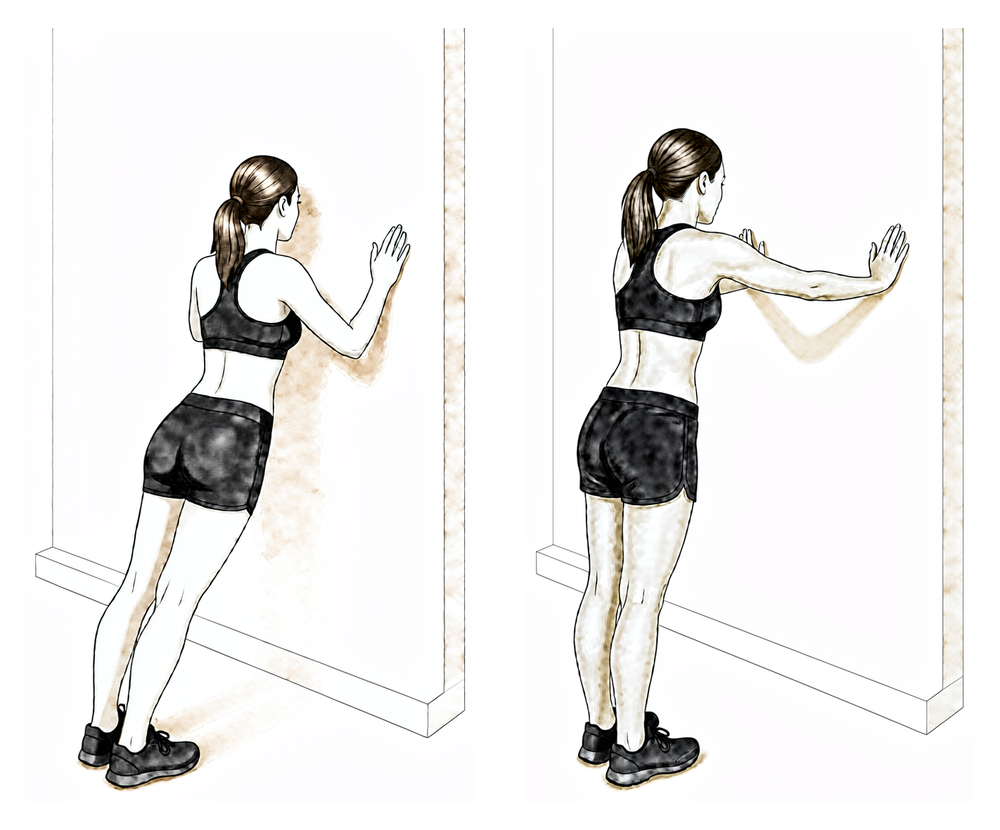
Kieran Hirpara 4.0
Push-up plus
This is part of the staged return to pressing, so it comes last. Begin against a wall or from the knees with a shallow range, keeping the elbows from travelling behind the line of your body. At the top of each push-up, press a little further to round the upper back, then lower with control. Progress depth and load only as the AC joint stays comfortable — a return of aching over the area means easing back.
As guided by your physiotherapist
The final phase is the return to unrestricted activity. Day-to-day life and most sport are usually back well before this point; what remains is the heaviest end of loading. Pressing strength in the gym is rebuilt progressively, and returning to previous bench press performance can take up to about four months. Athletes in repetitive overhead sports are progressed back over roughly two to four months from surgery. Full return to sport and heavy work is confirmed at your follow-up review, based on full movement, comfortable loading and a satisfactory examination.
For your physiotherapist:
Goals
- Unrestricted return to work, gym and sport
- Maintain shoulder girdle strength and mechanics in the long term
Management
- Advance gym- and sport-specific conditioning as tolerated, including progressive heavy pressing with attention to technique that limits AC joint strain (controlled depth, elbows not travelling behind the body line)
- Complete interval throwing and overhead-sport progressions where relevant
Precautions
- Progression remains symptom-guided: recurrent aching over the AC area with a particular lift is a signal to adjust load or technique before progressing
After your protocol
The phases above are adapted from published rehabilitation protocols for distal clavicle excision (Saint Louis University Department of Orthopaedic Surgery, University of Utah Sports Medicine, Sports Surgery New York, Palm Beach Orthopaedic Institute, OrthoVirginia and Specialty Physicians of Illinois), with the week ranges expressed as typical rather than fixed. Your rehabilitation is guided individually by your physiotherapist, working with the practice, based on how your shoulder recovers. This page works alongside the practice's general recovery advice; see managing post-operative pain and wound care. For the operation itself, see distal clavicle excision.
The clinical evidence behind this operation and its rehabilitation (including the open-versus-arthroscopic comparison, how much bone is removed and why, and the published protocols this page draws on) is summarised with full references in the evidence section, available as a PDF from the top of this page.
Evidence & references
Distal Clavicle Excision (Mumford) — Surgical Rationale & Post-operative Rehabilitation
Topic scope: the evidence underpinning distal clavicle excision (DCE) — also called distal clavicle resection, AC joint excision, or the Mumford procedure — for the two main indications (acromioclavicular [AC] joint osteoarthritis and distal clavicular osteolysis, the "weightlifter's shoulder"), and the post-operative rehabilitation that follows. Covers open vs arthroscopic technique, direct vs indirect (bursal) approach, how much bone to resect, the iatrogenic-instability risk of over-resection, and the (consensus-based) phased rehab timeline.
Defining principle of the rehab here: DCE removes a few millimetres of worn bone from the end of the collarbone and repairs nothing that needs months of protection — provided the AC ligaments and superior/posterior capsule are preserved. So (like a debridement or subacromial decompression, and unlike a cuff repair, labral repair or AC-joint stabilisation) this is an early-motion pathway: a short sling for comfort only, movement from day one, strengthening as range returns. The single important caveat runs the other way: if the surgeon resects too much bone, or the stabilising AC ligaments/capsule are violated, the joint can become iatrogenically unstable — which is why technique (resection amount, ligament preservation) matters more here than the rehab calendar. The two operation-specific quirks the rehab respects are that cross-body (horizontal adduction) movement compresses the resected area and is the slowest to settle, and heavy pressing (bench press, dips, push-ups) loads the AC joint hardest and returns last.
A. THE OPERATION & ITS INDICATIONS
DCE removes the worn or eroded outer end of the clavicle so the acromion and clavicle no longer grind at the AC joint. Two indications dominate:
- AC joint osteoarthritis — degenerative wear, often with a history of prior AC injury or simply age-related change. Surgery follows failed non-operative care (activity modification, analgesia, AC joint corticosteroid injection).
- Distal clavicular osteolysis ("weightlifter's shoulder") — atraumatic, repetitive-microtrauma resorption of the distal clavicle seen in weightlifters and overhead athletes. Activity modification and rehabilitation are first-line; injection or surgery is reserved for refractory cases or athletes unwilling to stop loading [StatPearls 2023; Charron 1998].
DCE is frequently combined with subacromial decompression (for room/co-existing impingement) and the rehab is unchanged by that addition. If a rotator cuff repair is also performed, the slower protected cuff-repair pathway takes over.
B. EVIDENCE BY THEME
1. Open vs arthroscopic — equivalent long-term outcome, faster arthroscopic recovery
A randomised, prospective trial (Robertson et al., corpus, DOI 10.1016/j.jse.2006.10.006) and a systematic review (Pensak et al., Arthroscopy 2010) found similar long-term functional outcomes for open and arthroscopic DCE, with both arthroscopic techniques exceeding 90% good/excellent results. Across measures there was a trend toward earlier or better outcomes after arthroscopic treatment — less post-operative pain and a quicker return to daily activities — without a difference in the final result [Robertson RCT; Pensak SR 2010]. A second comparative cohort reached the same conclusion (corpus, DOI 10.1177/0363546511419633). Moderate (RCT + SR + cohort).
2. Direct vs indirect (bursal) arthroscopic approach — direct is faster
Among arthroscopic techniques, the direct (superior, top-down) approach permits a quicker return to athletic activity than the indirect/bursal approach, with equivalent long-term results — one comparison reporting a mean return to sport of ~21 days (direct) vs ~42 days (indirect) [Pensak SR 2010; arthroscopic-approach comparison]. Moderate.
3. How much bone to resect — and why over-resection is dangerous
This is the central technical controversy and the reason DCE rehab cannot be reduced to a calendar:
- The stabilising superior and posterior AC ligament/capsule runs from the anterior acromion to the posterior distal clavicle, and the coracoclavicular (trapezoid) ligament inserts on the clavicle undersurface roughly 22–25 mm from the tip [Renfree; capsule/ligament-insertion cadaveric study, corpus DOI 10.1016/j.arthro.2009.04.072; clavicular-strut cadaveric study, corpus DOI 10.1016/j.jse.2013.01.004].
- Anatomic work suggests as little as ~2.3–2.6 mm of resection can begin to violate the superior AC ligament [Renfree, via PMC6930955]; biomechanical models show AC joint anteroposterior translation increases after either open or arthroscopic excision, and stability falls as the resection lengthens [Blazar; resection-length biomechanical model, corpus DOI 10.1016/j.arthro.2007.07.004; DCE-vs-symmetric-resection biomechanics, corpus DOI 10.1177/0363546512469873].
- The practical consensus is to resect enough to abolish bony contact but no more — commonly quoted as ~5 mm (sufficient to clear contact in cadaveric models) up to ~8 mm, and not beyond ~8 mm, preserving the posterior/superior capsule and AC ligaments [PMC6930955; StatPearls 2023; resection-length biomechanics, corpus DOI 10.1016/j.arthro.2007.07.004].
- Over-resection or capsular violation can produce iatrogenic AC instability — a recognised (though uncommon) cause of persistent pain after DCE that may itself require ligament reconstruction [iatrogenic-instability case, PMC6930955; Painful Conditions of the AC Joint, corpus DOI 10.5435/00124635-199905000-00004].
Moderate (cadaveric/biomechanical + anatomic + expert consensus); exact safe threshold is debated.
4. Outcomes & return to activity
DCE is a reliable, high-satisfaction operation for the right indication — arthroscopic series report >90% good/excellent results [Robertson RCT; Pensak SR 2010]. For osteolysis in weightlifters, an arthroscopic-resection series reported return to sport at a mean of ~3 days and to the preoperative weight-training program at ~9 days, remaining asymptomatic and able to progress load beyond pre-operative levels at ~19-month follow-up [Charron, Am J Sports Med 1998, PMID 9548111]. Across the literature, most everyday activity returns within weeks and heavy pressing/overhead sport over ~3–4 months, consistent with the published rehab protocols. Moderate (cohort). A noted exception: worse ("poor") results cluster in patients with pre-existing post-traumatic AC instability or Workers'-Compensation claims [Pensak SR 2010] — DCE alone does not fix an unstable joint.
C. PHASED POST-OPERATIVE TIMELINE (isolated DCE ± subacromial decompression)
Week ranges are typical, not fixed — progression is criteria-based, guided by the physiotherapist.
| Phase | Window | Sling | ROM / use | Strengthening | Operation-specific notes |
|---|---|---|---|---|---|
| I — Early recovery & movement | Week 0–2 | Comfort only; weaned/discarded within 1–2 weeks | Elbow/wrist/hand + pendulums from day 1; passive + active-assisted shoulder elevation/ER/behind-the-back IR; scapular setting | Grip; gentle isometrics as pain allows | Avoid cross-body (horizontal) adduction — it compresses the resected area. No driving in the sling; no weight-bearing through the arm |
| II — Restoring range | Week 2–6 | Off | Progress assisted → active ROM to full in all planes; reintroduce cross-body adduction gradually (end-range pinching is common, settles) | Begin cuff + scapular band work once active range near full; lifting ≤ ~5 kg | Light lower-body conditioning (walk/bike/jog) from ~wk 4 |
| III — Strengthening & return | Week 6–12 | Off | Full functional ROM | Bands → dumbbells; functional + sport-specific; most return to sport/heavier work ~8–12 wk | Reintroduce AC-loading presses (bench/dips/push-ups) last — light, shallow depth, elbows not behind the body line |
| IV — Return to full activity | Week 12+ | Off | Full | Progressive heavy pressing; return to previous bench performance can take ~4 months; overhead athletes progressed over ~2–4 months | Symptom-guided — recurrent AC ache with a lift = adjust load/technique before progressing |
The phased structure is drawn from published surgeon/physiotherapy protocols (Saint Louis University; University of Utah Sports Medicine; Sports Surgery New York; Palm Beach Orthopaedic Institute; OrthoVirginia; Specialty Physicians of Illinois — see Citations). These are consensus/expert documents; no rehab RCT defines the optimal post-DCE regimen.
D. KEY CONTROVERSIES / EVIDENCE QUALITY
- How much bone to resect is the real debate, not the rehab. Too little leaves residual bony contact; too much risks iatrogenic instability. The safe window (~5–8 mm, capsule preserved) is supported by cadaveric/biomechanical and anatomic work, not by an RCT — exact thresholds vary by source. Moderate, technique-dependent.
- Open vs arthroscopic, direct vs indirect. Long-term outcomes converge; arthroscopic (and specifically the direct approach) recovers faster. Moderate (RCT + SR).
- Patient selection matters more than approach. Pre-existing AC instability and Workers'-Compensation status predict poorer results — DCE treats a worn/eroded joint, not an unstable one. Moderate.
- The rehab protocol itself is consensus. Phase timings come from surgeon patient-guidance protocols, not a rehab trial. Weak/consensus.
E. EVIDENCE STRENGTH FLAGS (summary)
- MODERATE (RCT / SR): open vs arthroscopic equivalence with faster arthroscopic recovery (Robertson RCT; Pensak SR 2010, >90% good/excellent); direct > indirect for return speed.
- MODERATE (cadaveric / biomechanical / anatomic): resection-length vs stability relationship and the iatrogenic-instability mechanism (resection-length model, corpus DOI 10.1016/j.arthro.2007.07.004; DCE-vs-symmetric biomechanics, corpus DOI 10.1177/0363546512469873; capsule/ligament insertions, corpus DOI 10.1016/j.arthro.2009.04.072).
- MODERATE (cohort): osteolysis-in-weightlifters return-to-sport (Charron 1998); high overall satisfaction; poorer results with pre-existing instability / WorkCover.
- WEAK / CONSENSUS: the post-operative rehabilitation protocol (surgeon patient-guidance documents; no defining rehab RCT); the exact "safe" resection threshold.
CITATIONS
RAG corpus (180,000+ Orthopaedic articles)
- Robertson WJ, et al. Arthroscopic versus open distal clavicle excision: comparative results at six months and one year from a randomized, prospective clinical trial. J Shoulder Elbow Surg. 2007. DOI: 10.1016/j.jse.2006.10.006
- Arthroscopic versus open distal clavicle excision (comparative cohort). Am J Sports Med. 2011. DOI: 10.1177/0363546511419633
- The biomechanical stability of distal clavicle excision versus symmetric acromioclavicular joint resection. Am J Sports Med. 2013. DOI: 10.1177/0363546512469873
- Arthroscopic distal clavicle resection: a biomechanical analysis of resection length and joint compliance in a cadaveric model. Arthroscopy. 2007. DOI: 10.1016/j.arthro.2007.07.004
- Analysis of the capsule and ligament insertions about the acromioclavicular joint: a cadaveric study. Arthroscopy. 2009. DOI: 10.1016/j.arthro.2009.04.072
- Acromioclavicular joint ligamentous system contributing to clavicular strut function: a cadaveric study. J Shoulder Elbow Surg. 2013. DOI: 10.1016/j.jse.2013.01.004
- Painful conditions of the acromioclavicular joint. J Am Acad Orthop Surg (JAAOS). 1999. DOI: 10.5435/00124635-199905000-00004
Literature (URLs)
- Pensak M, et al. Open versus arthroscopic distal clavicle resection (systematic review; >90% good/excellent, direct > indirect return). Arthroscopy. 2010. PMID 20434670. https://pubmed.ncbi.nlm.nih.gov/20434670/
- Charron KM, et al. Arthroscopic distal clavicle resection for isolated atraumatic osteolysis in weight lifters (return to sport ~3 d, training ~9 d). Am J Sports Med. 1998. PMID 9548111. https://pubmed.ncbi.nlm.nih.gov/9548111/
- Distal clavicular osteolysis (cause, activity-modification first line, ~8 mm resection preserving AC ligaments). StatPearls. 2023. https://www.ncbi.nlm.nih.gov/books/NBK582148/
- Distal clavicular augmentation with AC and CC ligament reconstruction in iatrogenic AC instability (~5 mm safe-resection guidance; Renfree ~2.3–2.6 mm violates superior AC ligament; trapezoid 22–25 mm from tip; Blazar AP-translation increase). PMC6930955. https://pmc.ncbi.nlm.nih.gov/articles/PMC6930955/
- A sports medicine clinician's guide to the diagnosis and management of distal clavicular osteolysis. PubMed. https://pubmed.ncbi.nlm.nih.gov/37294199/
- Distal clavicular osteolysis (review). Physiopedia. https://www.physio-pedia.com/Distal_Clavicular_Osteolysis
Published rehab protocols (patient-guidance — basis for the phase structure)
- Saint Louis University Dept of Orthopaedic Surgery. Subacromial Decompression / Distal Clavicle Excision Rehab Protocol. https://www.slu.edu/medicine/orthopaedic-surgery/sports-medicine/-pdf/shoulder-subacromial-decompression-and-distal-clavicle-excision.pdf
- Burks RT. Distal Clavicle Resection/Mumford Post-Op Protocol. University of Utah Sports Medicine. https://www.robertburksmd.med.utah.edu/pdfs/distal-clavicle-resection-mumford-protocol.pdf
- Sports Surgery New York. Arthroscopic Subacromial Decompression / Distal Clavicle Excision Rehab Protocol. https://www.sportssurgerynewyork.com/pdf/arthroscopic-subacromial-decompression-distal-clavicle-excision-rehab-protocol.pdf
- Hill B. Rehabilitation Protocol: Distal Clavicle Excision. Palm Beach Orthopaedic Institute. https://www.pboi.com/pdf/hill-pt-distal-clavicle-excision.pdf
- Eastwood D. Distal Clavicle Resection Therapy Protocol. OrthoVirginia. https://www.orthovirginia.com/wp-content/uploads/2022/09/Eastwood-distal-clavicle-resection-PT-protocol.pdf
- Mahylis JM. Distal Clavicle Excision Rehabilitation Protocol. Specialty Physicians of Illinois. https://jaredmahylismd.com/pdfs/distal-clavicle-excision-rehabilitation-protocol.pdf